|
Barndoor III. Well. Things have gotten completely out
of hand this time. Barndoor II fell apart when I shipped it to New Mexico
for a dark-skies getaway in 2007. Sure it was heavy and cumbersome, but
it was delicate, too. The motor brushes fell out of it again and this
time I just packed it up and sent it home.
While trying to get a Losmandy G11 to speak to an LVI SmartGuider, I changed out the G11's drive electronics and a motor. Neither had anything to do with the problem (LVI says it needs an as-yet-unreleased adapter that should be available any day now -- not! see SmartGuider v G11). Rather than put the older hardware back on the G11 mount, and with another set of almost-new spares in hand, I decided to use the original board, motor, and hand controller for another project: 2009's cut at an ultimate barndoor mount for casual, widefield astrophotography. This time, instead of using a modified electric trainset controller, I'm using an actual telescope controller. Rather than a generic, geared Maxon motor running at a fraction of its rated speed, I can use a Hurst stepper which has proven itself for years as a digitally controlled telescope drive. Etc. On the G11, the electronics package spins a worm which was directly coupled to this stepper motor. The motor's shaft completes a revolution once every 4 minutes. Exactly. Instead of a worm, I'm attaching a 3/8x16 bolt with an acorn cap on its tip. With this as the barndoor mount's drive bolt, the ideal seperation from drive bolt to hinge is 3.571 inches. (Try to get within a couple of hundredths -- the closer the better for longer subframes.) This time, I have a lathe, some basic milling bits, a metal-cutting miter saw, a drill press, and plenty of scrap aluminum. Which means I have no excuses for building a sloppy or incorrectly dimensioned barndoor mount. I've kept the ball and socket camera head and the rubber bands from the previous effort, thank you. The rest is fresh off the drawing board by way of the basement shop.
Barndoor III Parts:
The first night under the stars was a comedy of errors. Nothing called the design into question, but shortcomings in my execution of it became dreadfully apparent. A couple of hours in the shop resolved the two most important details: too much slop in the top plate's mounting arrangement and an iffy coupling of the drive bolt and motor. A third item is hardly worth mentioning: the threads in the lower plate (a hexagonal rod coupler I turned down on the lathe to fit snugly into a round hole) dropped out. Just tighten the set screw for goodness sake! Crystal clear skies gave me a chance to check it out again right away. This time, I can't think of anything that didn't work well. Actually, I can't think of anything that didn't work perfectly. That's a rare thing in astrophotography.
Second Night Under the Stars:
Design note: This is sobering. First, go read about all those complex calculations back on the original barndoor page -- play with the interactive design program, the live graphics showing error over time for incremental mods to this and that, the concerns about the effects of the hemispheric cap nut acting as a cam. All that led me to settle on 3.571 inches as the ideal distance between the hinge and drive bolt axes in Barndoor III. What if we ignore all the nuances, get back to basics? Just observe that the drive bolt advances 1/16th of an inch every four minutes, which is 1/64th of an inch every minute (1/64 = 0.01563). The Earth spins once in 24 hours, so in one minute the Earth spins through 1/(60*24) = 1/1440 of a rotation, or 360/1440 degrees which equals 0.2500 degree. So if we know the drive bolt is going to rise 0.01563 inches every minute, how long must the base be for that amount of rise to produce an angular tilt of the top plate of 0.25 degrees? The answer is (obviously): 0.01563 inches / tan(0.25 degrees) = which is only eleven thousandsths of an inch longer than the results recommended by all those computations back on page one. Trust me: I cannot reliably build this device to within that tolerance. Not no way, not no how. It's adjustable, it's tunable, and it's tweakable to that precision (if it matters), but given that it is made to be tweaked based on observed performance, it just doesn't matter whether I aim for 3.571 or 3.582 inches in the shop. In fact we can generalize for any simple barndoor of this sort (fixed base, drive bolt extending vertically through the base): the distance from hinge axis to drive bolt, D, is just D = y/0.00436 where y is the distance advanced by the drive bolt in one minute. Slide rule accuracy is enough. I'm sure I must have known that years ago before I overthought this problem and turned it into a computer-aided design hoorah. I probably even wrote about in that book and kept it just this simple. Well, anyway, it's been fun and I've got one solid barndoor mount on my hands. Now how about some pictures?
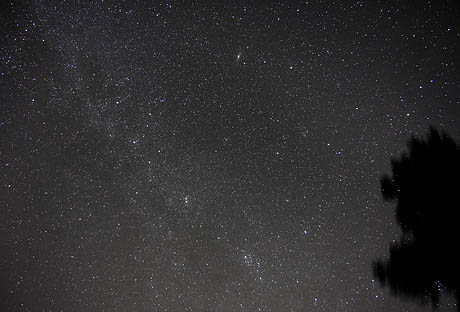
Third Night: I resisted the urge to get very ambitious. I had the 135mm F2.0 Nikkor ready to go with a 7nm H-a filter mounted, then thought, no, I want another successful night of this. Let's not push too hard and be disappointed if stars are not pinpoints and the Veil isn't rendered as fine filaments. Besides, I can shoot H-a in moonlight. Instead, just repeat last night's work. Find out what was luck and what wasn't. So I used the 17-85mm zoom at 17mm again. Is the alignment repeatable? The focus? On the plus side, the quick release receiver I added works very nicely. And on the minus, I had a tangle of cords to deal with. While trying to turn the drive bolt back to its starting position using the Losmandy controller, I discovered that the set screw had backed off enough to let the motor come loose, which is tough to fix in the dark. Before I even opened the shutter, I had a list of fixes and things to think about. The cord situation will be a little simpler when the 12v battery arrives; the set screw needs to be locked in, but not just yet. Put a set of allen wrenches in the case. And a flashlight. But first, the night is clear, so shoot Cassiopeia, Andromeda, and Perseus rising through the pines. I shot a series of 20s focus trials (infinity stop, halfway from stop to mark, at the mark, on the "0" in "10", on the "1" in "10"). Best focus at 17mm is right on the mark, or so it seems pending very close inspection. Then I shot a series of 9, 120s exposures that didn't combine all that well. The stars were lackluster even though the individual frames looked good. So I have nothing pretty for show and tell so far. The 50D images are huge: it takes Deepsky Stacker longer to align and stack them than it took to acquire them. I'm finishing the evening off with a single 10-minute exposure just to see what happens. Based on the alignment numbers for the 120-second series, there should be 3-4 pixels worth of trailing at full-res, but since star images are running 2-3 pixels, it still ought to look good at a generous web size. I also made a 20s shot while resetting the drive bolt. That will have something to say about how smooth the motion is (pretty!) and whether this is a cheap way to shoot star trails (you bet). I went out to retrieve the camera, and discovered I'd left it set for 20-second exposures rather than on "Bulb" (I got 30, 20s exposures for my trouble). Then the battery died. When I set up for another try, I first realigned dead on the pole using an 8x50 finder 'scope laid alongside the hinge-side of the top plate. The mount had been aimed about 2/3rds of a field high (for notes about the alignment monocular, see the final paragraphs of "Barndoor II"). And then I tried the 10-minute exposure again. That's the way you do it! You play the guitar on the MTV! With wide fields, forget stacking 1 and 2 minute subs. 300-600s is the way to go when the sky permits. The mount is certainly up for it:
Click to see the bigger image. It's worth it, but even the 900-pixel enlarged version doesn't really begin to reveal the detail in the full frame (stars in the Double Cluster are resolved!). Its worst problem, by far, is coma inherent in the lens, not focus or tracking. I've treated the highlights a little harshly in my haste to get something to look at; M31 and M33 glow a beautiful soft grey in more carefully prepared data. Then I dropped the barndoor off the tripod while carrying it inside. It thudded into soft, damp ground, so I doubt anything was hurt. Nothing that can't be put right tomorrow for sure. Good night! Fourth Night: There's only a small crater in the yard where I dropped the barndoor mount last night. It's not as deep as my knee. As long as I am careful not to fall into it, all will be well. Today I removed, trimmed and smoothed the plate the motor is bolted to in order to avoid gratuitous corners and sharp edges. Now the mount packs away more compactly -- the better to haul it around for dark sky adventures. I taped up some extraneous cables associated with the AC/DC power supply, too (what would I give for Eric Job's artistry in cable management on any dark and confusing night?). And put the finder scope and its bracketry together more sanely. I'm thinking I should go to the top of the driveway this evening and see if I can shoot the summer stars tilting into the west.
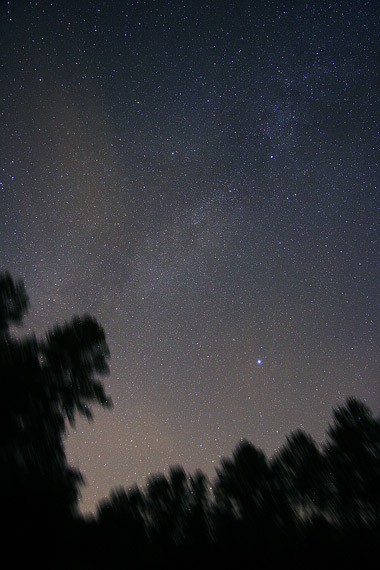
360s, 17mm, F5.0, ISO 1000, Canon 50D This is the first time I've used the barndoor with the intent to make a nice picture (contrast with testing to see if it works). This is tougher. Here's the best of the night, a single 6-minute frame. Too much light to go longer; combined images again don't work particularly well (what's going on there?); and the mount does not track for as long as I had planned -- the set screw in the drive bolt interferes. There are ways to get around that. I had much more ambitious plans than this. Here are some clues. Check this out and compare with the previous image; it'll be plain what I had in mind. I need much more exposure for this to work well:
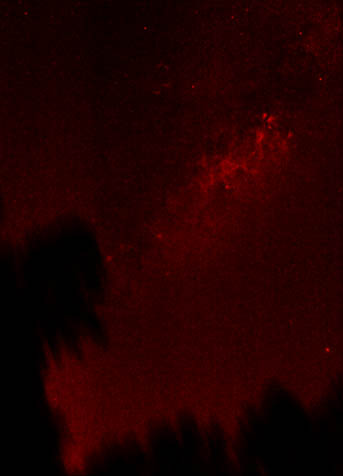
24mm F2.0 Nikkor at F4.0; 7nm Baader
H-a filter;
The changed image scale and slight projection difference will be lethal to any sort of blended result. Also, the short exposure meant I had to stretch like mad to get anything worth seeing. Next chance I get, I'll shoot the hydrogen-alpha data with the same lens at the same focal length. It'll vignette some, which is why I didn't try it that way first, but that's a small problem compared to trying to map the different images together. It's going to be a challenge to get enough signal to get rid of the noise in the dark areas. If the extreme variation in entry angles is a problem, I could drop back to an old Lumicon bandpass H-a filter instead of the much narrower Baader interference filter. Anyway, if it were easy...
I'm ready to declare testing over. Let's start a new page for photos made with Barndoor III. Of course there'll be more tweaking. There's always more tweaking with any ATM project (that's Amateur Telescope Making, for the innocent).
|


