|
|
04/28/2010. First Light for the A-P Mach1GTO. These are notes from my first night out with the A–P mount. Some of what I did was dead wrong. Some of it worked anyway. If you're reading this for tips on the use of the Mach1GTO, the LVI SmartGuider (aka Orion Solitaire), or the two of them together, please don't put much reliance on this page. I'm new here myself and am recording mistakes and successes alike. The A-P Mach1GTO will become my primary imaging mount, replacing in that role the Losmandy G11 I have used and tweaked and worked with since 1993. Some, many, most of these notes are for my own reference, so you'll find much that is very specific to my uses (counterweight placements, for heavens sake). Skim and ignore the ultra-specific. Really. I won't mind. I'm keeping these notes on the net rather than squirreled away locally because you just never know what people will find useful. Between the trivial details there might be something you need to know, too.
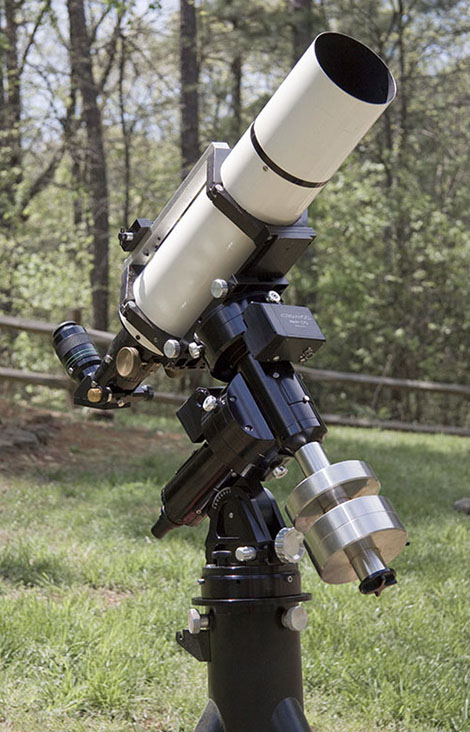
With my two counterwights (10# and 18#), the 5-inch F6 with ST80 guide scope requires the shaft extension for proper balance. The extension itself amounts to a 6# counterweight. The heavier counterwight would likely suffice out near the end of the extended bar, but using both counterweights provides lots of options. Begin with the larger weight near the junction of the two bars and the lighter one closer in (this is shown on a "third night" photo, see link below). Hook up all the wires and turn it on. Polar align with the alignment 'scope. (In the future, pick a Go-to assisted alignment option and run through it. Tonight I skipped several steps and faked my way around; I confess I kept using sync instead of re-calibrate which is bad practice. I only R part of TFM.) The ST80 with the Agena 28mm crosshair Kellner in a prism diagonal focusses at 5.19 on the GSO scale. This is close enough for the Smartguider as well, but it could be better (later note: 4.9 is good; leave the focuser there and only partially insert the eyepiece for visual use). Note that the better the focus for the guider the more able it will be to lock onto faint stars. Reducing star spreads from 7 to 4 pixels should increase intensity on the chip by 49/16 = a factor of 3, or 1.2 magnitudes. At its 762mm native FL, the 5" F6 can be roughly focussed for the Canon 20D-HG with H-a filter mechanically. Put the Feathertouch ahead of the Maxbright; rack both A-P and FT focusers to their in their full in position; then back out the FT fine focus by a little more than 1/4 turn. Better yet, use the LiveView option on the 50D to preset any EOS camera, and better than that, use Nebulosity on the netbook to focus either the Canons or the SBIG quantitatively. Set the autoguide rate of the Mach1 (A-P menu item 7) to 0.25 or 0.50. The guider has a small chip (752x480 pixels, 6 micron pitch) and it's easy to lose the guide star with faster corrections. I tried a 100sec unguided H-a frame of M81 and M82 and then attempted to calibrate the guider on a 5th or 6th magnitude star nearby. Decent detail (and some dec drift) appear in the short exposure, but I had no luck calibrating the guider. Setup failed with a "Motor Not Moving" error on the Dec return step. This is almost certainly because the star left the chip. Thin clouds moved in before I could experiment more with this star, so I slewed to Pollux and tried again. (Note that tonight I was mistakenly adjusting button rates rather than autoguider rates, so my fiddling had no effect on my success with Pollux. The autoguider rate remained at 1.0x sidereal which contributed to pushing the star off the chip during calibration.) I attempted some ten minute guided H-a frames of Pollux and environs. They're a mess: they have big field rotation centered well off the chip, which I don't understand. I'm not satisfied with many aspects of tonight's setup, including my operation and configuration of both the autoguider and the mount. The fault is not in the stars or in the mount but with my impatience. So many things could be wrong! Attempt two needs to be more controlled and deliberate. Do these things before trying it again:
|
:: top ::
© 2010, David Cortner
