|
|
9/21/2010: TOM SWIFT
|
 "Tom Swift" by James Gary |
CHAPTER 1 — THE NEW PROJECT "I'm sure it's going to work, Ned!" he said eagerly to his chum as they neared Tom's private laboratory. "With my new device I hope to learn more about the planets. I want to start soon—" "Listen here!" broke in Ned Newton. "If you're thinking of going to Mars or the moon, just count me out! I've gone with you to many strange places and have never kicked. But this—" "Hold on, young fellow!" interrupted the youthful inventor with an amused chuckle. "I've nothing like that in mind YET! All I want to do is show you my new 'space eye.'" |
|
— Tom
Swift and his Giant Telescope, Victor Appleton, 1939. |
OK, that's more than enough of that.
So I bought this Pelican case for Amy's fiddle and it turned out to be way, way bigger than what was needed (or what would work for the airlines), and so it reverted from "hers" to "mine," and I thought a while about good purposes toward which it might be turned.
The little Aspire One netbook has worked very nicely for the Chameleon, the ST2000XM, and the Canons (when tethered). Except that its screen is tiny, hard to read, hard to use for critical focus, and is scaled all wrong to see the entire field of view of the Chameleon and ST2000. When using the computer in the field, there's this list of things that need to be with it. And when imaging, there's this short list of things that need to be handy (barlows, adapters, the cameras themselves).
So I put a 17-inch Dell monitor in the lid (eBay, $25), lined up accessories along one side and across the bottom layer of foam. Immediately beneath the lid-mounted monitor (where it would otherwise strike the foam), I made a wooden work surface with short legs. With the surface down and the legs up, the work table sits in a hole in the uppermost layer of foam and makes a wooden recess for the monitor to descend into; reversed, it's a 17x19 inch work surface for the netbook, a mouse, and the A-P hand controller. Lug it outside, open the case, plug in the big monitor, run a VGA cable to the netbook's aux VGA port, extend the desktop onto the big screen, set it for 1280x1024 and voila! The extra pixels give me room to see what I'm doing rather than trying to squint at, through and around the little netbook screen. Dialog boxes can be dragged to the netbook's default screen to get them out of the way. The power cord and VGA cable are stored wrapped around the monitor, held in place between the egg-carton foam in the lid and the back of the monitor.
There'll need to be a separate case for
guiding hardware. The existing power case (a too-small Tupperware
tub) and dedicated case for the solar kit points the way for
a (if not the) logical division of cases: control and data acquisition
/ power / guiding / ST2000 / solar. You always need the power case
when using the mount, so it stays with the mount. Everything else should
be separate and distinct. Here's the telescope and
mount, and over there are six cases. Bring each out one at a time
depending on what kind of photography you're wanting to do:
Power Case |
A.T. Suitcase |
Guiding Kit |
H-a Telescope |
ST2000XM CCD |
Eyepiece Case |
|
| Solar Photography |
x |
x |
x |
|||
| Lunar / Planetary Photography |
x |
x |
||||
| Unguided deepsky with Canon | x |
|||||
| Guided deepsky with Canon | x |
x |
||||
| Unguided deepsky with ST2000XM | x |
x |
x |
|||
| Guided deepsky with ST2000XM | x |
x |
x |
x |
||
| Just Looking | x |
x |
Some debut images made using the the Amazing Telescopic
Suitcase to focus and operate the PGR Chameleon and to organize assorted
other toys. All these photos were made in a 20-hour period trying out
different combinations of glass and sensors, all focused and controlled
via the Amazing
Telescopic Suitcase:
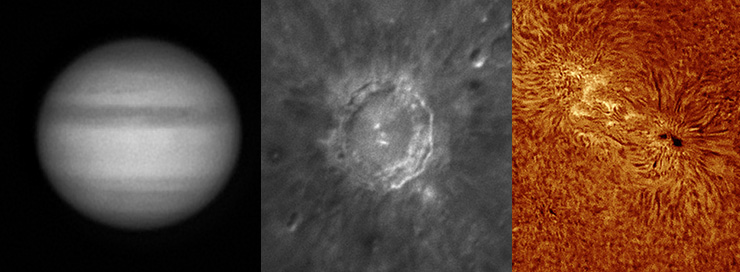
(Jupiter and the Moon were shot through a gap in the eastern treeline; they were less than 20° up and boiling like mad.) It takes four or five minutes to roll the telescope mount out of the basement, rough-align it and get it powered up. Then another few (five to ten, depending on how many "x"'s the project rates) to pick out optics and appropriate cases, bring them outside, and get them electrified and running. Not bad. "Jiminy!" said Ned Newton, "you couldn't do it much faster even if you had an observatory of your own!"

M13. 5-inch A-P @ F6, ST2000XM, Astrodon Gen-1 filters. LRGB, 20x30s each channel, unguided. Captured with Nebulosity 2; dark-frame subtracted, aligned, stacked, combined in Maxim DL5; tweaked in PS CS4. Cropped a bit tighter than I would like. Not bad when the hazy, moonlit sky held all of seven or eight stars. The red channel is not properly focused. I focused using the luminance filter in slot four. Re-check focus with the filter in slot one. I would think something moved except for the fact that I took R data first. The PSF through the blue filter is very tight, green is almost as good, red is off, and luminance is OK. Revisit combination methods, too, 'cause the combined stars are messier than any individual channel. Also, just about all stars are burning out to pure white. And see if it's time to bake out the desiccant in the CCD while you're at it (see entire frame on following page). File this under: one photo makes a lot of work.
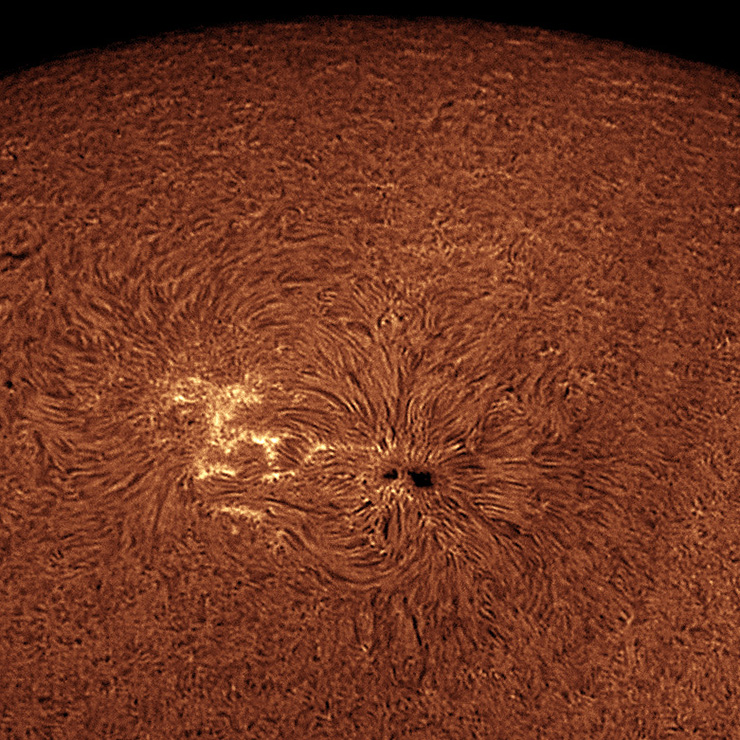
Active region 11108, LS60HaTDS50, Point Grey Chameleon, 500 frames.
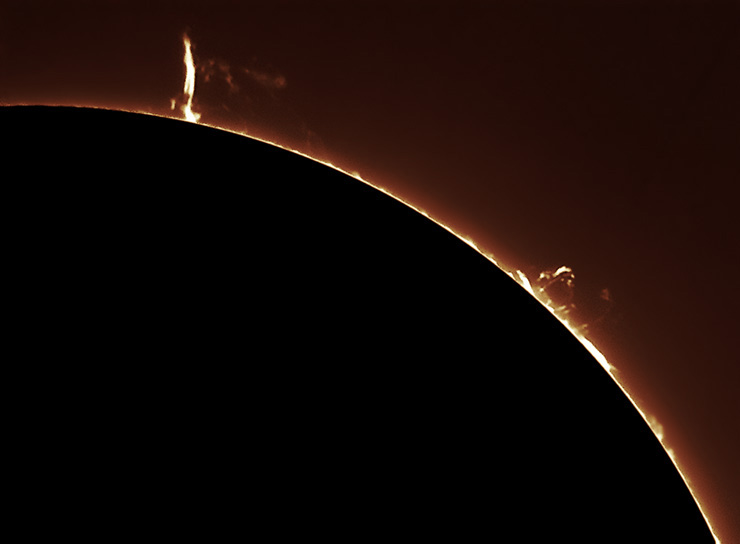
At right, magnetic loops rise above sunspot / AR 11109 approaching from just beyond the limb. This one is said to be a likely host for C- and M-class flares.
:: top ::
© 2010, David Cortner