05/08/2013. PixInsight is a really nice piece of s/w. I've been using it on my solar imaging for a few days (web debut to come soon), and I finally turned it lose on some deepsky photos. There's a lot to learn. So far I've been using these features more than any others: antinoise, HDR, star-masking, and of course its rich and excellent deconvolution routines. I'm sure these and other tools can be used to better effect than seen here, but hey, so far, so good. Here's 6h45m of M81, using all the tricks I've learned so far. Lookit them starclouds! Lookit them dark lanes!
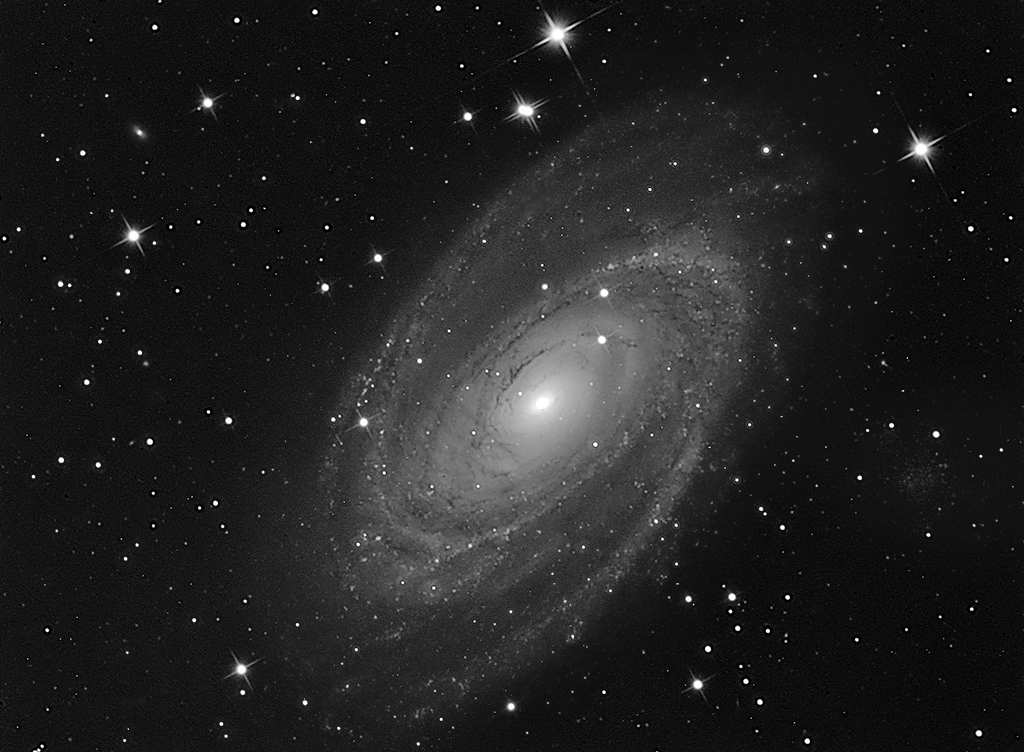
M81
AT10RC @ F4.8
27x900s L
Processed in PixInsight
5/15/2013. A couple of moon-free nights let me grab luminance frames of NGC 3718 to compare to images taken under the full moon a couple of weeks ago. The difference is striking. Here's the best from the most recent, darker-sky attempts. I'll offer a quantitative comparison soon enough.
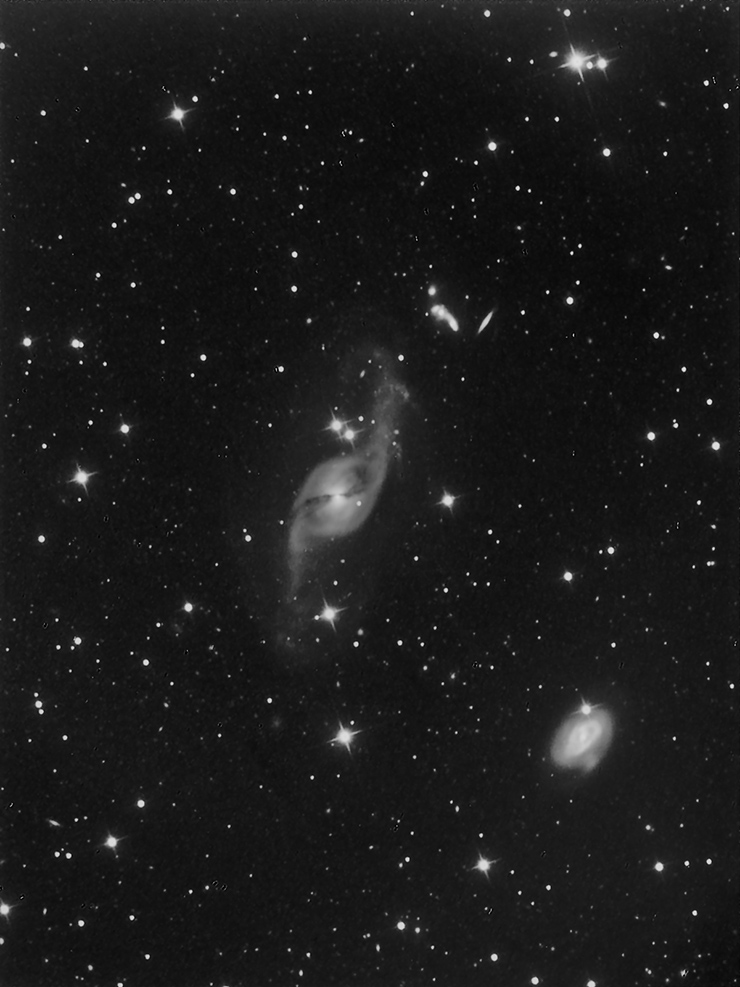
NGC 3718 & friends
35 x 900s L (8h 45m)
AT10RC @ F4.8
In the full-res, 16-bit rendition it's easy to see the cocoon of scattered stars that envelopes NGC 3718 as well as clumps, arcs, and knots in its extended tidal tails.
Even so, I think I've been doing it all wrong. I've been following the examples of excellent deep sky astrophotographers in using long and longish sub-exposures (900s, typically). Thing is, for the most part they are under much better skies than mine and their CCD's are electronically quieter, have higher quantum efficiencies and deeper electron wells. All those details (and more) determine the optimum exposure time. I ran across pages (formerly) associated with Ron Wodaski's book, The New CCD Astronomy. They make a convincing case that I'm exposing grotesquely too long if the game is maximizing signal to noise ratios (and it is). This, like financial planning, may be a realm where it's important to run the numbers and act on them rather than relying on what "seems" right. In fact, exposures as short as a minute or two might be optimum (!?). For a plausibility check, I scaled back to 300s exposures (which are still on the order of 3 - 4x the recommended duration) and tried M100:
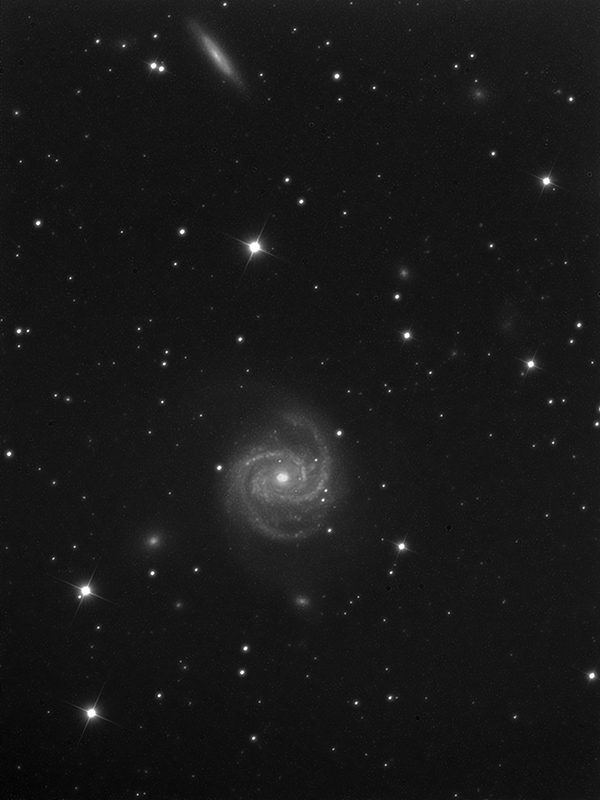
M100
17 x 300s L (1h 25m)
AT10RC @ F4.8
This is promising. It's a good start on a photo of Gus Johnson's galaxy. Again, I'm not sure what will show up in the 8-bit web version of this image, but in the original 16-bit TIFF on a calibrated monitor, the outer whorls of M100 are surprisingly conspicuous as are a scattering of faint background galaxies throughout the field.
I went looking for pages that related sky brightness as manifested in CCD backgrounds to those measured by a Sky Quality Meter. Here's a useful URL for that:
http://www.stanmooreastro.com/StandardBackground_mag.html
That's so I don't misplace it. I'll gather up the optimum exposure calculator(s) here eventually and probably insert a mind-numbing, eye-glazing table to relate exposure times, SQM readings, and CCD background counts. You've been warned.
Here's a great exposure calculator:
http://www.ccdware.com/resources/subexposure.cfm
06/01/2013. Allow me to horn in here with an out of order post. I want to show this M100 photo near the one above. Here's a stack of (only) 30, 1-minute exposures:
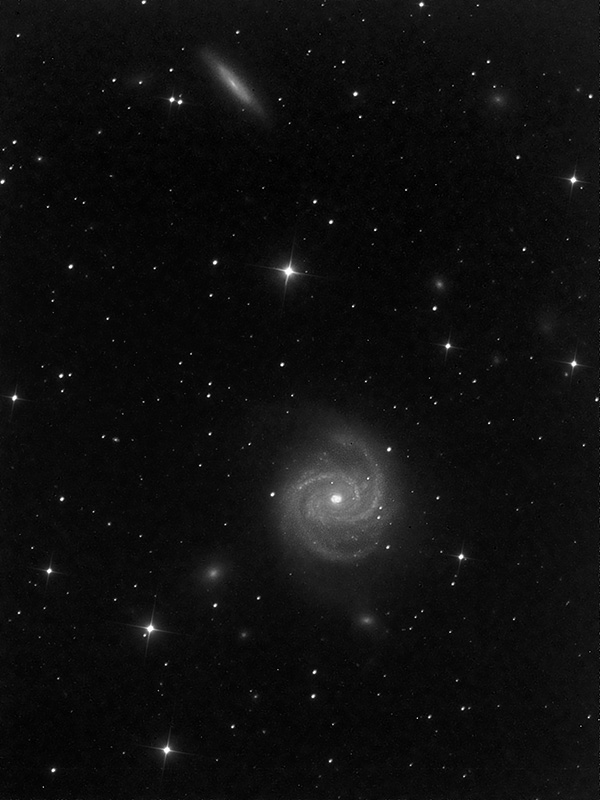
M100
30x60s L, (30m total)
AT10RC @ F4.8
And that, I think settles that: under my skies and with this camera, short luminance subframes are at no disadvantage to longer ones (just like the math said). I wanted 85, 60-second subs so I could do a direct comparison with the image comprised of 17, 300-second subs shown before (both would be 85 minute exposures), but with just over one third the exposure time, I think the second image is very, very similar, actually superior in some ways, inferior in others. The background is not as smooth, the stars are tighter, the fainter fuzzies seem a little harsher -- but it's a third of the exposure. The detail within the bright spiral arms may suffer some. I actually captured close to 90 frames, but the sky was hazy and occasionally overcast. I threw most of the images away and used only the 30 best.
After messing with the calculator links above and spending far too long in Excel, I've derived the following general guidelines for the use of five different sub exposures. The relation between average background counts and recommended subexposures looks good. Use that part of the table like this: take a 60s exposure, measure the average background, look up the appropriate sub-exposure. But I'm not entirely sure that the SQM readings (mag per square arc second) match up with the average background counts very well. [D'oh! The backgrounds probably need to be after dark subtraction. Think on this.] The intent is to use the SQM columns like this: "if the SQM reads 18.0, and you intend to use the F4.8 focus, then take 300s subexposures; if you intend to use the native F8 focus, use 900s subs." I'll check the computations, but I foresee a lab exercise in my future to validate the relationship between Sky Quality Meter readings and average background counts. In the meantime, this:
Avg Bkg in 60s |
Find SQM here
if using F4.8 |
Find SQM here
if using F8 |
Recommended
Sub Exp. |
< 200 |
> 19.5 |
> 18.4 |
1800s |
200 - 320 |
19.5 - 18.7 |
18.4 - 17.5 |
900s |
320 - 700 |
18.7 - 17.6 |
17.5- 16.5 |
300s |
700 - 1500 |
17.6 - 16.6 |
16.5 - 15.5 |
150s |
> 1500 |
< 16.6 |
< 15.5 |
60s |
And no, I don't really want a function to relate exact sub-exposures to exact sky brightness because to make good use of a particular exposure, I'd need a library of darks for every possible exposure. If it should turn out that I do need more precisely adjusted exposure times, then I suppose bias frames could be used to adjust standard darks. Still... until convinced otherwise, let's stick with these standard exposures. And build a new library of 150s darks.
Just for the record, should you ever see background counts in the 110-120 range (SQM 20 and darker), the recommended sub-exposures are 1-3 hours long, which is usually impractical and undesirable for various reasons. Let's call 1800s = 30m the longest generally useful sub exposure.
05/31/2013: A comet that almost got away. PANSTARRS, 2011L4, is nestled up against Polaris, less than six degrees from the north celestial pole. It hid in the pines during the evening and earliest morning hours. Earth passed exactly through the plane of the comet's orbit eight days ago while clouds and a trip to New Mexico intervened. May 31 was my first chance to photograph the comet's remarkable "anti-tail." I figured there'd be enough gaps in the pines that I'd get something, and I did. It's far from the best photographs of this geometrical curiosity, but this one's mine:
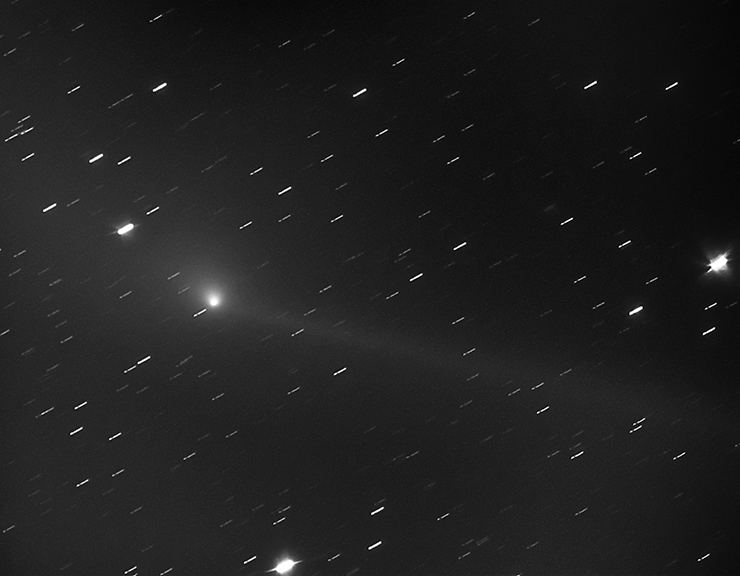
Comet PANSTARRS
16x60s L
AT10RC
ST2000XM @ -20°C
The comet's tail is actually the short fan extending to the left of the nucleus and coma between about 9 o'clock and 11 o'clock; the streak to the right is the first degree or so of a long "anti-tail" featured in much better photos made closer to the orbital plane crossing under darker skies and without pine tree filters (e.g.: this APOD). The anti-tail consists of dust ejected from the comet over the last several weeks or months spread out along its orbit, viewed edge-on. On this warm night, I shot something over 100 consecutive 1-minute unguided frames and used the best (last) 16, aligned on the comet, to produce this photo. The whole scene was much fainter than I expected, pine boughs notwithstanding.
06/05/2013. Some rainy-weather progress: I wanted to be able to mount, remove, and then remount the CCD on the telescope in reproducable orientations, the better to accumulate light over multiple sessions and maybe to change subjects in the course of an imaging session without reshooting flats. Also the better to anticipate the availability of good guide stars. It's simple to provide a means that will work well enough for effective stacking; and we'll see if the same simple move suffices to allow me to re-use flats. Go here: http://miltonhill.us/ and download the setting circle printing software. Print an RA circle with the same length as the circumference of the outside of the camera-mounting adapter. In my case, the circumference is about 8.05 inches. Trim the strip close; "laminate" it with Scotch tape, and attach it to the outside of the 2-inch adapter with rubber cement. Poke holes for the thumbscrews that hold 2-inch accessories. Mount some manner of index on the camera (mine can be improved upon), and voila:
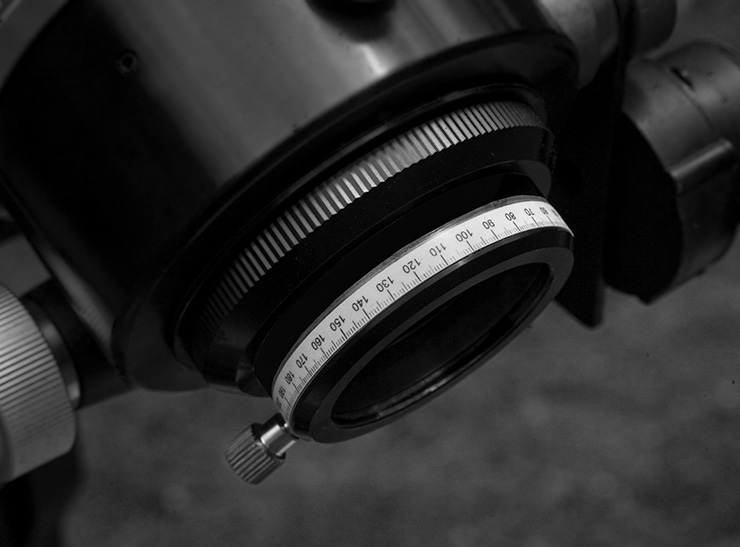
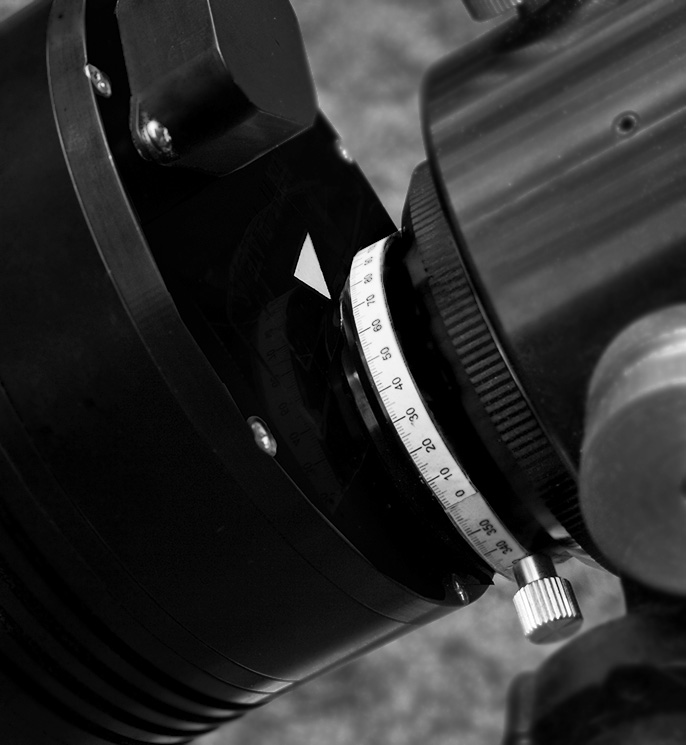
Note that I use Guide 9.0 to plan exposures and find guide stars. I've set Guide to display charts inverted with north up. The 90° index mark on the new orientation scale / placard is on top of the focuser with the telescope in A-P Park 3 (i.e., aimed at the north celestial pole). The scale increases counterclockwise and corresponds to the angle shown in Guide's Display/CCD-frame dialog box.
For example. You want a bright guidestar for a photo of M3 using the AT10RC at F4.8. Play with Guide and notice that a 6th magnitude star falls on the guide chip if you rotate the CCD preview frame to 55 degrees. So guess what you do: rotate the CCD camera until the arrow points to the 55 degree mark on the placard.
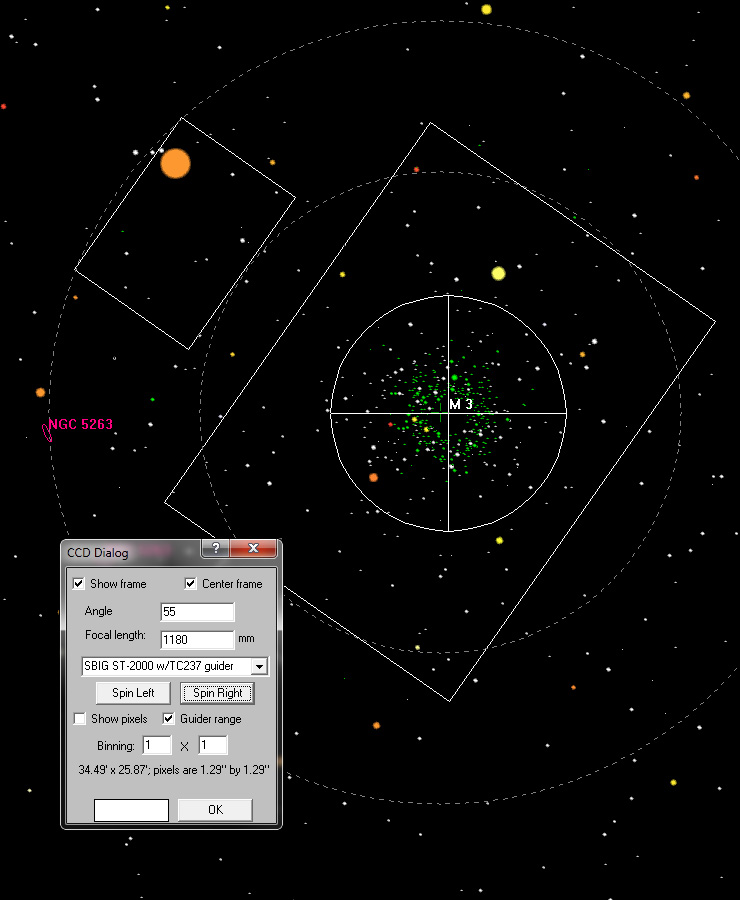
Of course, you only need something brighter than about 12th, so this is overkill. And for M3, the core will burn out in exposures longer than 60 seconds or so, so you really don't need to guide at all. Sshhhh! This is just an example.
Except where noted, deep-sky photos are made with an SBIG ST2000XM CCD behind a 10-inch Astro-Tech Ritchey-Chretien carried on an Astro-Physics Mach1GTO. The CCD is equipped with Baader LRGB and 7nm H-a filters. The internal guide chip of the CCD most often keeps the OTA pointed in the right direction (I'll let you know when a Meade DSI and a separate OAG or guidescope takes its place). Camera control and guiding are handled by Maxim DL 5.12. The stock focuser on the AT10RC has been augmented with Robofocus 3.0.9 using adapters turned on the lathe downstairs. Maxim performs image calibration, alignment, and stacking; Photoshop CS4 and FocusMagic 3.0.2 take it from there. Gradient Xterminator by Russell Croman and Astronomy Tools by Noel Carboni see their share of work, too. Beginning in May 2013, PixInsight has taken over some of the heavy lifting for transfer function modification and deconvolution.
:: top ::