3/10/2015. I've been dreaming up opportunities for spectacular landscapes, and since I'm not really in a position to make reservations or buy tickets, I had to come up with something else that feels like progress. Or bust.
How about putting together some panoramic gear? I didn't want to just buy it. The affordable bracketry is clumsy and the elegant stuff is expensive. Part of the reason the expensive commercial stuff is expensive is that it needs to be versatile -- it has to be adjustable to work with all kinds of camera bodies and lenses. I just need something that works with my stuff. Also, the expensive gear looks really cool. That's fine and all, but hey:

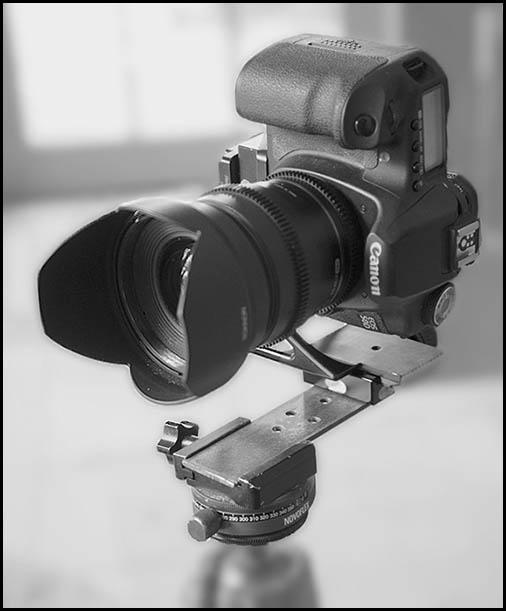
Kit in progress
50D standing in for 6D
Scattered here and there in assorted cases and storage drawers, I had clamps and raw metal and long-unused hardware: couple of Neewer quick-release clamps ($8 each), a short piece of steel stock, the L-bracket from my ancient D1, a rotating Novoflex widget with a spirit level built in (left over from the San Diego Then and Now project), and a handful of bolts. At first, I got by with a couple of pieces of square aluminum tubing in place of an official honest-to-god L-bracket. That served to confirm the nodal point for the three lenses I'm most likely to use (24mm Rokinon, 24-105mm Canon at 24mm, and 14mm Rokinon). I lined the camera up on two fixed points, one close, one more distant, and adjusted the metal slider back and forth in the clamp until the two points remained aligned with each other while I panned the camera left and right. That's "finding the nodal point." Fortunately, the nodal, zero-parallax, points for all three lenses are very, very close together. In this case, except in the most exceptional circumstances, one setting fits all.
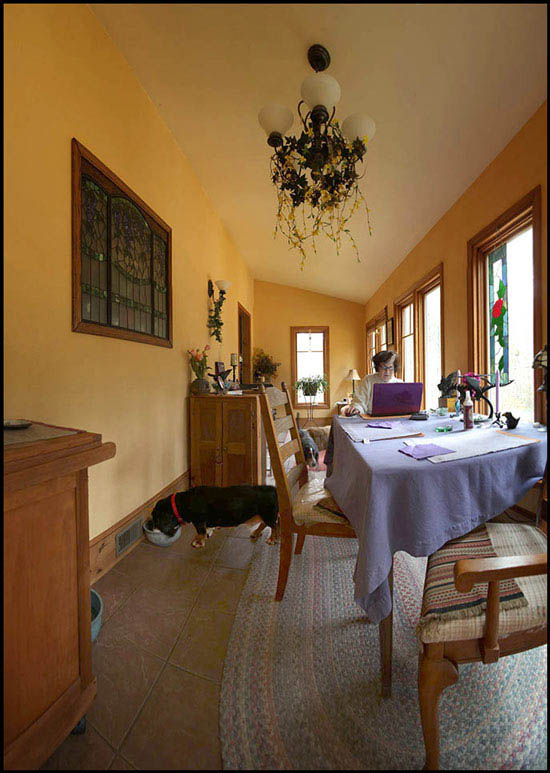
I modified the Really Right Stuff Nikon D1 L-bracket to replace the aluminum claptrap with a lighter, more compact camera support ("modify" = "drilled one hole"). Add it up piece by piece and the kit would be damned pricey, but since all these bits were lying around anyway, my kit was free. I cobbled it up and mounted it atop my medium-weight tripod in the galleria / dining room / sun room to try it out. Here are the first three "see trials." I don't know precisely what afflicted the first two, but if you get it all level and overlap the frames by 30-50%, things work:

Works in Progress with a 24mm Rokinon x 14
Stitched in Photoshop using "Photomerge"
It's worth rotating and undistorting each frame before stitching them.
My main interest for this is wide landscapes and detailed interiors. When I want to use a longer lens for a highly detailed view of a smaller piece of a landscape, the panorama bracketry is overkill. If I'm stitching a panorama where the nearest item in the frame is 200 (let alone 10,000) yards away, who cares about parallax? A regular tripod will do; for that matter, so will hand-holding (see here, here, and here for example). For wide-angle stitchery that includes up-close details, and especially interiors, parallax does matter, and I wanted a rig to support the camera in a vertical ("portrait") orientation and rotate it around the nodal point. The vertical orientation maximizes coverage at the trivial expense of a few extra frames for any given horizontal coverage, and the zero-parallax panning makes for much simpler processing and all around better images.

14mm Rokinon x 4
I've thrown away a lot of floor and ceiling in that panorama, and I've straightened out some lines with Photoshop's "warp" command. I suppose I should come up with a means of doing multi-row panoramas, but so far, so good. When a single frame is upwards of 5k pixels and a casual 4 or 5 frame panorama can run to 10-15k, I'm just not convinced more rows are really needed. I'll probably rig something up, but only if it doesn't make the outfit clumsy to set up and use.
3/11/2015. Making this too hard, I am. Shoot the middle row, tilt the whole apparatus up using the ball head, shoot the top row panning as for the first row, tilt the whole shebang down, shoot the bottom row. Rotate the images, undistort them, select all the images, and set Photomerge to work. Voila:

24-105mm at 24mm x 9
3-row panorama
Pay no attention to the duplicated hound! It works.
And yes, I do know that your iPhone has an app for that. That's why this has to work better.
:: top ::