Backyard Sunbathing
05/05/2022. The Sun once again clears the pines in the afternoon, so I can forego hauling the kit over to the lake lot or to some other more open venue. I still had to dodge clouds and unexpected computer battery exhaustion, but I got a few long clips that could be refined into decent images. Seeing was average at best, as forecast, so the images below are an interesting comparison to those on the previous page built from source files snagged under really good seeing. Clouds got in the way of every attempt at a mosaic, and I was getting some image breakup on large ROIs and full-frame videos. A computer restart helped with that but did not solve the issue; neither did changing the USB priority up or down. A fresh USB3 cable perhaps?
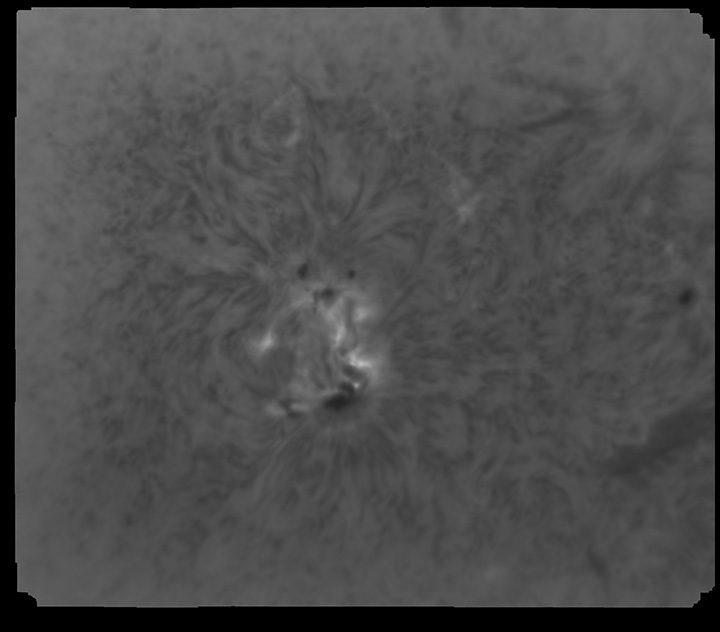
05/08/2022. In the wee, small hours, I went sunbathing. Why was I awake at 4 A.M.? don't know, the usual, nothing, I just was. So I took a fresh cut at the image derived from one promising stack and had some success, which I here record. AS!3 stacked the best 1,000 frames from a 5,000 frame video.
Here's where we start:
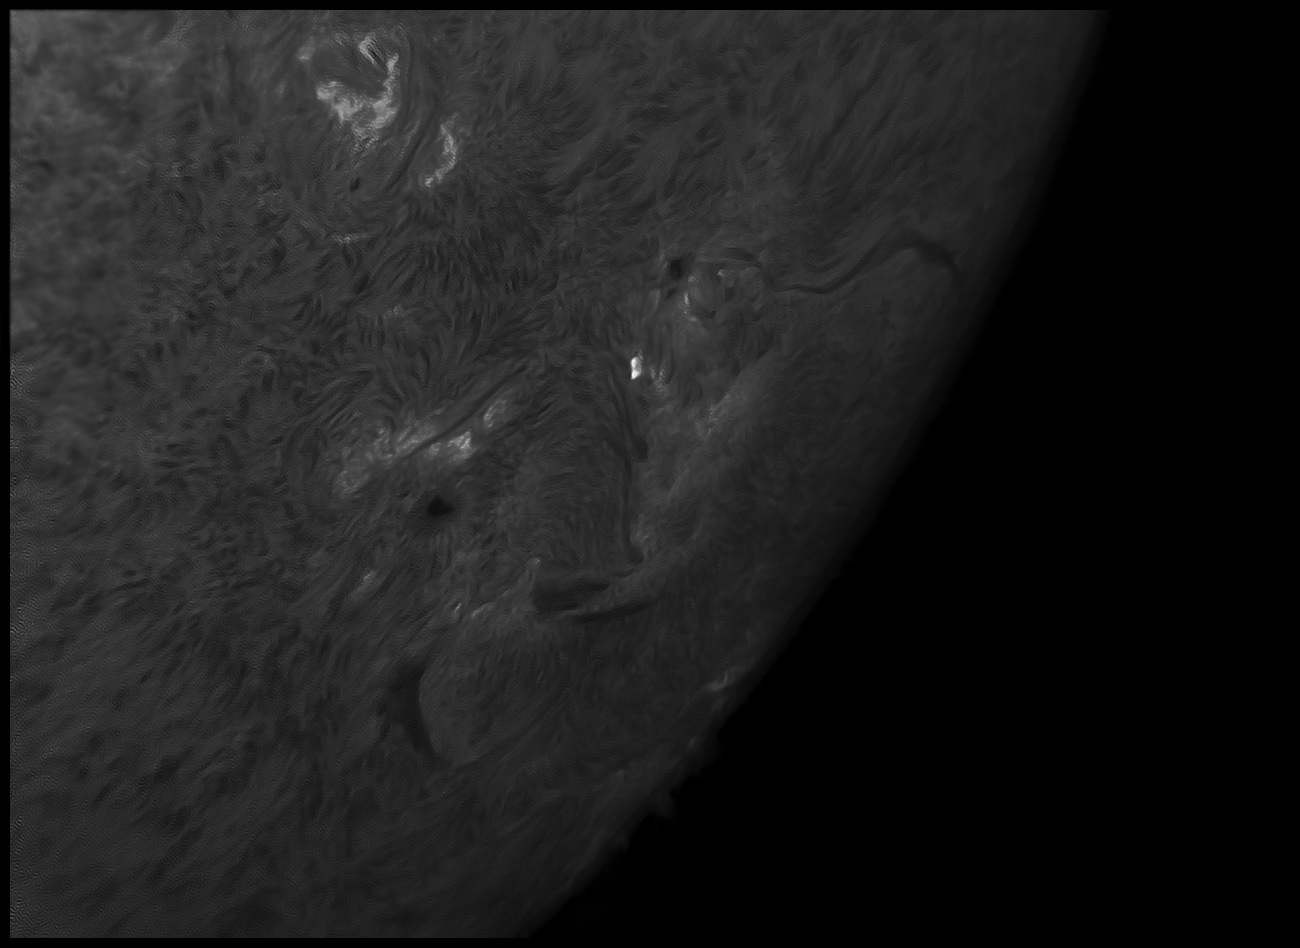
Here's where we finish:
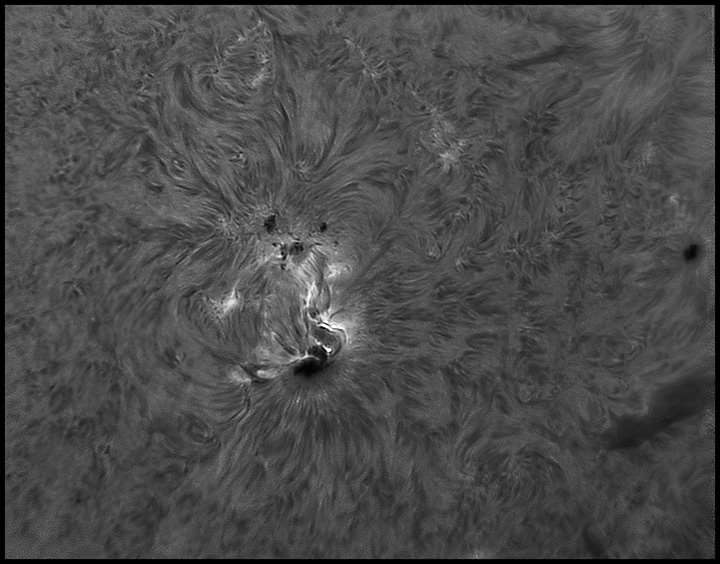
ROI 2000x1600
ASI178MM
Bigness is just a click away.
Here's how we got there:
- Load the oversampled 16-bit TIFF generated by AS!3 with 1.5x drizzle into IMPPG.
- Select the approximate finished crop and use gamma to bring up some details.
- Set unsharp masking sigma to a moderately aggressive level.
- Slide unsharp masking amount up to what looks right, then back it off a bit.
- Check "Prevent ringing" in the L-R deconvolution dialog box.
- Accept the default 50 iterations. Maybe. Probably.
- Slide the L-R deconvolution sigma up until things look good, then back that off, too.
- Apply the transform to the entire image, and save the result as a TIFF.
- Load the IMPPG processed image into Photoshop.
- The dehaze button in Adobe Raw is hard to resist, but take it easy. Use shadows and highlights to get a good starting point.
- Crop to taste.
- Apply moderate to strong noise reduction even if you don't think the file needs it. We're going to bring up a lot of detail, and noise, alas, counts.
- Use "Levels" to improve visible contrast. Just a little so you can see what you're doing.
- This is a good time to try some unsharp masking (you know you want to), but don't do much.
- Copy and paste the image into a second layer.
- Use Filter / Stylize / Emboss on the second layer (58 degrees, 2, 144%, FWIW).
- Set blend mode to "soft light," and offset the layer to improve edge details. Mess around; best results depend on the details in the image.
- Flatten the image, then copy and paste again.
- Set blend mode to "multiply."
- The result will be very dark. Reduce the opacity of the top layer to lighten the image some.
- Apply a modest Gaussian blur to the top layer (2, 3, 4 pixels). Nudge opacity as needed.
- Flatten the image.
- Use curves to bring tones up to taste.
- If you can't resist an unsharp mask pass, take it easy (45%, 1 or 2 pixels, 15 level threshold, for example; the threshold setting has a lot to do with the tonal qualities of the finished image).
- Focus Magic or Photoshop's "Smart Sharpen" may do good things. Topaz Sharpen seems to introduce some odd vertical artifacts in hard-to-anticipate places, so be very cautious if you try that.
- Voila!
Then I went back to bed.
I don't say it's a recipe, but a few steps are key: the emboss thing is important (it amounts to dynamic masking of edge details); the multiplication steps are big (they produce many tones where there were few, making edge transitions more tonal); but the general sense of stepping back from what you really want to do to see dramatic results during the process in order to have better results in the end is critical. There are remarkably few actual sharpening steps. Most of the process is cleaning up the data and presentation so that what sharpening passes there are can do their best.
Go forth, and sin no more.
05/14/2022. I dodged trees all morning and clouds all afternoon until the sky finally turned to rain. I only got two decent clips, both short. Seeing was mostly awful, transparency generally was worse. But the workflow above actually worked out reasonably well. The better clip only had 402 frames; I'd've preferred 5,000. I used the best 50%; 5-10% would've been better. Still, here's the before and after:
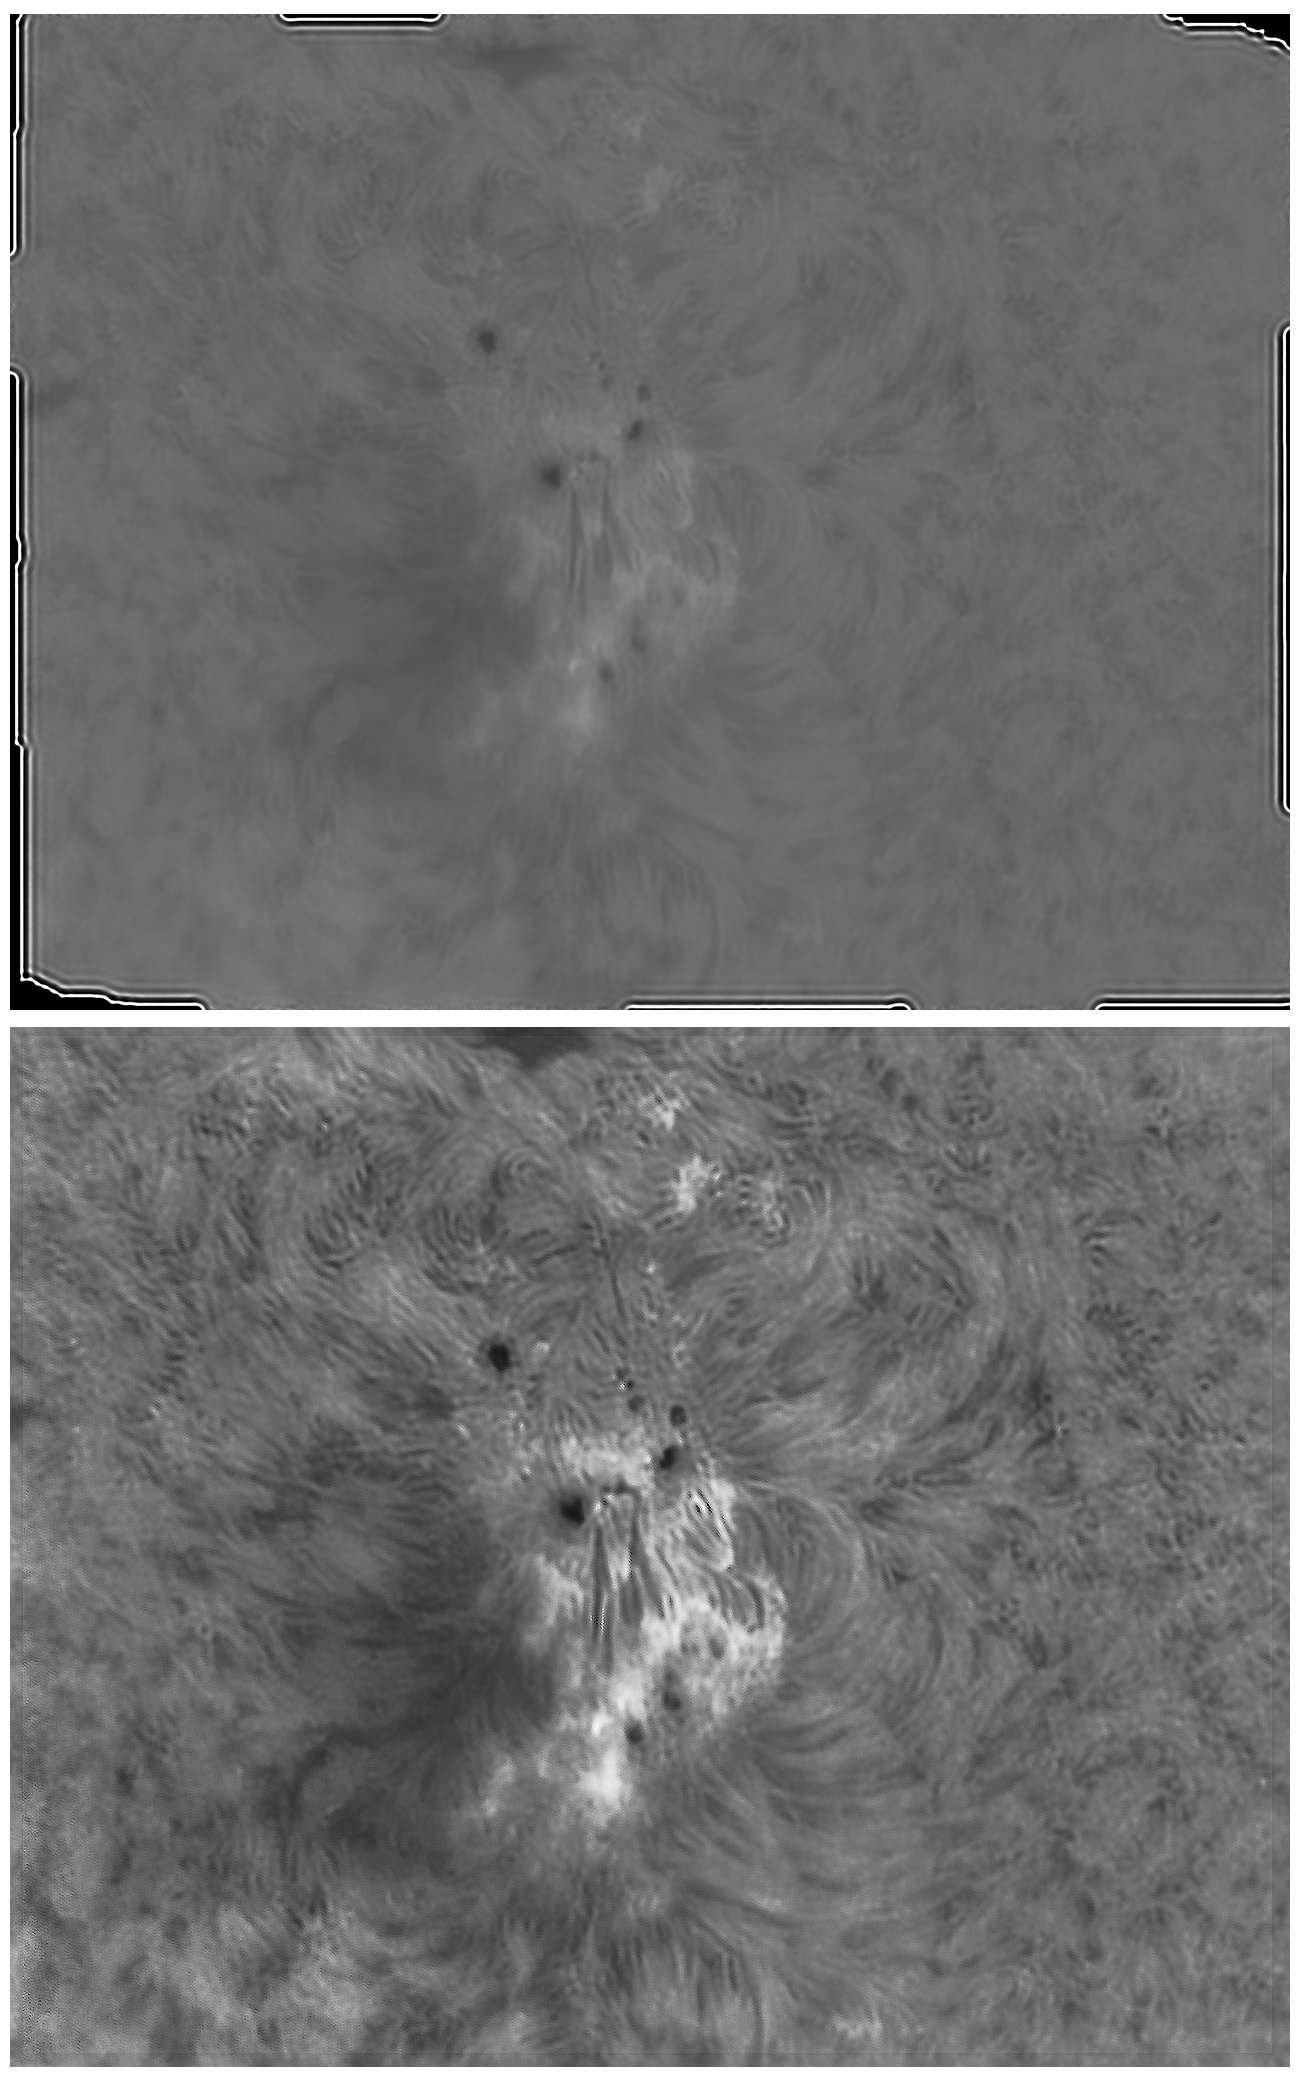
I've got to figure out the image breakup with USB3. It does help to restart the computer (or maybe just the camera? [that worked the next day]) with the cable plugged in. And I raised the % assigned to USB to 70 from 50 and turned off high-speed mode in the capture s/w (worked fine w/high speed mode enabled the next day). Something helped some, but not enough. New cable perhaps? Anyway, it's worth shooting in marginal conditions when interesting things are happening.
5/15/2022. Then there are days when it all works just fine. I restarted the camera a couple of times to cure the stuttering, used it in high speed mode, took data both full-frame and with a 2400x2000 ROI, had no clouds to speak of for a couple of hours after the Sun cleared the meridian tree. Seeing was good but not exceptional. I followed the workflow outlined above to produce this mosaic from consecutive clips of 5,000 frames and 3,000 frames:
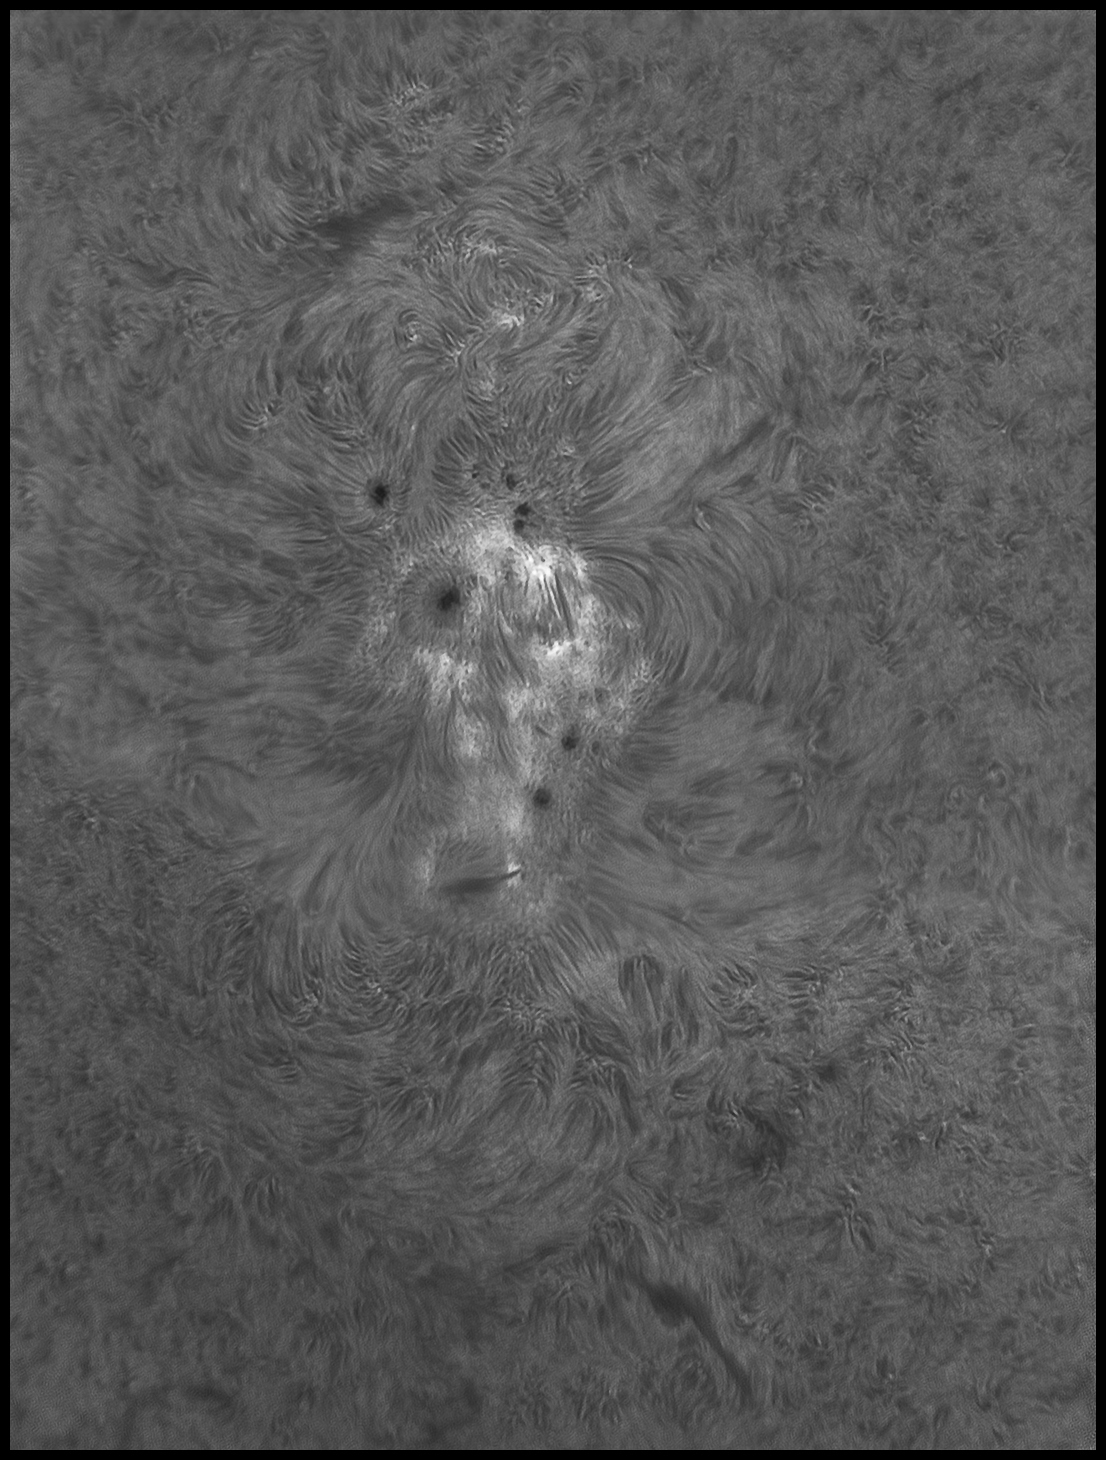
Best 1,500 of 5,000 (top), Best 1,000 of 3,000 (bottom)
Why not click to make it big? 34GB of data went into that.
Several other clips worked well, including some subtle but unspectacular regions, and one striking c-class flare. Yes, I do have a lighter rendition of this, but I really want to emphasize how bright a decent flare is when compared to any other solar feature:
Best 200 of a 500 full-frame clip.
Bigifying is possible and very much worthwhile.