|
I knew that after the flare a lovely set of arcade prominences was almost sure to form, and they did. With the Sun putting on a spectacular show high in a cloudless sky, we went to Kay's retirement party. I gabbed a couple of really good clips just before we left, so it wasn't too traumatic. Over the next few days, I worked out how to make a decent (not excellent, just decent) time-lapse video of the show from pre-flare through max to the arcade stage. I need to do this in better s/w that will actually interpolate between the frames. Premiere Pro or After Effects perhaps. In the meantime, simple alpha-channel fades will have to do (and yes, I know there's room to improve the consistency of the frames): .
. Details to follow (there's a ton of them). An HTML5 embed worked nicely in Chrome but not in Firefox, so I'm sticking with the Vimeo embed for now. I wouldn't be at all surprised if a better quality video turns up here by and by. . .
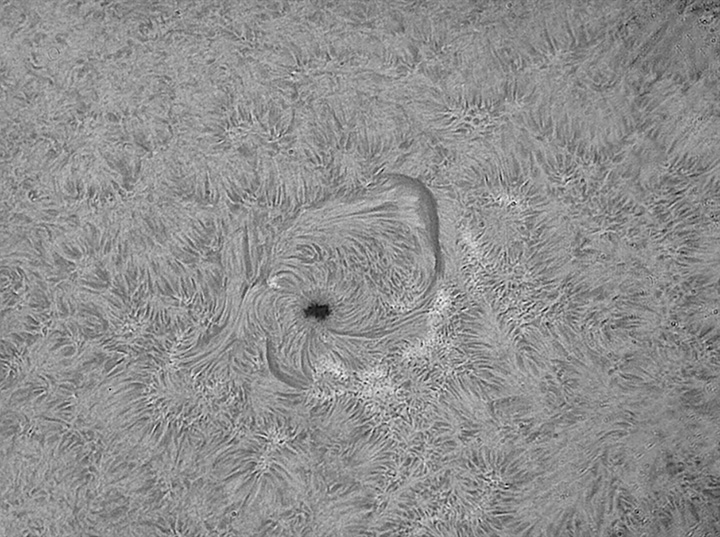
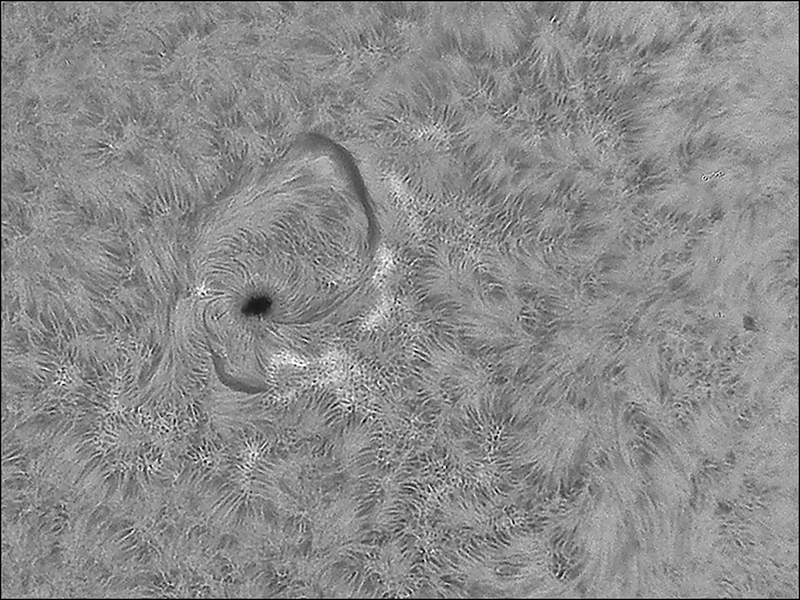
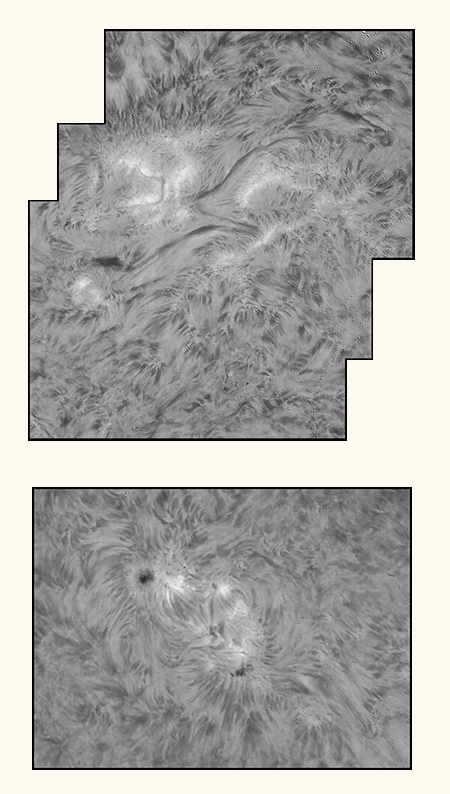
. 6/19/2013. Day before yesterday, some interesting stuff was about to roll into view on the Sun, so I thought I'd see about imaging it. The PGR Chameleon flaked out on me. It's almost surely in the USB connection, but even though I could sometimes get it to deliver a good image if I held it all together just so, the display always reverted to a myriad of lines drawn across the screen. I disassembled things to see if there were any obvious faults around the connections, squeezed this and that, and put it back together. No improvement. If anything, things were worse. I thought it might be a good time to try an ASI120MM instead. Faster frame rate, better software (FireCapture supports it without any driver gymnastics), more robust body and USB connections, an included wide-angle lens for nearly all-sky duty... Fine. I ordered one direct from ZWO and it arrived in less than two days from Shanghai (thanks, Sam!). A new model is about to debut, which caused me some concern (the buy it button disappeared from the ZWO website hours after I placed my order; Sam reassured me that the camera was on its way). After it arrived, solar whack-a-mole continued. In the meantime, I discovered that its CMOS chip is notorious for producing Newton's rings in narrowband applications. So I researched solutions, just in case they were needed. They are. I tried the camera out briefly just before noon. As promised, it drew prominent Newton's rings across the image. They were so stark that focusing through them was difficult. (Last year about this time, I was complaining about Newton's Rings in my PGR Chameleon. I didn't know how good I had it! I never did anything specific about them -- they were not bad at all compared to this -- I just learned to work around them and how to retouch the most egregious problems.) For Newton's rings there are imaging-workflow fixes (take a flat, or allow the target to drift...) and software only fixes (the rings, being periodic, should be obvious in a 2-dimensional Fast Fourier Transform; locate their signature in the frequency domain, erase it, and apply the inverse transform) and hardware-only fixes (tilt the camera with respect to the optical axis and the rings should go away -- they're damned hard to produce in a lab, after all, where the game is to get everything squared up). The flat was not entirely successful; the FFT fix was completely successful in removing the rings from a flat but only moderately successful in removing them from a real image; using both techniques together did a pretty good job of removing the rings from a solar photo. The process is complicated, time-consuming, and depends on acquiring a good flat for every imaging run. Even then it's not a 100% solution, and solar flats are tricky things, so I decided to try the third solution. I could build a tilter (there are plans on the net), but that would take hours and would be mechanically suspect. Besides, the threads on the ZWO body and the Lunt blocking filter appear to be ideal for the T2-based tilting adapter from Teleskop-Service and sold by Opt. In fact, I believe that no additional adapters will be required (correct!). That makes it a cheap fix compared to the cost of the tilt hardware plus adapters on both sides. Probably cheap even compared to the T-rings I'd ruin trying to make one in the shop from innocent parts. One is on the way from Germany by way of California (to go with the ZWO from China by way of Alaska, according to UPS). Couple of notes about today's experiments: though the flat didn't entirely solve the Newton's rings problem, it completely eliminated dust and uneven illumination. I will likely adopt flats for solar imaging for those reasons alone. So figure out how to make 'em. I assumed PixInsight would offer the tools to find and fix the FFT. It does produce a beautiful 2D FFT transform, but it refuses to let me edit the frequency-domain plot and that makes it basically useless for frequency-domain image processing. However, a forensic plugin for Photoshop does the round trip through FFT and inverse-FFT well enough (though only in 8 bits). Google "4n6" to find the one I'm using. Intriguing toy; it might become a tool. The Asus Aspire One did that shut-down-during-boot thing again (the first time was while in TN while cleaning up the house; it eventually just started working again). This time Google came to the rescue: turn it over, tap it hard near the fan vent, try again. Perfect. Simple issue: if the fan's not turning, it's not going to boot. Try to suck some gunk out of there if this gets to be a habit. So the bad news is that a lot of things have needed fixing. The good news is that fixing them has been relatively painless so far. Oh, and as of today I've got new glasses (dark driving glasses and finally some really good computer glasses). . 6/25/2013. The Asus netbook is crushed by FireCapture, which appears to be the overwhelming choice for controlling the ASI120MM camera, so I've set the Dell Latitude up to handle image captures. Runs nicely, but it's pernsickity when it comes to getting good speed from the sensor. Some important tips: close or seriously shrink the preview window; do not leave the histogram window open; use a buffer (4-8k) for the imaging data; write to the hybrid disk... and something still slows it down from time to time. I do get 25-27 fps when it's cooking along which is close to the interface's 35 fps max and beats the Chameleon handily. Newton's rings have most of my attention (also cleaning the sensor, but that's just ordinary tedium). Lest I think I've made no progress, here's the state of solar imaging a few days apart:
Solar Whack-a-Mole: June 21 vs June 25 . The Tilt-Adjuster from Teleskop-Sevice arrived yesterday, and I managed to take some data today. As shipped, the Tilt-Adjuster helps, but it does not eliminate the rings. I've drilled and tapped #10-24 holes for a second set of tilt-adjustment screws. I have the push-bolts but the pull-bolts have to come from Amazon (a 100-count box with next day shipping comes to way less than driving around to buy just a few locally -- I'm using brass, flat-top slotted bolts rather than outragously pricey socket-headed versions like the OEM bolts). Pictures to follow. [Man! I ordered the wrong size. Drove to Brinkley's just down the road and bought three of the right size for next to nuthin'. Man!] In its original form, the Tilt-Adjuster permits a maximum tilt of about 87 thousandths of an inch (measured with calipers in the gap). The push bolts are 1.8 inches apart arranged in an equilateral triangle (implies a height of 2.01 inches). So the maximum tilt available is about arc tan (0.087/2.01) or 2.48 degrees. There's some concern on the online solar fora that introducing tilt will defocus part of the image. I think not, and I see no evidence of that issue in today's tests. Look, the MT9M034 chip in this camera is only 3.54 x 2.69mm. In the worst case, the camera might be tilted along a diagonal. The diagonal spans only 4.45mm. Tilt that at 2.5 degrees and one corner will be 0.19mm higher than the other. So, how does 0.19mm compare to the allowable focus error? In The New CCD Astronomy, p39, Ron Wodaski supplies this approximation for what he calls the Critical Focus Zone in microns, where F is the focal ratio of the telescope: CFZ = F^2 * 2.2 A typical solar telescope is working with quite a long focal ratio, and my Frankenscope is not so different from the norm. I haven't computed it lately, but I'm running an F-ratio somewhere in the range of F15 - F25. So at worst: CFZ = 15^2 * 2.2 = 495 microns = 0.495mm And it could be as broad as CFZ = 25^2 * 2.2 = 1375 microns = 1.375mm So we can surely double the available tilt (and we can probably triple it) without risk of exposing any parts of the chip to defocused sunlight. And that's assuming the worst case. If the chip is tilted along its short axis and the F-ratio is indeed close to F25, we can stand the damn thing at a 45 degree angle and be in focus from one edge to the other. Not that I intend to try it -- the field of view would be mighty strange. These numbers comport with my experience out by the telescope: to adjust the focus, you really need to crank the knob. If I had a bigger chip, tilting might be an issue. But if I could afford a bigger chip, and the computer to cope with it, I could damn well afford one without Newton's rings in the first place, 'K? By the way: if you open a gap in a narrow-band imaging train in broad daylight, you'd better be prepared to deal with a lot of stray light. Murder on contrast. I taped up the gap for sky trials, but a permanent fix will probably involve an internal baffle (which is a fancy name for a strip of Protostar flocking paper curled up inside the adapter). Also BTW: this just struck me. I wonder if I might have reversed the rings' phase by starting sky trials with the maximum gap? Could I conceivably have opened the adapter too far and somewhere between wide open and completely closed lives a sweet spot without rings? It's not likely, but have a look anyway. . 06/26/2013. Bingo! I increased the gap to 200 thousandths (5.7 degrees) and the rings pretty much went away. (Remind me to tell you about Brinkley's sometime. Not tonight. Soon.) They still affect one corner. Rotating the entire camera has no influence. I need to try rotating the Tilt-Adjuster with respect to the chip, and I need to dial the tilt down to see if there are sweeter spots. This is the max tilt available using the new push-pull bolts. Different EFL's need to be checked, too. A single turn of vinyl electrical tape is insufficient to seal out sunlight when the barlow is not attached directly to the threaded inner adapter of the camera (where the barlow acts as a very good baffle). Alas, or hurray!, I have billable work to do for the next few days and can let this problem rest knowing I can image productively if the Sun does something special. Here's a downsampled rendition of the full field of view: .
Best 300 from 1200 frames
ZWO Optical ASI120MM mounted on
Thanks to user "gabrieli" on Stephen Ramsden's invaluable "Solar Chat" forum Google brings people here for details of this mod, but I fear
Here we go. Thus encouraged, I took a flat by defocusing the camera (about 1 cm of inward travel) and collecting 100 frames. Then I processed that clip in AVIStack 2.0 (open, process, file/generate flat field) and used the flat while stacking a focussed clip of 400 frames taken immediately afterward. I have no complaints left:
06/30/2013. The 40th anniversary of the Mauritanian eclipse found me staring at the noonday Sun yet again. I added another degree of tilt (now using 6.8° by means of longer #10-24 "pull" bolts in the TS Tilt Adjuster) to see if that would remove the last bits of Newton's rings. It did, at least from the maximum EFL configuration (Barlow on the end of the snout). Seeing was poor. Clouds moved in and kept me from trying additional EFL's. No flats required (these images are small because not so much is happening, and messed-up flats --see below -- produced some ugliness which is more apparent at larger sizes):
Three tips for effective solar imaging (with and without this crooked adapter):
About Brinkley's: So I ordered all these lovely flat-topped machine screws from Amazon because I didn't want to drive all over creation looking for them locally. I figured I'd easily spend more on gas and irritation than I would in buying a box from Amazon even though I'd be buying many more than I needed. But I ordered the wrong thread pitch (d'oh!) and when I realized that, I checked to see if there was an overlooked hardware store in Valdese. No, but Brinkley's Lumber Co. was listed as one just down the road in Rutherford College (3 miles). Really? I thought it was a lumber company. Worth checking. Sure enough; a nice enough local hardware retailer. I bought a couple of sets of flat-topped #10-24 bolts for 54 cents and asked, "How long have you guys been here?" Since 1917. Well, we used to be up the road in town... but we've been here since 1977. The fellow behind the counter had been there for 63 years. Which reminds me: Happy 63rd Anniversary, Mom & Dad.
:: top ::
|
© 2013, David Cortner


