11/20/2014. Tonight, I opened the show with M52 and its neighbor the Bubble Nebula, then returned to M33 for a more carefully composed image. Weather permitting, I wanted six hours of the galaxy to see what lies beyond its bright spiral arms. The weather did not permit. The sky hazed over and contrast suffered after only a couple of hours. Practice, mister, practice. (Yes, I can combine the finished images from the first and second sessions, and the result does reveal additional spiral structure; but it's not especially lovely; the crop required by the first session's near miss makes a mess.)
Here's M52 and the Bubble Nebula, the full-sized field, downsized for the web:

M52 & the Bubble Nebula
48x180s (2h 21m total)
Click the image for a better look.
While passing time on the computer waiting for the M52 process to complete, I found a book on eBay. Will tell all about it on Christmas morning.
11/22/2014. So I took another night's worth of exposures of M33. High, thin clouds moved over throughout the night, and I culled several low-contrast subs. The STV stayed dead on its guide star through it all and stayed pixel-perfect all the way down through the trees. I had PixInsight work with the best 100 subs from the second and third sessions, then did my best to bring out plenty of detail in M33 while respecting its low surface brightness, that soft "mound of light" impression it makes in the eyepiece. For one thing, I think it's important to make sure the bright stars in the foreground are significantly brighter than anything in the galaxy. View the image outside the page if you can (right-click, view image) to see it at its best. Here you go:
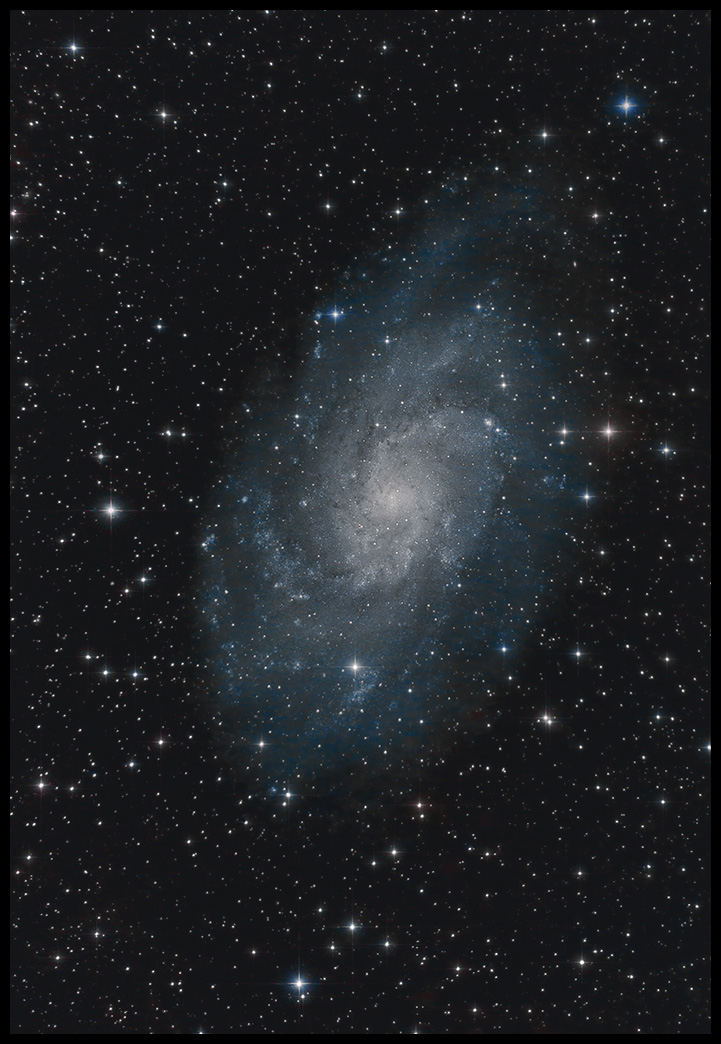
M33
100x180s (5h 00m total)
Time to process the stack: 5:14:39.
Click the image...
For both images above, I used PixInsight's range selection tool to mask stars and bright features and applied aggressive noise reduction (and saturation reduction) to the sky. Hardware was the usual recent kit (6D, 10-inch F4 Newtonian, Mach1GTO, Baader MPCC-III corrector) with no surprises in the camera settings either (iso 1600, RAW, daylight balance, no in-camera noise control or highlight protection).
Add to the To Do List: experiment with longer subs; you don't know, really, what the sky will allow or what is optimal and how much noise the 6D will generate in five or ten minute exposures. For any given total exposure time, longer subs cut processing time dramatically. People use such DSLR exposures to good effect, and since you're always averaging dozens of frames, image quality may not suffer. It's worth knowing how the camera will behave under darker skies that will encourage long subs. And subs of that length would permit good narrow band imaging, too (O-III for the unmodified 6D, O-III and H-a for the modded 50D). Play a bit with some extreme ISO stacks, also. What happens, for example, if you stack 50, 10-second exposures at ISO 12,800?
In other news, the RV survived its brush with winter weather. I put off winterizing it in anticipation of December stargazing. Ice stalagtites dripped from the faucets yesterday morning (consecutive lows of 15° and 22°) and the water pump would not pump for some time, but by mid afternoon, warm air (upper 40's) cured all. Considering my intentions with the camper, I'll need to handle cold weather more gracefully than this, but it's good to know that freezing isn't instant death for the water lines. Also, I found that the supply line to the pump from the main reservoir is easy to access. I'll add some insulation there and think about routing it farther from the outside wall. I might need to find a way to allow cabin air to warm the water storage tank rather than letting outside temperatures rule uncontested. That said, I am also sure that the RV can be used very effectively without the luxury of running water. A decent sleeping bag and a few water carriers are on the shopping list before cold weather, high-altitude, Out West, In The Dark, proper stargazing becomes the order of the day. Brainstorming what needs to be squirreled away to keep such jaunts fun is my current version of counting sheep.