Collected Kludges
2/14/2015. A few things that have worked lately might be worth collecting in one place. In no particular order, except the one in which they come to mind:
1) Repurposed step-down rings.
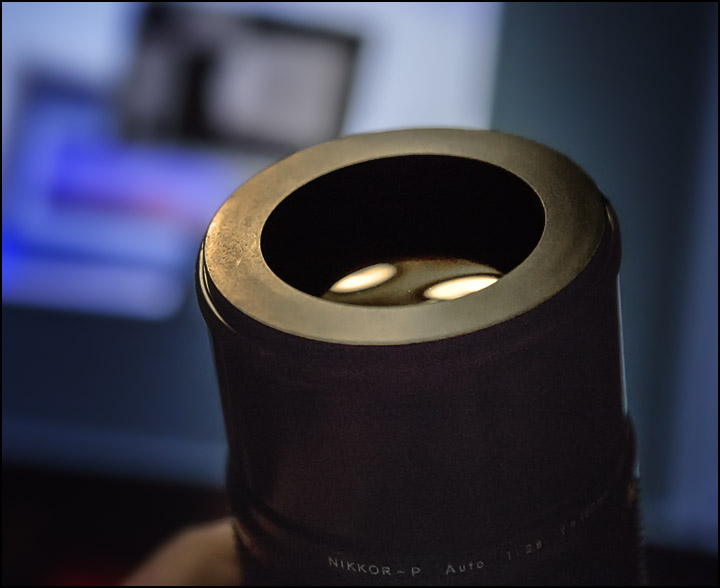
See, under the stars, most lenses work best when closed down a stop or two from wide open. Coma and chromatic aberration and uneven illumination can all be largely defeated by stopping down. But stopping down camera lenses involves an iris diaphragm whose corners and edges produce spikey patterns of eight or more rays around bright stars. Sometimes that's OK, sometimes it's not. "Step-down" rings are made to allow smaller filters to be used on larger lenses, but "step-down" rings work as "stop-down" rings, too. Here, a 72mm to 52mm ring makes my old 180mm F2.8 Nikkor into a sharper 180mm F4 Nikkor. See below for a sample image.
2) Right-angle live-view.

Bet you have one of these lying around somewhere (if you don't, then yours is waiting on eBay or Astromart for $10 or so). Unless you have an articulated LCD on the back of your scope-mounted DSLR, seeing what you're trying to frame or focus on via live-view can involve some serious contortions. So remove the 1.25-inch snout and eyepiece receiver from a cheap diagonal and hold the prism and its case against the camera's LCD view-screen. Sure, a mirror will do the job, too, but this is kinda elegant and maximally covenient.
3) SkyTracker alignment without an app:
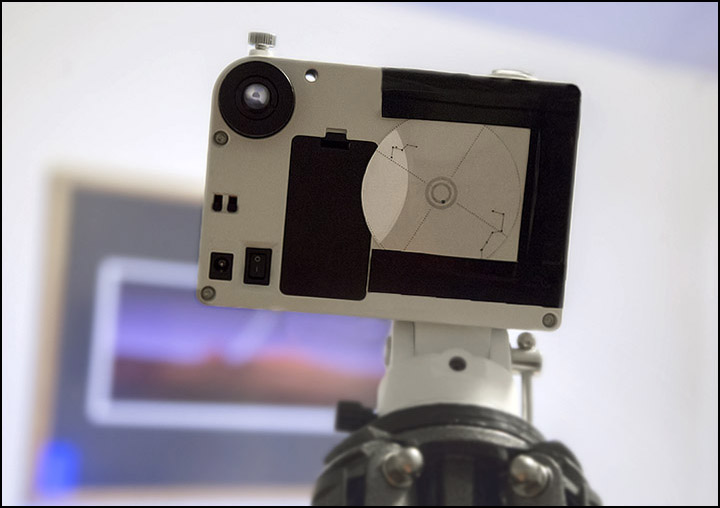
My iPad doesn't have GPS, I don't carry a smart phone, and the apps made to show the proper position of Polaris in the iOptron SkyTracker's polar alignment 'scope don't let me enter my place on Earth manually, so they don't work for me. I printed off a small version of Michael Covington's alignment chart and mounted it under a notched sheet of mylar on the back of the SkyTracker. Turn the chart to match the sky; put Polaris where the chart says it belongs; make pictures.
The proof is in the pixels. Here's a tight crop (about 1/5 of the frame, the lower right corner) showing some dark nebulae near Elnath. It's a stack of fifteen 150 second exposures made with the Canon 6D and 180mm Nikkor stopped to 52mm as shown above, focused with the prism as shown above, aligned on the pole using the guide shown above, flat-fielded with the monitor as described below, and using a Fotodiox Nikon to EOS adapter extolled below:

4) Computer monitor flats.
Fire up PhotoShop. Make a big ole new image and fill it with a uniform white or light grey fill. Fill up your computer monitor with it. Hold your DSLR up close, focused at infinity, and shoot some photos of the screen. Rotate the camera between pictures in case the screen is unevenly illuminated. Average them the way you would any flats. Are these flats perfect? No. They're only as flat as the screen and your rotated camera allows, but they're way better than no flats at all. Add a diffuser over the lens, and they should be as good as you can get.
5) Anti-Gravity Focuser Booster.
So, you hang five pounds of CCD and filterwheel and telecompressor and electronics off your focuser and, alas, it lacks the oomph to lift the package smoothly and repeatably against gravity. (Never mind this tip if you use an A-P, Feathertouch, or Moonlite focuser or you're shooting with a rotatable Newtonian where you can always arrange to move the camera parallel to the ground rather than with and against the local gravity gradient.) What's a fellow to do short of spending half a kilobuck for a better focuser? Apply anti-gravity boosters, of course. A bungee cord by a sexier name, hooked and looped and attached whereever it needs to be in order to replace most of the camera's weight with springy goodness. Don't get carried away, though. If you turn the anti-gravity knob to eleven, you won't be able to move the camera down.
6) An L-bracket for the CCD.
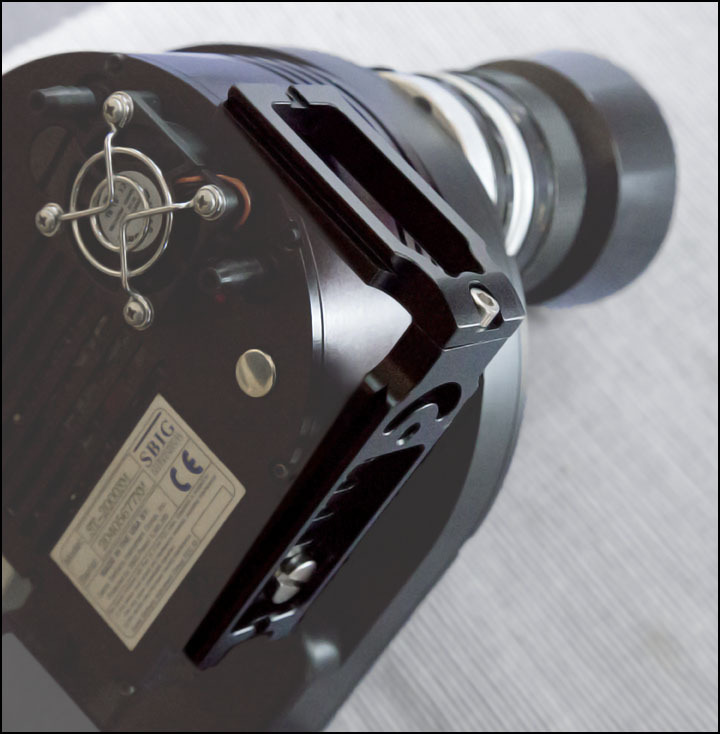
The ST-series of SBIG cameras comes with two 1/4x20 mounting holes. Trouble is the surfaces into which they're tapped are parallel to each other. So when you want to use the CCD for widefield, non-telescopic photos, you can orient the camera in either of two ways 180° apart, which amounts to no choice at all: what's needed is a way to rotate it 90° so you can have your choice of aligning the long side of the field E/W or N/S. So get a Neewer L-bracket ($7.50 or so on eBay or Amazon) and screw it to either attachment point. The short side of the bracket can be taken off and reversed easily if needed. I had to drill a new hole in the bottom of the bracket (one that effectively widened the last slot) in order for the short side to just clear the camera body. All this assumes you've standardized on Arca-style quick release plates. You have, haven't you? It will save wear and tear on the mounting hole (and, in my case at least, allows the CCD to be mounted like any other tripod-mountable lens or camera body in my outfit). Note the 55mm Micro-Nikkor mounted via the home-brewed version of a CLA-10 adapter — still no star-trials of that.
etc.) Things that are or ought to be old news.
And yet these have escaped my notice for too long: Softon filters for more natural widefield star photos; a dedicated carrier for widefield photography because "piggy-backing" is either something you did in kindergarten or someting I don't want to know about at all; and not all Nikon to EOS adapters are created equal (Fotodiox's are demonstrably better than the el cheapo versions I've bought by the handful, even the standard non-"Pro" Fotodioxes rock; thanks to Jerry Lodriguss for the word on these). I'm anxious to see how much difference one of these makes to my 135mm F2.0 Nikkor which makes a fuss about every micron of misalignment at the "film" plane.
Pictures to come. Maybe here, but if not then surely on subsequent pages in the great by and by.
Except where noted, deep-sky photos are made with an SBIG ST2000XM CCD behind a 10-inch Astro-Tech Ritchey-Chretien carried on an Astro-Physics Mach1GTO. The CCD is equipped with Baader wide- and narrow-band filters. The internal guide chip of the CCD most often keeps the OTA pointed in the right direction (I'll let you know when an OAG or guidescope takes its place). Camera control and guiding are handled by Maxim DL 5.12. The stock focuser on the AT10RC has been augmented with Robofocus 3.0.9 using adapters turned on the lathe downstairs. A Canon 6D and a modded 50D find themselves mounted on an Orion 10" F4 Newtonian or carrying widefield glass on an iOptron Skytracker. Beginning in May 2013, PixInsight has taken over more and more of the heavy lifting -- alignment, stacking, gradient removal, noise-reduction, transfer function modification, color calibration, and deconvolution. Photoshop CS4 et seq and the Focus Magic plugin get their licks in, too.
:: top ::