More Quark
7/2/2023. A few smaller items. The extension tube for the Antares compressor was about the right length IFF I mounted the Antares backwards on it. Alas, this did not work expecially well. I woke up with an idea: flip the cemented compressor in its cell, then mount it "backwards" so the optics are oriented correctly and at the proper distance. There you go. Almost there. The image is just a few percent too large, good for two-image mosaics. But image quality and flatfields are still nothing to write home about.
Apparently, there may well be a more fundamental problem preventing satisfactory images using an ordinary reducer: the telecentric output beam from the Quark does not act like the converging beam from other optics. Or something like that. Daystar's own 2-inch compressor offers an off-the-shelf solution; first I will try a larger sensor.
I wonder if I have too much tilt in the camera's T2 mount. Take some out and see if the field illumination improves and if Newton's rings remain absent. [7/4: I removed most of the tilt, saw just a hint of Newton's rings while focusing at high magnification and high contrast, but I see zero suggestion of them in any of the day's clips, and not for lack of looking. I see no other advantage right away, but focus across the field cannot be harmed.]
The USB-C connection to the Quark seems a little delicate. I made a loop in the USB cable and used black tape to secure it to the body of the Quark as a rough bit of strain relief.
Throttling didn't begin today until the sensor reported 52-53C. The temperature peaked near 55C at which time the camera delivered a paltry 8.5-12 fps. Try the radiator when it arrives, but be prepared to be more aggressive.


7/4/2023. The R6's sensor is, as expected, plenty large enough for a full-disk photo behind the TMB92 and Quark, but it is, as promised by many online savants, very dim. And for reasons I do not understand, the image is not sharp, either. I would try again on a clearer day for sharpness, but the awkwardness of the arrangement and the slow shutter speed and the high ISO required make the whole thing unpromising. The Ha enabled 50D might be worth a try, but it seems pretty primitive in this application. So, I can try other compressors already on hand, give up on whole-disk imaging, or buy the dedicated optics. Not yet, Satan.
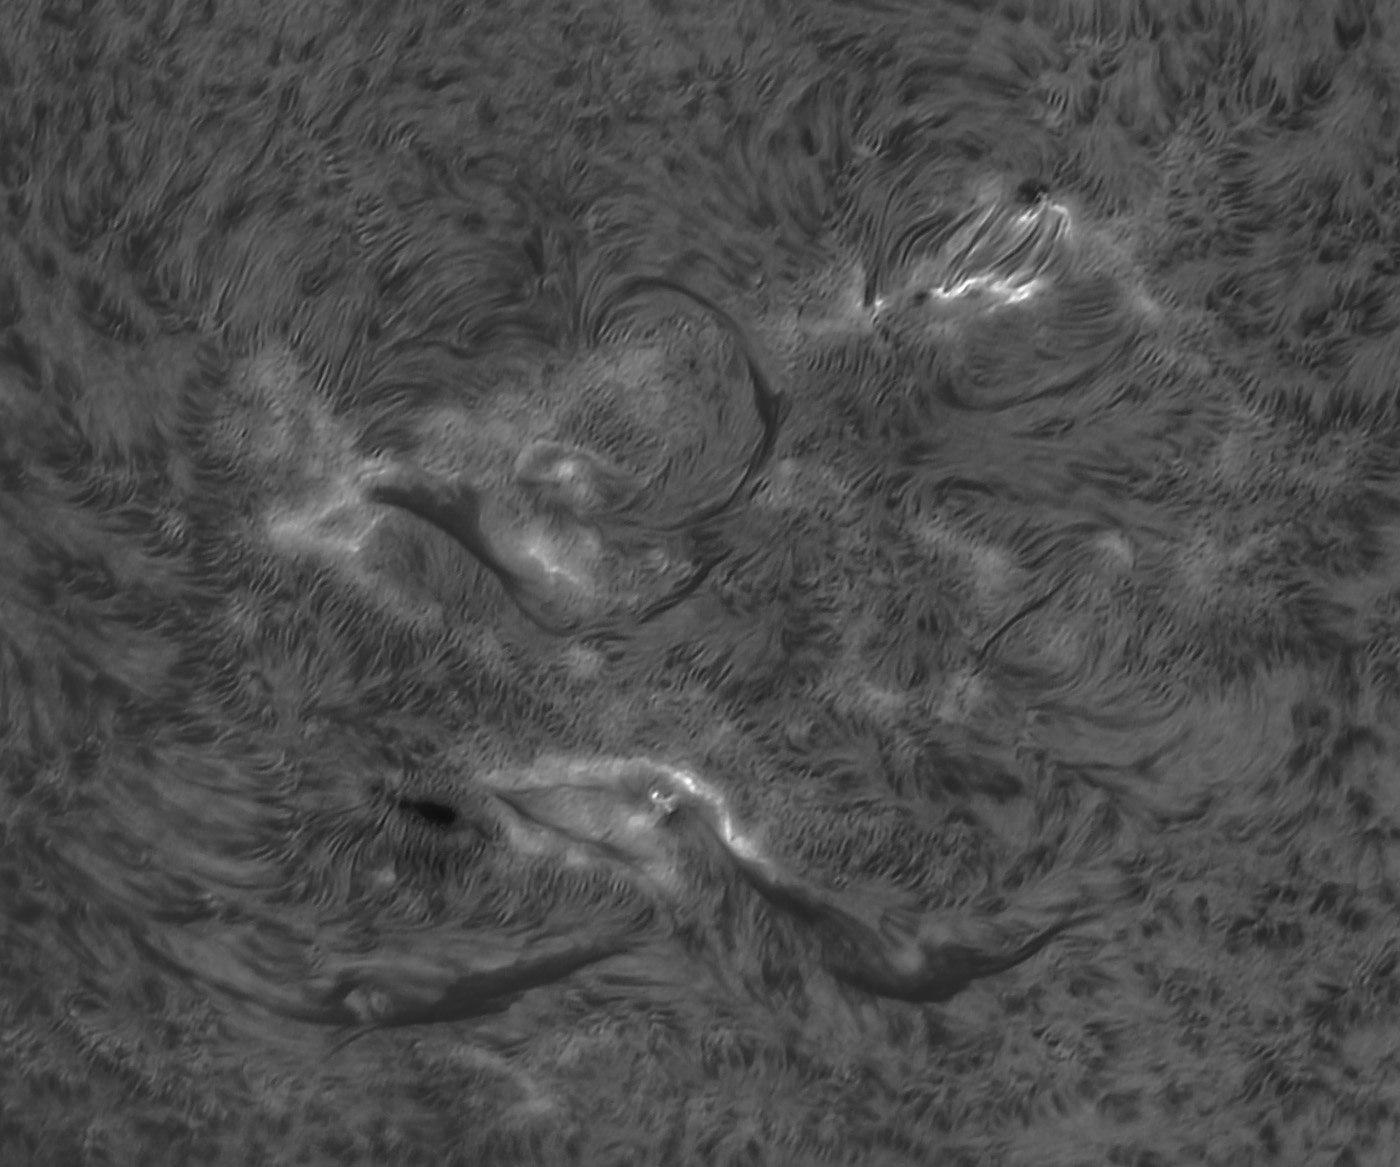
Today's best with the ASI178MM comes from the best 200 frames of a 500 frame clip. I had to use a short clip because of clouds, and a high-contrast gamma setting because of haze.

I've also found a Photoshop workflow that follows the emboss and sharpening stages with a hefty NR pass, then a lightly defocussed layer with a careful blend (experiment with overlay, but other blend modes may work better). The key insight is that these 8-bit clips only have, typically, 90-140 levels to work with, so anything I can do to manufacture more gradations will tend toward a smoother image. Try 12- and 14-bit imaging again after the throttling issues are settled.
7/7/2023. Bit of a breakthrough day, I think. First, the additional 40x40mm heatsink does very little by itself to keep the ASI178MM cool. When the chip reported a temperature of 54C, I put half an ice cube on the top edge of the heatsink and let it melt down through the fins. The ice melted within a minute. The chip temperature immediately cooled to 38C and stayed below 44C for the next half hour. If this becomes a habit, I'll rig a wick of some kind to steer the meltwater off in a preselected, safe direction. Also, find out what the threads on the back of the camera are in case a fan or Peltier cooler makes more sense.
Second: today I paid particular attention to the number of discete levels in each clip. 8-bit clips tended to offer 90-120 levels. Clips at maximum bit depth (the s/w says 16, ZWO says 12 or 14), showed 1800-2000 levels (so I'm thinking I'm getting 12-bit data). It's not so much that the deeper bit depth offers more detail at the low and high ends (though it may well), it's that the midtones are so much more subtle. By and by, this might be reason enough to change to a sensor with still deeper, 14- or 16-bit output. I need to take a very close look at the histogram characteristics of the stacked images. Unless there's a really good reason, I plan to use high-bit SER files routinely. There are two downsides: capture rates are reduced by 50% and they do get to be huge. Today's full chip clips of 2,000 frames, binned 1x1, captured as full-depth SERs occupy 25GB each.


Make those big by right-clicking, etc. Eventually I'll make 'em clickable.
In the interest of systematc experimentation, every clip today was 2,000 frames, and I refined each down to a 16-bit TIF using the best 250 frames. Seeing was forecast to be excellent, and it was, at times. During most captures, I could plainly watch the seeing vary from atrocious to spectacular. That impression was confirmed during the quality assessment stage of AS!3 and is the biggest reason for developing today's images using relatively few frames.
My solar images beginning in June 2023 are made using a Daystar Quark Chromosphere filter on a TMB92SS refractor. A 2" Baader 7nm Ha filter and an A-P dielectric diagonal provide extra IR protection. The camera (~2021 et seq) is a ZWO ASI178MM chosen for its tiny pixels and fast capture rate. It is notorious for a nasty pattern noise which can be avoided with careful exposure or removed using FFT-based processing. I capture
data using FireCapture, stack using AS!3, deconvolve and perform initial histogram adjustments using IMPPG, and polish in Photoshop. The solar kit is mounted on a Skywatcher Star Adventurer "tracking platform."
:: top ::