Son of Even More Eclipse Preparations
11/09/2023. After working with a 95-105mm step-up ring as a solar filter mounting scheme, I realize that I should have shopped up something bigger. The 10mm excess just doesn't give me enough room to work. Amazon lists at least one 95-112mm at a good price. I've ordered some aluminum stock to make the bracketry which will probably not work with the 105mm ring, but might, and would be needed for any solar-film-mounting scheme with these or other rings.

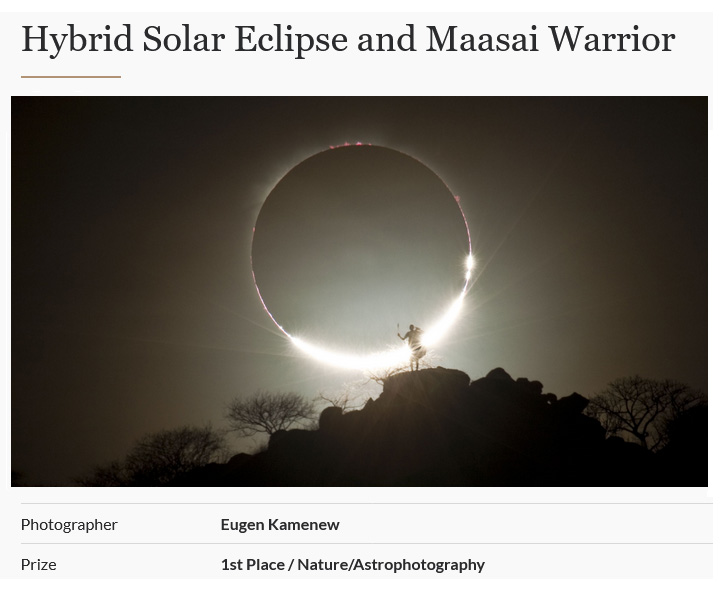
Yeah, sure. Click it
For the record. That's an HDR composite made from 1/15 and 1/125 second exposures of the August 21, 2017, eclipse from the Wind River Basin. TMB92SS, F4.5, Canon 6D, ISO 400, enlarged to preview framing for a 1000mm EFL lens on a Canon R6 next year. Maybe some data from some 1/2 second exposures slipped in, but I doubt that it would matter so close in. 2017's was a classic solar-minimum corona; 2024's will be a solar-maximum corona. It will probably look very different. The strategy in photographing it should be the same.
11/10/2023. Some frustrations with the Canon R6 options: you can't set auto-bracketting with full electronic shutter. It's going to get tricky, which means there's room to screw up. The remote will need to be used in both unprogrammed mode for contacts and in programmed mode during totality. Make a crib sheet, try it out, make sure buffers won't fill at the wrong instant. You're going to need an R6-compatible intervalometer. And keep an eye out for a great deal on the RF15-30mm lens. Just sayin'.
Ha -- it seems I have everything here somewhere. I found an Energizer intervalometer with a variety of cables, including the E3 that the R6 needs. Here's what I've got working as a plausibility check:
Mid-totality -- PreSet C2: 7-step bracketing, 0-+, mechanical shutter, initial speed 1/200, ISO 400. [see below, now a 3-step bracket at ISO 800; no now 5-steps at 640] Mid-totality is Preset C2 so that one notch either way calls up Preset C1 or Preset C3 loaded with identical settings for the third contact beads and ring.
Buffer notes:
With a 128GB Lexar Professional, 1667x, 250MB/s SD card, using a fully charged OEM battery and full electronic shutter in RAW mode, the R6 took 138 frames in 8 sec to fill its buffer (17 fps) and then required 16s to clear it. With an aftermarket battery: 108 frames in 7 seconds (15 fps) and about 22s to clear it. Do this a few more times to see what matters (black screen vs real images, etc., which does matter!). Frame rates, while they last, are always in the 16-20 fps range and clearing time is about 14-15s in pretty much all cases. Count on 100 frames in 5 seconds, a few more if I'm lucky. If I mis-time second or third contact, and keep the button down, rates become unpredictable. The rate drops to 3-4 fps for 1-2 seconds, and then gaps of a few seconds appear.
If I use CRAW for the contacts rather than full RAW, then a burst can last on the order of 12-13 seconds and include 250-270 frames. In electronic shutter mode, I'm only getting 12-bits of dynamic range (contra 14-bits in other modes) anyway. I don't know that there is any bit-depth difference between RAW and CRAW; I would have thought there was, but maybe not. The speed differences may simply come to down to moving bits and the number thereof. Anyway, with the electronic shutter, the contact imagery will be 12-bits at best no matter CRAW or RAW setting. So there is no downside to using CRAW for the contacts. And that's how presets C1 and C3 are now configured. C2, for mid totality, remains full RAW; the buffer will keep up with continuous shooting given the spread of longer exposures within the repeating sequence.
Speed setting doesn't matter to the electronic shutter -- it's always foot-to-the-floor -- but it does matter when using the intervalometer for sequenced exposures during totality. Set it to max in order to reduce delays between exposures.
What it comes down to is this: Replace the SD cards for reliability not for fps. These 1667x Lexars will do fine. As for space needs, at most 150 RAW frames (or 300 CRAWs) at each contact plus at most 600 RAW frames during totality (twice my actual estimate) comes to well under 32GB, so space is not an issue. See if there is a downside to writing to two SD cards (JPEGs to one just for giggles?). The fastest cards may clear in as little as 6-7 seconds, which is good for an additional 15s of totality. That's not enough reason for me. I can switch to C2 and start the mid-totality series before the buffer clears from the second contact burst. The buffer will clear soon enough during totality.
Buy some fresh batteries. Both the 6D and the R6 will be along, and it would be good to have two reliable batteries for each.
In 2017, I used the 6D at ISO 400 behind the TMB92 compressed to F4.5. See one result above. My longest exposures were 1/2 second. They seem excessive, but they do reveal streamers out to several solar radii. The 1/15 second exposures do so, too, with a little boost while opening the RAW files. 1/15s F4.5 is little over 1 second at F16 (F6.3 is 1 stop, minus 2 stops for the extender, minus 1/2 stop for throughput; so 3.5 stops). The field will be smaller. So that ought to be plenty of light. 1/1000 was short enough except for beads, and even that might yield to careful histogram work (1/4000 looked pretty good for beads). But beads are the EOS-M's thing; and I'm thinking about the R6 right here. 3.5 stops suggests exposures need to be 2^3.5 times = 11 times longer. Call it 10 to keep from going too crazy. And consider going to ISO 640 or 800 during totality. Noise will not be an issue, especially since there'll be no shortage of images to stack (45 - 100 or more at each exposure).
The 2017 sequence: 1/125, 1/4000, 1/1000, 1/15, 1/2 ISO 400 at F4.5
Using 3.5 stop slower glass: 1/11, 1/353, 1/88, 0.8s, 5.6s
Throwing out the shortest and longest, we're left with 1/10, 1/100, 1s.
Some possible sequences then...
1/15, 1/60, 1/4 (base, -2, +2) or
1/10, 1/50, 1/2 (base, -2.5, +2.5) [Intervalometer: D0, L1, I1]
1/15, 1/125, 1/2 (base, -3, +3) or if you prefer a 5 step bracket,
1/30, 1/500, 1/125, 1/8, 1/2 (base, -4, -2, +2, +4). Is the 1/500 a throw-away?
1/25, 1/250, 1/80, 1/8, 0.4
1/25, 1/400, 1/100, 1/6, 0.6 [Intervalometer: D0, L1, I2; use ISO 400.]
Bingo! Two winners. The 3-step 2.5-stop bracketting and a 1/2 second maximum exposure produces near constant shooting (28 sequences per minute). The 5-step bracket also produces 28-30 cycles (140-150 frames) per minute. Use that one.
As of 11/14/2023, the C2 preset sets the 5-step bracket shown directly above using first-curtain electronic shutter.
For beads in the R6, 1/4000 looked just about perfect in 2017, so use 11/4000 = about 1/320 this time? Examine 2017's take and maybe cheat it down some (1/500, 1/640, 1/800?). See what corrections are best / how much exposure leeway the RAW files have and take it from there. Jerry Lodriguss suggests much shorter exposures for beads and diamond ring (link below). Use C-RAW (see somewhere else on this pate) to be sure you capture plenty of data at second and third contacts -- the burst can be much longer than with RAW format and there is no penalty as far as big-depth is concerned.
One data point for contact phenomenae with slow glass comes from an international photo competition (https://www.photoawards.com/winner/zoom.php?eid=8-189440-20):
 That exposure was F16, 1/800s, ISO 400, with a Canon 5D3. So, yeah, high in a clear sky, use 1/1000 or even a little less.
Now, about beads in the EOS-M. They looked good in the 6D at 1/4000 and 1/1000 and ISO 400. I'm only giving away 2.5 stops with the 500mm + 1.4x converter, so multiply exposures by 6x rather than 11x. I was using dual ISO of something like 80/320. Go for 200/800 this time which makes the exposure factor more like 2x. The extra bit depth will easily make up that much. I'm thinking 1/1000 for the EOS-M's shutter. Maybe 1/640? Maybe 1/1250? Maybe favor shorter exposures because you've got the higher side of the dual ISO to make up for "shadow details," aka missing low. I think the high-ISO side of things will guarantee against leaving the frame black during totality. Try some more cloudy moon shots to see how the left side of the histogram behaves. Compare the standard "expose left" advice for high bit-depth video. Keep thinking. Right now, I kinda like 1/1250 and count on some post-processing to make the most of the data.
I'll revisit all this a hundred times before April, so don't sweat it too much right now. And don't lose sight of Jerry Lodriguss's tables, either:
www.astropix.com/html/astrophotography/eclipse.html
with their shorter exposure recommendations.
11/13/2023. You know what? I spent way too long today and used up some aluminum stock trying to make those 95-102mm step-up rings work as filter holders. At long last it occured to me that I'd spent a lot of time trying to undo one wrong choice. So hell, just buy the proper rings and get on with it. They'll be here by and by. Until then, enough about all this!
11/20/2023. The filter holders have come together nicely, by which I mean that one of them has. [Now two.] It took way too much time and effort to come up with these holders and their mounting scheme. They do seem as if they're going to work better than expected, though. Lordy. Next: load 'em up with Baader solar film, be alert for unexpected issues, and determine partial exposures. [One is done. Clouds till day after tomorrow. Must find a better way to cut solar film than gnawing on it with kitchen shears. The key is to make a sandwich using paper, the film, and its backing and cut all three together.) ND 5.0, 0.00001 flux, 16.6 stops. Seeing to focus is not quite enough; I must also be able to see the position of the Sun prior to removing the filters at totality. Practice resetting exposure about one minute prior.]
I was poking around on eBay looking for other stuff entirely when I came across Nikon's many lines of compact binoculars. My 14x70 Fujinons are way too big to carry to San Antonio; the 7x50 Bushnells are smaller, but they would still take a ton of room in any carry-on or FedEx. Compact Nikons should be just the ticket, and they are all over eBay at good prices. I read reviews, compared models, squinted, and found rubber-armored Prostaff ATB 10x25's for $50. C'mon... The apparent field of view seems a little small (47.5 degrees) but they're said to be really sharp edge to edge with excellent contrast, all the right coatings, and they're nitrogen filled, ruggedized, waterproof, etc. Their small objectives would gather plenty of light for this purpose, and the almost 5-degree FOV is actually very similar to that of the big Fujis. They may be excellent for other things, too, but they seem righteous for a solar eclipse.
11/24-26/2023. The eclipse cameras and lenses are on the SWSA on the carbon fiber "Alaska" tripod. The entire outfit seems more solid than I expected, but there is some vibration inherent in the rig. It's all owing to lots of mass held far outboard of the fulcrum, and there may not be anything to be done about that. [Ha! Lots. Most of it was easy! See below.] I'll try spreading the legs wider and setting the whole shebang lower, but there may just be more "shake" in this outfit than ideal. Two interchangeable filter holders are ready and loaded with Baader film. Next, I'll try it out on a clear Sun to nail down baseline partial eclipse exposures and get some experience with the kit.
11/27/2023. The Nikon 10x25 Prostaff ATBs arrived today wrapped in a single very thin layer of bubble wrap and dropped into a manilla envelope. That's how small and tough they are. A little cleanup and messing about to get the eyecups, interocular distance, and the diopter correction set and they're terrific, especially for just $50 for the glasses plus $19 for shipping (which was exorbitant considering the service level and packing job). But all up, in the end, it was a killer deal. Zero visible chromatic aberration, distortion-free images to the edges (not hard with such a narrow F.O.V. but still...), wide diopter corrections, smooth mechanicals, pristine glass, and they're really, really tiny. After dark, I took them out to see M31, the Double Cluster, and a few miscellaneous starfields through deep twilight and the light of a rising full Moon. They're emphatically not light funnels, but they did an at least decent job on all those targets. I admired a couple of nearly-full Moonrises while trying this and that to hold them still, and they did pluck a flight of Starlinks out of twilight and revealed an unexpected blue coloration confirmed by more experienced satellite spotters. Good show.
11/30/2023. Two things about the outboard mass of the eclipse rig: a good bit of the actual mass under the EOS-M was owing to the Arca/V/D adapters and some spacers for the TMB92SS on this mount. I can jettison all that for the eclipse, save the weight, and bring everything at least a couple of inches inboard. On the R6 side, if I rotate the focusing apparatus 90 degrees, I can then mount the camera "upright" rather than out to the side of the ball head. [I know this really needs before and after pix.] Doing all this brings a lot of mass well inward. That and tightening several screws made a huge improvement in shake and resonance. [Note to self: use some light-dury Lock-Tite to resist loosening caused by air travel / shipping vibration. And carry Allen wrenches.]
Everything needs to be tested end to end under angles similar to totality in Texas. I have a few days of rain to catch my breath.
12/03/2023. I've replaced the Sirui ball head under the R6 with the original alt-az mount from the SWSA. With the proper shimming (4-6 strips of black electrical tape for the moment) to get the 3/8-inch bolt to tighten down near the right orientation and a Vixen to Arca adapter, it seems to do a great job holding the R6, its 1000mm lens, and the associated fine-focus hardware. The advantage over the ball head is that in this configuration, the SWSA hardware's alt-az controls provide slow-motions in R.A. and Dec. There should be no problem getting the Sun properly framed. If I want to forego the shimming and bring mass even farther inboard, I could remove the fixed 3/8x16 mouinting bolt and use another bolt and a fender washer closer to the center of mass. I aimed the SWSA's axis toward a 29-degree polestar and verified that the twin mirror lenses reach the required altitude easily, with plenty of adjustment to spare.
12/10/2023. A second, shorter, cheaper selfie stick (the first will be under the Insta360 on a light tripod) will work to both stabilize the little binoculars and hold the 6D with a fast wide-angle lens -- think very light, very light-duty monopod. There are some shenanigans to resolve about 1/4 and 3/8 threads under a small ballhead but some quick experiments with a bushing confirm that all will work. Proper thread adapters will be along next week.
There will be a short interuption in eclipse preparations while I reconfigure some toys to try to catch some Geminids over the next few nights.
:: top ::