Come to Order!
7/27/2023. I've found a much-improved workflow for narrow-band solar. Do the stacking thing as usual, but then open the stacked image in PS first. Dehaze, brighten shadows, constrain highlights, save, and then open in IMPPG. Deconvolve, USM, histogram, save. Re-open in PS to denoise, tweak again with raw filter parms, etc.
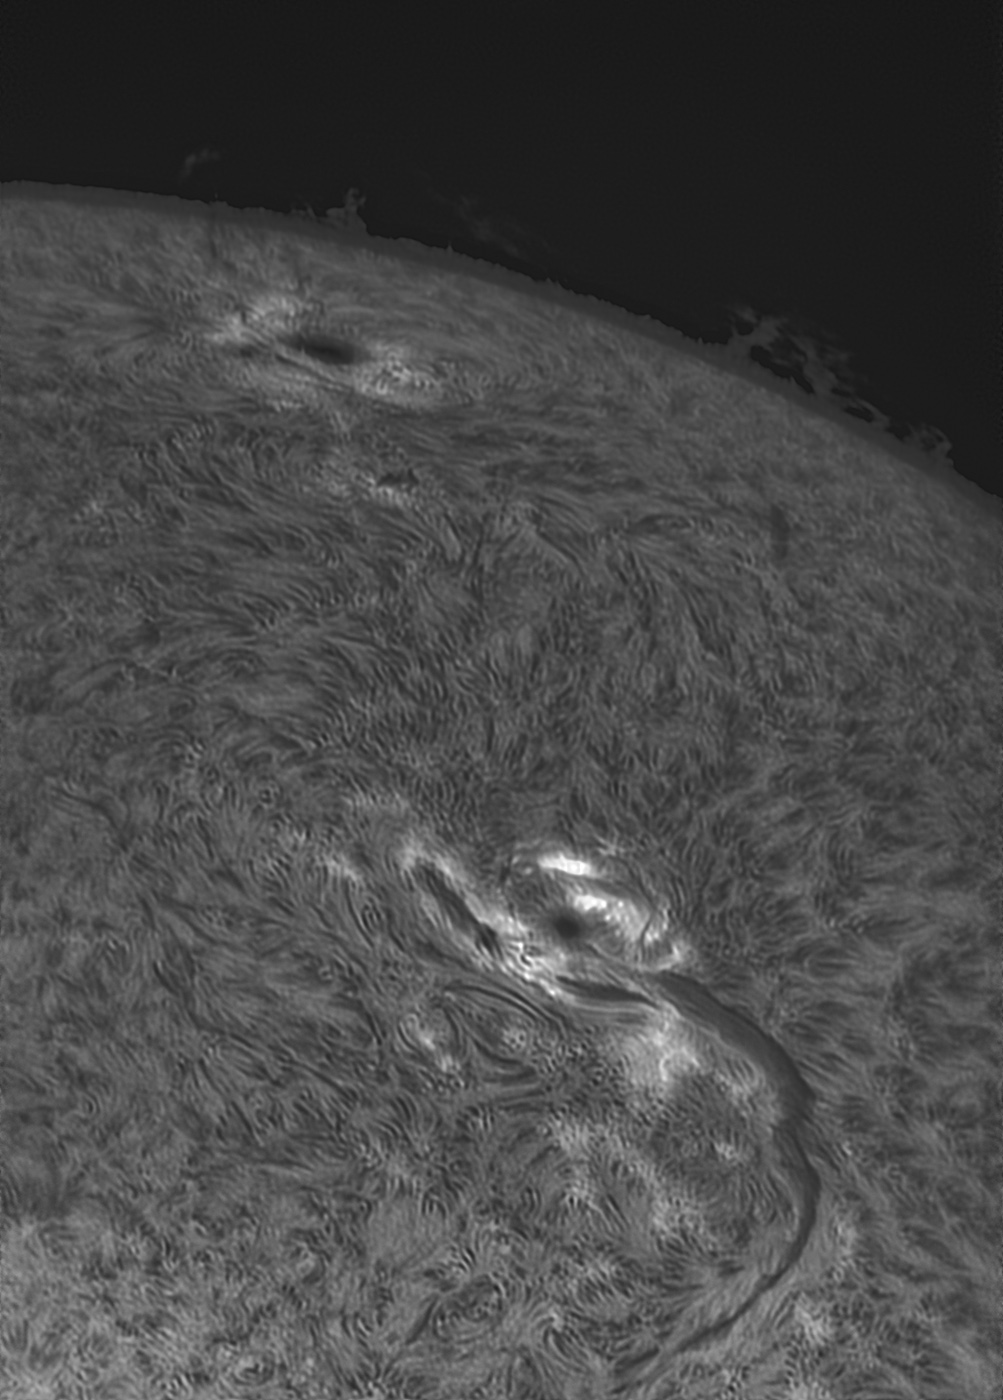
That first preparatory session in PS saves a TON of work trying to recover faint stuff on the limb and retains more detail there than when processing the stack in IMPPG first. It also makes deconvolving surface detail much easier:


Not my sharpest images, but definitely not a fluke. Now I have to reprocess approximately 1.2 gazillion solar stacks. But not tonight. OK, tonight, but just this one. Then, I must. get. some. sleep! Here's the "au naturale" shot that took so much careful histogram work to get right before (see previous Slowblog page). Except better. And in 15 minutes, tops.

Spicules still tend to get lost in a muddy amorphous layer. I need to find the point in the workflow where that happens and fix it.
07/28/2023. The troublespot is probably in the early, too-aggressive use of Dehaze and Shadow sliders when opening the output from Autostakkart! in Photoshop. Take it easy with those. For today's images, I was careful to underdo rather than to overdo. Must remember that I'm not trying to raise features to their final values in that first step, just bring them up to the point that IMPPG can "get a grip on them" and handle the information effectively. I also tried using IMPPG to do this in two stages rather than "presoaking" in Photoshop. In IMPPG I tried to adjust histogram, save, and then reopen to deconvolve, but PS worked better (today).
The sampples below are the best 250 frames of 1,000-frame clips. Seeing was very good; what turbulence I saw was small and slow. I took one long clip of 3,000 frames then used the best 1000, 250, and 90 frames from it: 250 was the sweet spot between noise and sloppy data. The third image below is a two-frame mosaic to get more solar real estate.


Compare the following treatment to the presentation of the same data at the bottom of the previous "slowblog" page. This is not a subtle improvement! Much sharper and much better dynamic range -- who could ask for more? (Well, I could, but maybe not today.)

08/05/2023. This is still working really well. Rather than use up all your bandwidth on nice but not exactly breathtaking images, here are links to today's take without embedding the images here. Most are the best 250 of 1,000; "Image 1" is the best 100 of 1,000; and "Image 4" is a mosaic of four clips to take in a wider field of view. Click on 'em if you're hungry for mo'sunshine.
Image 1
Image 2
Image 3
Image 4
My solar images beginning in June 2023 are made using a Daystar Quark Chromosphere filter on a TMB92SS refractor. A 2" Baader 7nm Ha filter and an A-P dielectric diagonal provide extra IR protection. The camera (~2021 et seq) is a ZWO ASI178MM chosen for its tiny pixels and fast capture rate. It is notorious for a nasty pattern noise which can be avoided with careful exposure or removed using FFT-based processing. I capture
data using FireCapture, stack using AS!3, deconvolve and perform initial histogram adjustments using IMPPG, and polish in Photoshop. The solar kit is mounted on a Skywatcher Star Adventurer "tracking platform."
:: top ::