A Late Start This Year
6/01/2025. Goodness, look at the calendar. It's been 8 1/2 months since my last confession.
There's a big sunspot group mid-Sun and some clear(ish) weather on the way. I'd like to say I decided to get all my seasonal start-up mistakes out of the way today after being distracted with deepsky imaging and preparation, etc. That would suggest that today's firedrill was a success. Alas, I wanted images, and I didn't get much to brag about. Batteries and clouds were not my friends. The big lithium battery was depleted (probably the boost circuitry and a long sit) as were all the computer batteries. I used a powerbank to warm the H-a filter, AA's to drive the SWSA, and hoped the tide-me-over supplemental cell in the computer would suffice. It might have, except clouds arrived just as I began taking data. I got one somewhat hasty 2,000 frame clip in before pausing to take flats, refine focus, and tweak polar alignment, but I never got more than a fraction as many frames in any clip afterward. I tossed all but one, a 180-frame snapshot (see below). Then the computer quit. OK, tomorrow then. In the meantime, I'll charge every battery in sight. It's better to have this happen in the sideyard, under a comfortable late spring Sun, rather than suffering a similar fiasco with a heavier kit in the community lot an hour past midnight (that's for tomorrow night and the co-mounted supertelephotos which will probably produce their own drama).
You can make it big, but don't expect much.
No, you can't. It's too damn rough. Maybe tomorrow.
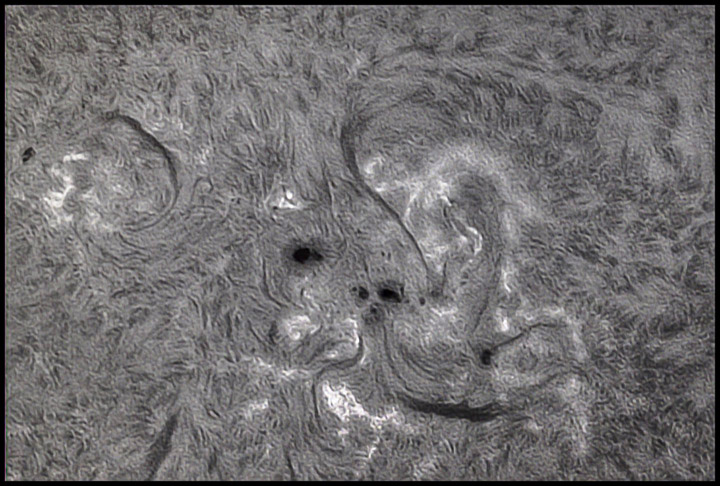
Best 50 of 180 frames between incoming clouds.
TMB92, ASI178MM, Quark Chromosphere
Nevermind all the techspecs and all the processing steps. I'm just trying to remember how I do this. I wanted one decent shot of the sunspot group that might produce auroras tonight. Stay tuned.
6/02/2025. No light show last night, much improved technique today under hazy (smoky) skies with poor to middling seeing. I took a lot of data and developed two workflows. Just now I prefer #2. Samples soon.
- Stack with AutoStakkart. ImPPG. BlurXterminator in PixInsight. Photoshop to finish.
- Stack with AutoStakkart. ImPPG. Photoshop denoise, High Pass layer, jack contrast and sharpen as needed, blend with soft or hard or vivid light as needed.
Today's narrowly averted disaster: I had AA cells in the SWSA and walked away with the mount still tracking after covering it with a dust- pollen- and rain-shielding bag. Amy heard a noise. I looked outside, saw nothing amiss but went to check. The bag had tightened around the mount and scope with enough force to shove the scope out of its V-clamp. The bag caught it; the sharp-cornered sun-finder snagged and saved the day. I removed one of the batteries as a reminder to use the lithium cell and a power cord so that everything stops when I take down for the day.
6/03/2025. Dept of Wheel Reinvention: omitting the focal compressor entirely produces too much magnification for the aperture (except maybe under excellent seeing); the compressor mounted inside the snout is usually OK, and putting the compressor on the end of the snout yields too much compression (this makes the field illumination extremely uneven). The Goldilocks arrangement is sometimes the addition of the 20mm T2 extension behind the snout with the internally mounted compressor installed. That allows much shorter exposures than without the extension and still permits decent scale, but the clips are not critically dependent on particularly good seeing. This is the arrangement I've used in the past for 12-frame whole-disk images.
Let's save the bandwidth until I have a really good example for you. Seeing was terrible today, and the sky was hazy which made it a good day for experiments but not worth much for imagery.
Experimental Workflow 2B: ImPPG for tone and deconvolution. PS for noise reduction. New layer. Multiple passes of Sharpen Edges, then High Pass. Sharpen that layer, stretch with curves. Blend with Soft, Hard, or Vivid light. Proceed as needed. And then use NR to approximate those "velvet tones" I am forever chasing and forever missing. In the interests of humility, here's my best effort with today's best data:
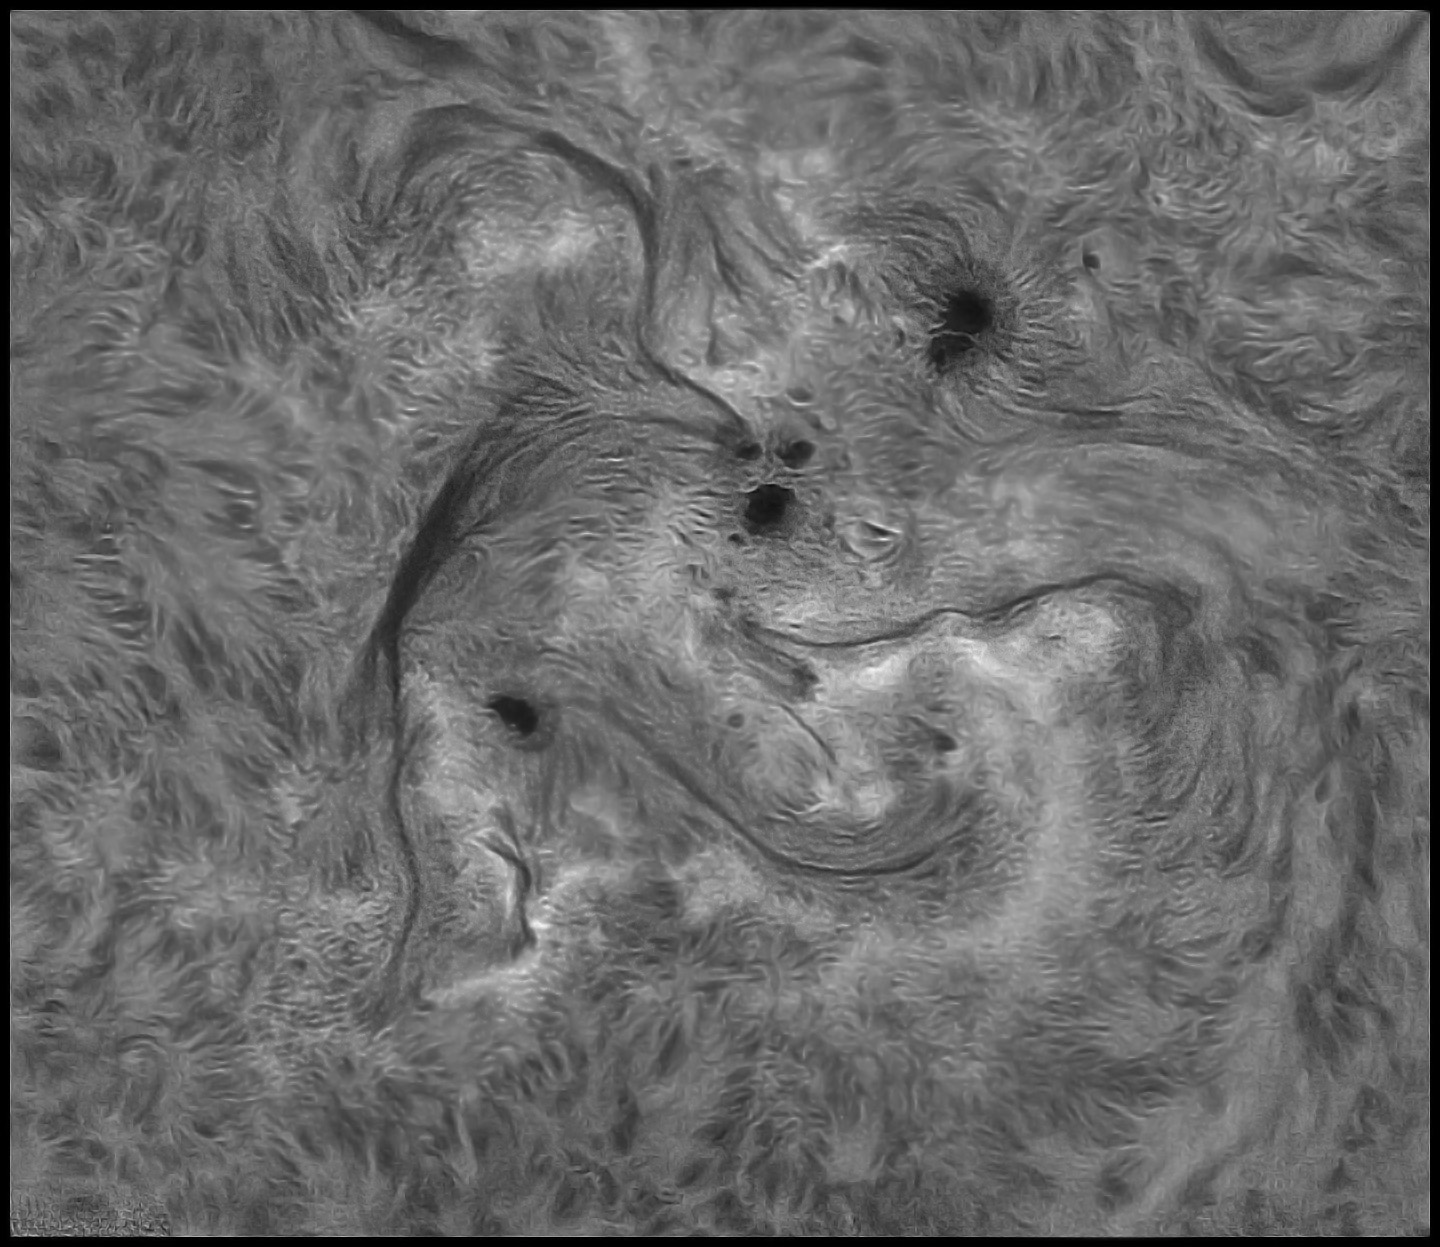
Best 400 of 2,000
Go on. Make it big. I can take it.
Probably overdid it with softening the rough edges, but
y'know, I've only been at it for ten years, and it's a start.
Look down below for alternate processing of a similar stack from the same session.
6/09/2025. I caught this small active area as early today as possible. I still had to contend with some clouds, but the seeing was at least briefly, occasionally excellent. Lower magnification worked well (faster exposures, less apparent degradation from seeing) using the "Goldilocks" arrangement described above -- the internal compressor spaced out with a 20mm T2 extension. I took data through both a relatively large (below) and a smaller ROI since I needed a decent frame rate in order to collect a few thousand frames between thin clouds. I exposed all of today's clips at low (high contrast) gamma, which made processing easier but probably cost some tones. Gamma Zero would have allowed better tonality and faster exposures, too, but I didn't want to make another flat after achieving a pretty solid focus. It took a while to dial in polar alignment, too. Anyway, it worked out:
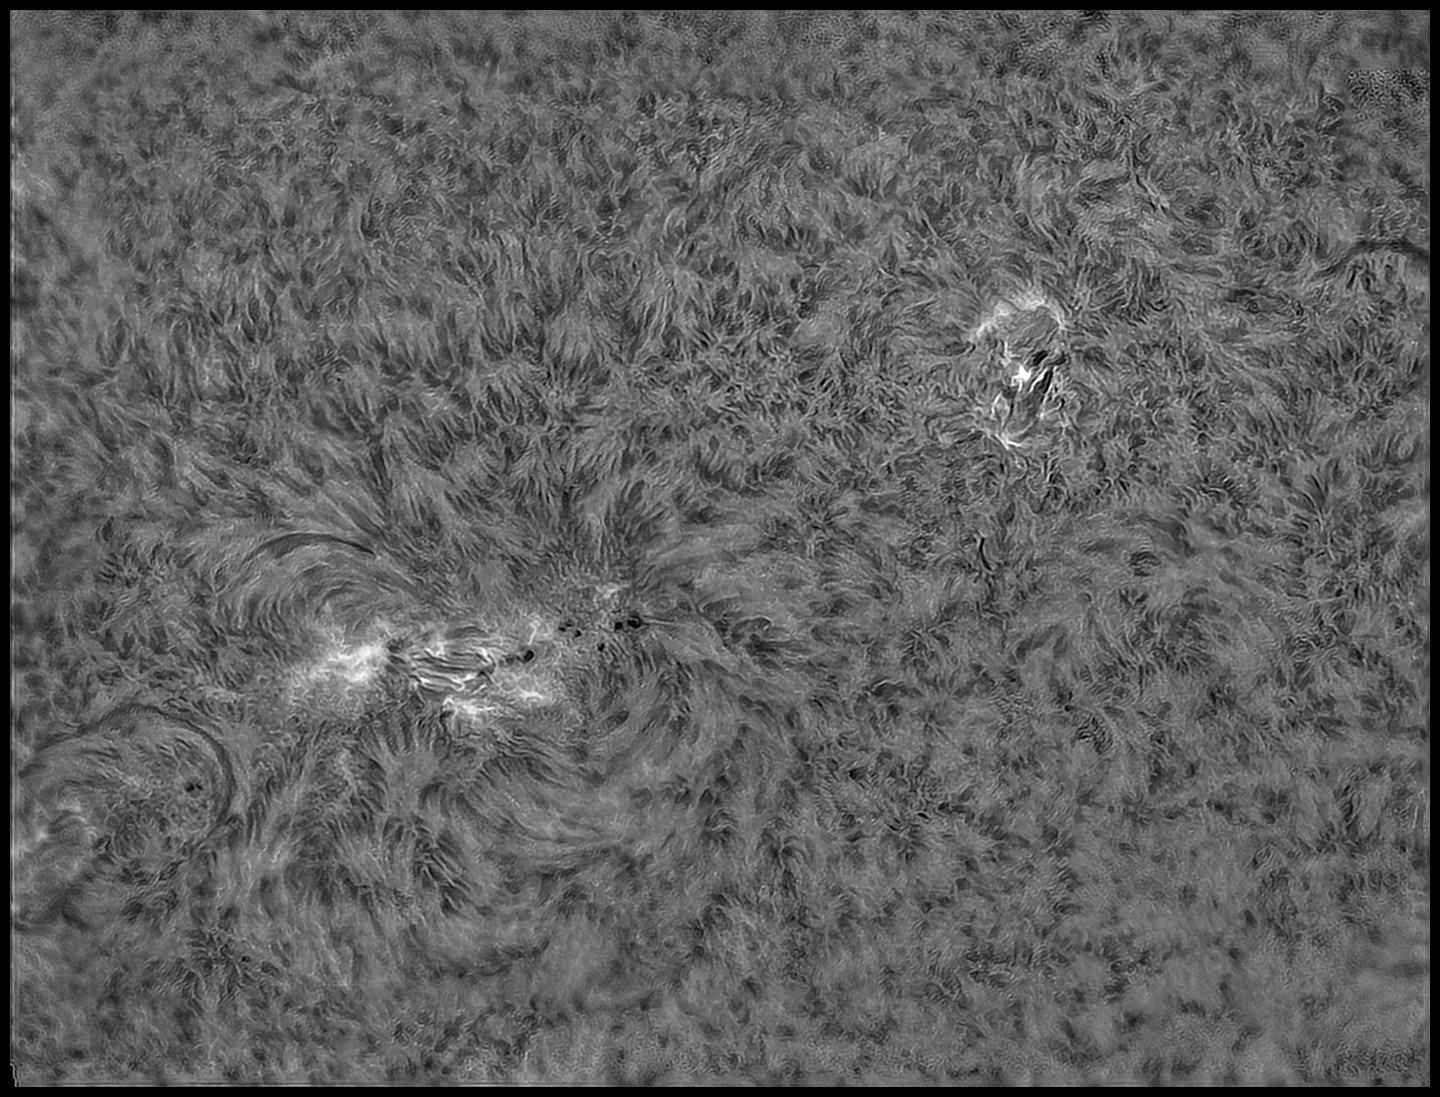
Goldilocks arrangement and a large ROI. Best 400 of 2,500. It's clickable.
This is an example of yet another workflow: Autostakkart to get from 16-bit video to Tif. Then PixInsight to crop dead borders and run Blurx (auto PSF). Then Photoshop/Raw to control and contain shadows and highlights and apply very minor noise reduction (how much actual noise comes through from 400 subframes?). Then ImPPG for Lucy-Richardson devonvolution. Back to Photoshop for "high pass" layering (sharpen and stretch the render, apply soft light blending; or maybe I did the emboss trick this time -- try both, they're similar). Finally, sharpen edges, more noise reduction and unsharp masking; resample for display and mess with sharpening options. Nothing to it, right?
6/12/2025. An unexpectedly clear and steady sky today gave me a chance to redeem my accidental deletion of most of yesterday's data. In Windows Explorer, the list of full-disk data (which I meant to delete after assembling a 12-panel view) resembled the list of high-rez experiments, and, well, I deleted the wrong files. The mosaic came out well, though, and I used a couple of its panels for decent closer views.
The key news from today's efforts is that the best image came from 200 frames chosen from a tall stack (3500 frames) with high gain (380), shortish exposures (2.5ms), with gamma disabled. The second best was made with 200 frames from a shorter stack (1000 frames), similarly high gain, longer exposures (3.3ms), with an aggressive gamma specification (12). So y'know, just go figure.
A few tips: Stacking and multiplying moderately deconvolved images seems to work as an early step to bring up fine gradations. When it works, this works very well without making the image harsh. It reduces the need for desperate sharpening efforts later on. Keep playing with that. Also, weak noise reduction early on helps avoid stronger NR later. [Added later that same day: do this! Stack and multiply, adjusting the curves of each layer and the opacity of the top to produce an overall sharpened effect before proceeding on with more or less standard steps --omitting the most aggressive ones, like high pass filtration). Thus:

Best 200 of 4,000
A lot of work done via stacking in multiply mode.
I also blended in slightly defocussed highlights (Gaussian 2.5 pixels, blend light, mess with curves.)
Click as you will. Still getting there, but this is notably better than the earlier example above.
:: top ::