Fine-tuning a Rokinon / Samyang lens
2020/12/15. It started with the Geminids. Peak night was cloudy, but the next night, December 14-15, was glorious. I took the 6D with the SkyTracker and 24mm F1.4 Rokinon up above the woods to see if I could catch any stragglers. (No. I saw one very nice meteor headed away from where the camera was aimed. That was all.)
I noticed, yet again, that the 24mm did not produce well-focused stars across the frame. When aimed to the south, its west third is hopeless, and all but the east third is pretty crappy when you come right down to it. I know there are excellent examples of this lens out there. Mine isn't one of them. I figured either something was mis-centered in the optics (about which I could no nothing), or the lens mount is not square to the sensor (about which I might). I stuck a piece of black electrical tape between the lens and the camera (pick a side, any side), and the results were spectacularly improved. That fix was clearly unstable and temporary, so I looked for a better, more permanent fix.
Here's a web page all about shimming wide angle lenses for astrophotography. He's even wordier than I am, but the advice is excellent. Read this to see how it should be done. Skip ahead to see how I did it.
https://cacaoeditions.com/your-cameras-and-lenses-are-crooked/#adjusting-your-lenses
I don't want to wait (or pay) for actual, calibrated, official, micron-specified Misumi shims. I have black "electrical" tape, and I have aluminum foil. I can combine them or I can use multiple layers of either or both.
The lens mount is attached to the lens by just three mounting screws 120 degrees apart (not exactly 120 degrees, but close; the screws and sockets only align in one orientation), so there's not a lot of subtlety to be casually exploited. I decided to just shim the screw closest to the spot where I had added the temporary black tape.
Don't be shocked to see that the metal mount is attached to a plastic chassis; the effect is pretty shoddy, but it gets things done at a great price. It's a manual lens so there aren't a lot of linkages and springs and levers and pivots to deal with. That said, there are some. See cautionary tale below.
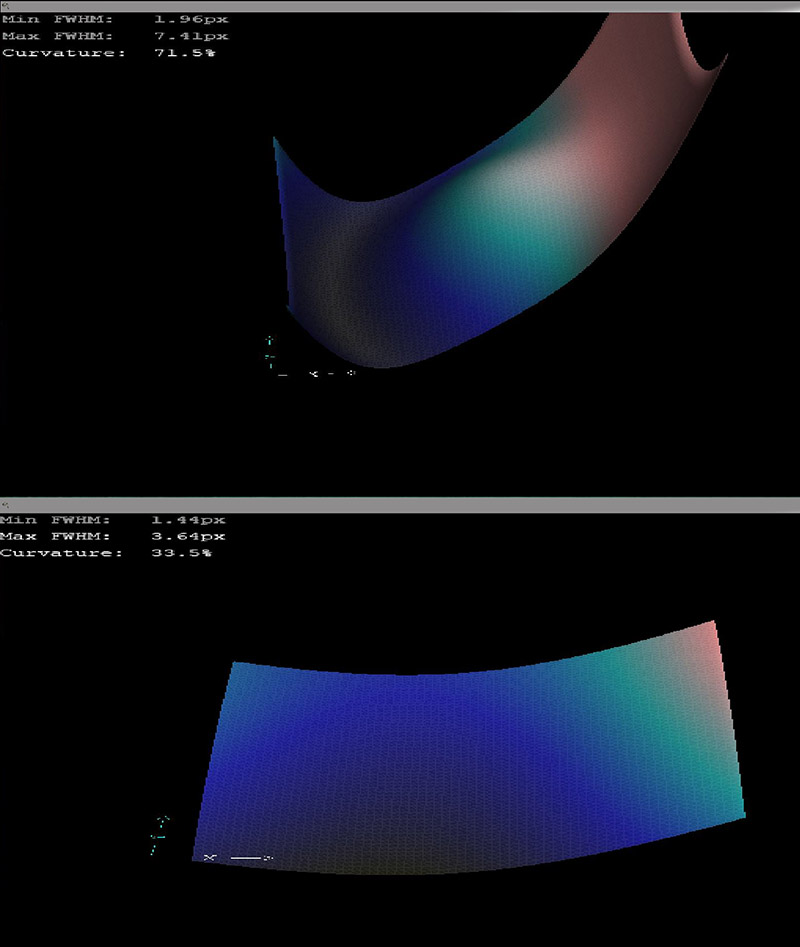
Here's a CCD Inspector plot of the lens before and after I spent a few hours with trial and error shims. A perfect plot would be dark blue, flat, and level. Ha! In the end, I put a huge amount of lift under one screw: 10-12 layers of tape. Not so much "87.4 microns" as "oh, maybe 3/64s of an inch, maybe a little less." It's at least a good start:

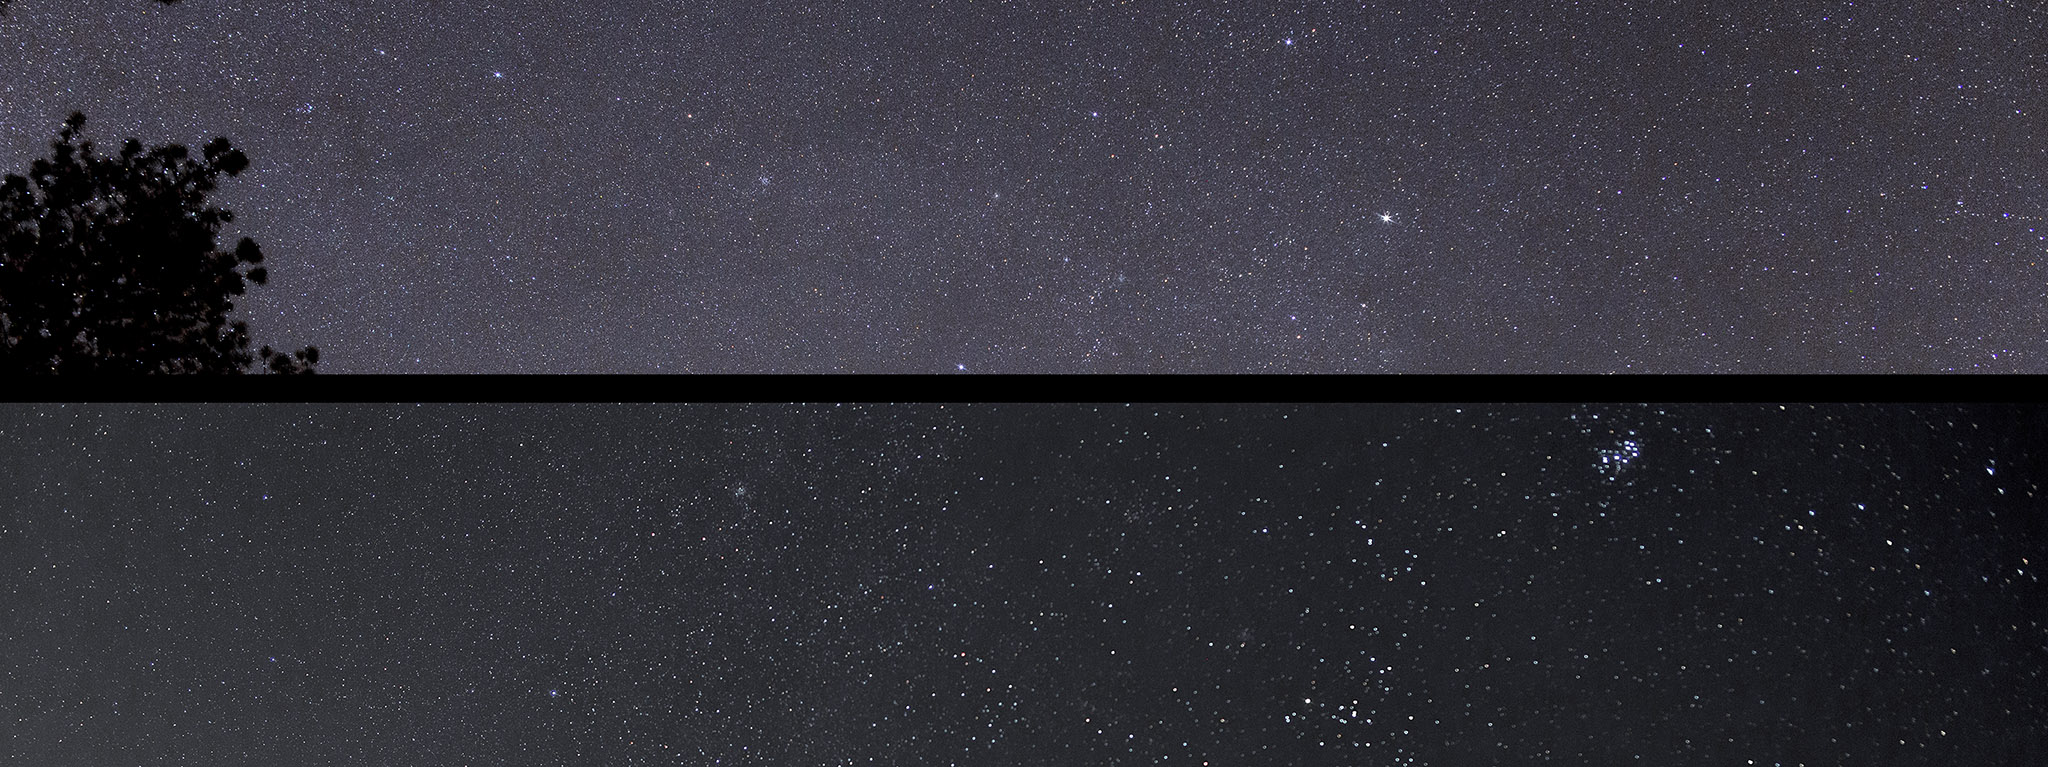
Under the stars, here's what that means. These two strips span the width of a 5500 pixel frame. They've been downsampled to about 40% of that for web display (if you click the image). Note how the stars in the bottom strip are reasonably tight on the left and absurd on the right. That's the "before." The upper strip is the after, after adjusting.

Click the image to see it at 2k. Exposures are different parts of the sky, different exposure lengths, different ISOs, but both are around F2.8 (it's a cinema lens, no click stops) and each was focussed on a star near the center of the frame.
Incidentally, if you should happen to tip the lens while the mounting plate is off, if you happen to turn it upside down, say, as if, maybe, to dump some detritus from ham-fisted attempts at inserting a shim -- not that I'd ever do such a thing -- and if the ring that connects the diaphragm to the aperture ring should just happen to fall out, this video will show you how to put that back:
https://www.youtube.com/watch?v=wSaNxC_PcmE
2020/12/17. Trouble. The tape compresses. It oozes. It moves. The field flatness of the 24mm Rokinon tonight was not nearly as good as before. I opened it up again, hunted down and removed the vinyl tape shim (lord, what would have happened in a hot car out west?), and replaced it with a shim made from Reynolds aluminum wrap. I made this one by cutting a strip of foil 165mm long (it just happened), and wrapping it around the shaft of a small screwdriver. After slipping the resulting tube off that "mold," I flattened it really, really most sincerely flat. It came out 5mm wide. I think that implies 165/5 = 33 layers. Standard weight aluminum foil is 16 microns thick (so says Reynolds), so the shim I've installed should be about 530 microns [Ha! Just measured it -- 0.021" = 533 microns]. That's a lot; it's on the order of twice the largest adjustments mentioned in that first link up top. But the result is a very flat field, the best yet, measured at F4 where the stars are nice and tight. However, I am pretty well convinced the lens no longer quite reaches infinity focus (the mount has been extended on average something like 300 microns, so that shouldn't be a surprise). The hard stop is the sharpest point, and that is not where I recall it used to be with this lens. Worse, the focus ring seems to stop just short of best focus. The blue stars of the Pleiades have a distinct red fringe when imaged at wide apertures where focus is most critical. Bright stars do not pass through this red fringe phase through best focus to a blue fringe as they used to do.
I'm thinking of thinning the lens mount by 1.5 whiskers using an oribital sander or maybe making a light pass with the lathe. There is no going back from those steps, so I am in no hurry to decide which path to take. [ETA: You've got a lathe in the basement why? For exactly this sort of thing. Get on with it.]
2020/12/18.

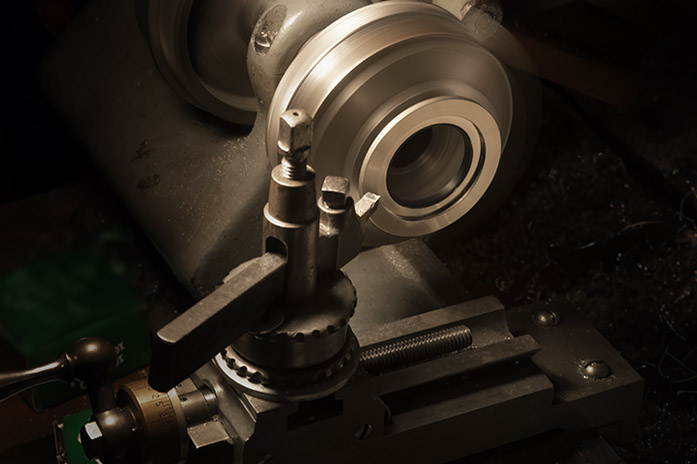
I've got friends with CNC routers and 3D printers in their basements, and I'm using a lathe built in 1895 (designed to be delivered to rural metal shops by horse-drawn carriage) to modify lenses for a DSLR and thermoelectically cooled CMOS camera. It's a peculiar thing, living in the future.
Hail Mary full of Grace, the spirits are about to speak... Sort of a Rosary by way of Bullwinkle. I have no idea how to direct a prayer to Saint Veronica, patron saint of photography (used to be linen, but she was reassigned in the late 1800's).
I took 0.018 inches (about 460 microns) off the back of the lens mount. I thought that would be more than enough. Had I been bold, I might have tried to machine the angle I set with the shim into the lens mount itself. As it is, I earnestly hope I have turned the mount down perfectly square without developing any angle at all, because the odds of my getting that right are slim at best.
Oh, fudge! This amateur machinist accidentally dragged some metal out with the tool as he turned the face of the lens mount, increasing its diameter ever so slightly. After I put the mount back on the lens and snugged it down with its screws, I saw that the lens's diaphragm was not behaving. That would be an easy fix (I'm in practice), but I could not remove the now-oversized mount from the lens for love nor money. The screws had pulled the now-oversized flange into a tight embrace with a just-so sized plastic housing. It was tight. Eventually, I prevailed. I sanded and filed the edge of the mount, but that didn't seem to do the trick, so I chucked the lens mount back in the lathe and held a rat-tail file against the edge and face to polish both. Then I fixed the diaphragm, again, and re-re-re-assembled everything. I removed one layer of foil from my makeshift shim while I was at it. Now some stars, please.
Later that evening: I went to the community lot to shoot the Moon and the conjunction of Jupiter and Saturn. After getting my fill of that (see below), I grabbed a couple of overhead, starfield photos to see how the alignment is coming. Very well, it seems! Here's where we stand:

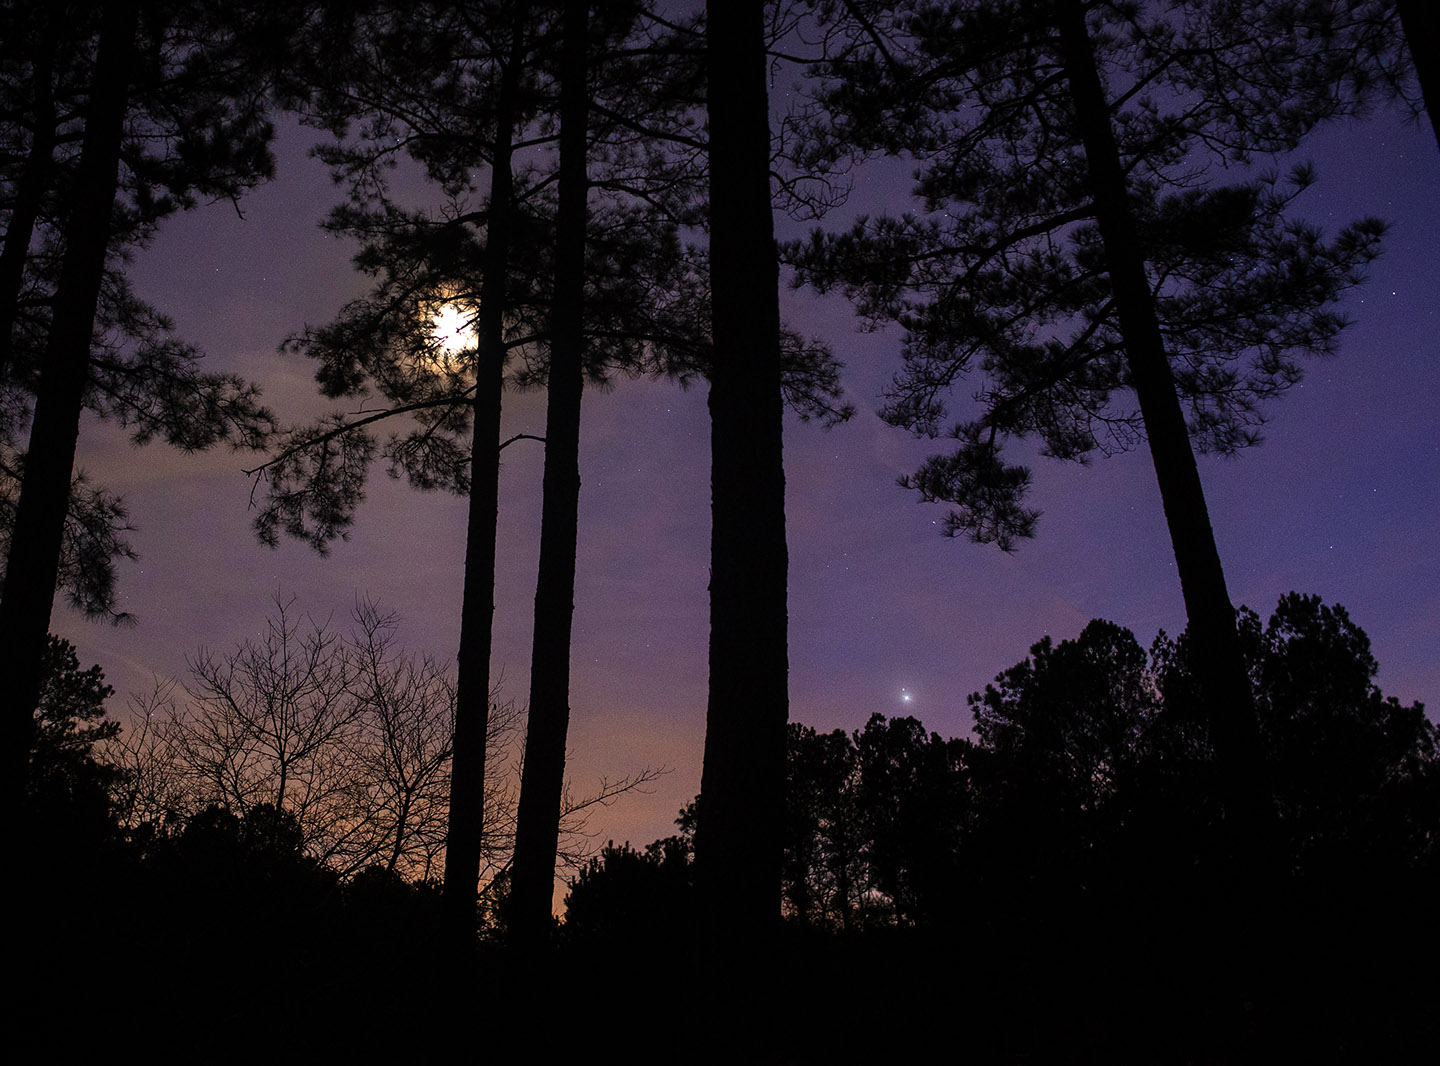
Not that the next photo shows this off particularly well, but here's a view of the conjunction, with the Moon in the pines. The frame has been cropped moderately. The point of best focus is again reachable; the lens's hard infinity stop is again safely beyond any required focal point. We'll have some wide, deep images soon enough. For the moment, enjoy:

(Click it for a bigger version.)
The Rokinon 14mm F2.8 could probably stand to be squared up with respect to the sensor, too. But let's leave the 14mm alone until this one is truly done, then think what to do and not do for the ultra-wide 14mm. Also, I have a hard enough time finding a wide-open sky with wall to wall stars to measure the 24mm; finding one to measure the 14mm will be tougher.
2020-12-22. The sky above the cul de sac is just wide enough for the 14. The good news is that the field is reasonably flat (30% or so total); the bad news is that the outer 10-15 degrees is terribly comatic. Stars are radial streaks in every corner, all to about the same degree. I don't think I can do anything about that. If the coma is unacceptable --it's pretty severe-- then giving up some angular coverage still leaves a hell of a lot of sky. For skyscapes, the horizon of a vertical composition would very likely take up most or all of the badly comatic part of one end of the field. F4 is better than F2.8 but not so much better that F2.8 should be avoided when you need the light. When it's not so cold, I'll give it a try at F5.6 and F8. With enough ISO, and enough subs, why not?
Infinity focus is way short of the infinity mark and infinity stop (it's somewhere around 1 meter), but that's of no concern if you focus using liveview before every session anyway (which you pretty much have to do). I suppose if I get really bored, I could shim all three lens mount screws until stars focus closer to the stop, but to what end?
In short: the ultrawide Rokinon starts out in much better shape than the 24mm F1.4 did. I don't plan to touch it unless someone knows a cure for coma.
:: top ::
My deep-sky photos are made with a variety of sensors and optics. Deepest images come now from a ZWO ASI1600MM Cooled Pro CMOS camera. A good many images come from an unmodded Canon 6D. Video and video extracts begin in a Canon EOS M, usually running in crop mode via Magic Lantern firmware. Telescopes include an AT10RC (a remarkable budget Ritchey-Chretien astrograph), an Orion 10" F4 Newtonian, and a pair of apochromats: a TMB92SS and a AT65EDQ. A very early Astro-Physics 5" F6 gets some use, too. So do lots of camera lenses on both the ASI1600 and the Canon 6D. A solar Frankenscope made using a 4" F10 Orion achromat and the etalon, relay optics, and focuser from a Lunt 60 feeding a small ZWO camera will see more action as the Sun comes back to life. Mounts include an iOpton SkyTracker (original model), a Losmandy G11 (non-Gemino), and an Astro-Physics Mach1 CP3. Software is PixInsight for heavy lifting and Photoshop for polish.