Short-focus Adventures
2021/04/05. I've been trying to get back in the game, and putting the LXD-55 into working order has been just the ticket. Widefield photos during a run of clear, moonless nights have gone particularly well. There are trees (so integrations are relatively brief and target lists are short), and the sky, while dark and dry, is not by any means western (there is no Milky Way...). I'm using the 105 at a forgiving F2.8 rather than F1.4, which turns out to be fast enough for fun (flat-fielding and focus at F1.4 are both pains and not worth doing here). On Astrobin, I see people getting good results on faint dust even from poor skies. Time to learn some new tricks or to make the most of old ones.
Here's a rundown of lessons from recent nights and their applications on subsequent nights:
Casual polar alignment is enough for 30-second exposures at 105mm. Eyeball it if Polaris is visible; if practical, use the alignment scope and don't sweat exactitude; or use an iPhone compass app to find north and a roof-pitch app to set the angle of the polar axis. The closer the better for stacking, but trailing at 105mm for 30s will not be a problem with any of those methods.
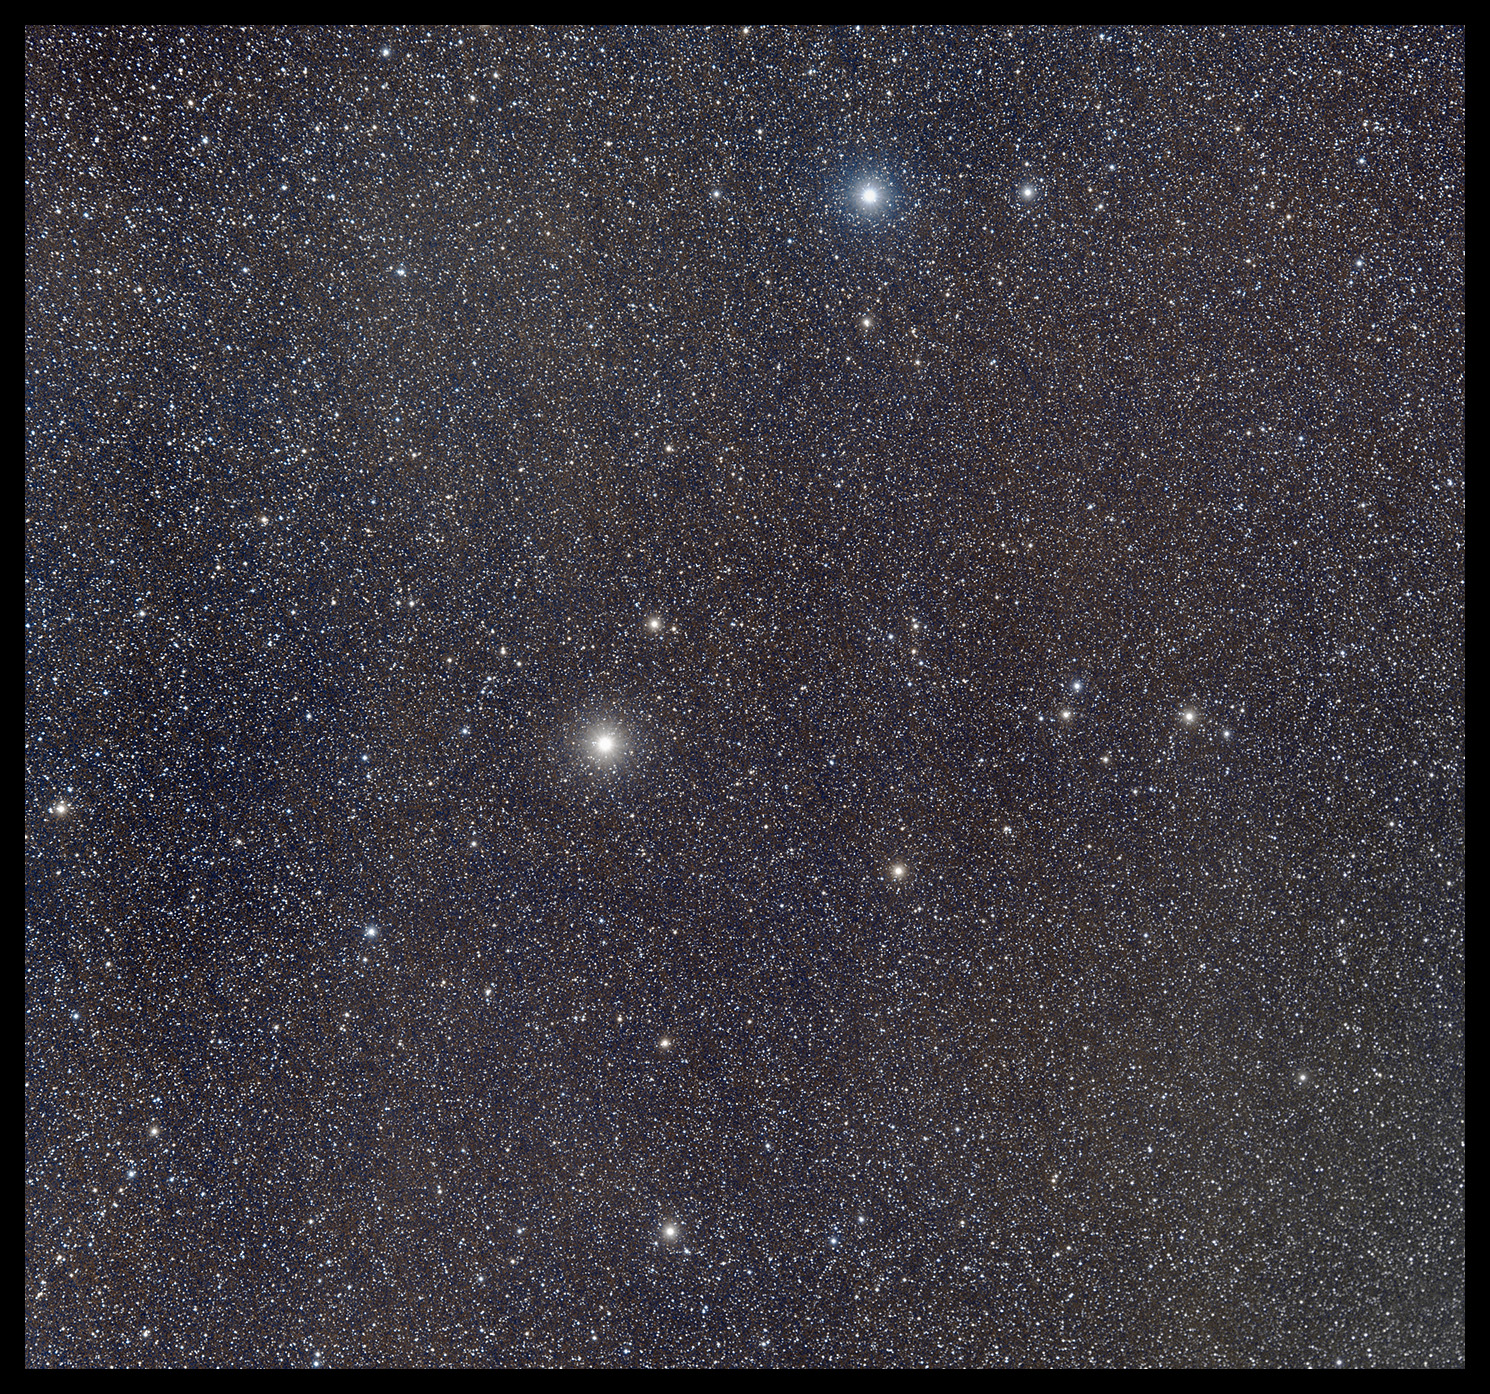
Focusing the 105 in liveview works well, but the Bahtinov mask does not produce a large enough pattern to be helpful. In LV, you can see star images pass through a minumum PSF and see faint stars pop into view at best focus. Refer to the target below for where to zoom in. Remember to open to full aperture when focusing.
30s at F2.8 and ISO 1600 works well here (think of it as astrophotography from the bottom of the sea, and hope for the best). From Rodeo, open up two stops and maybe extend to 60s.
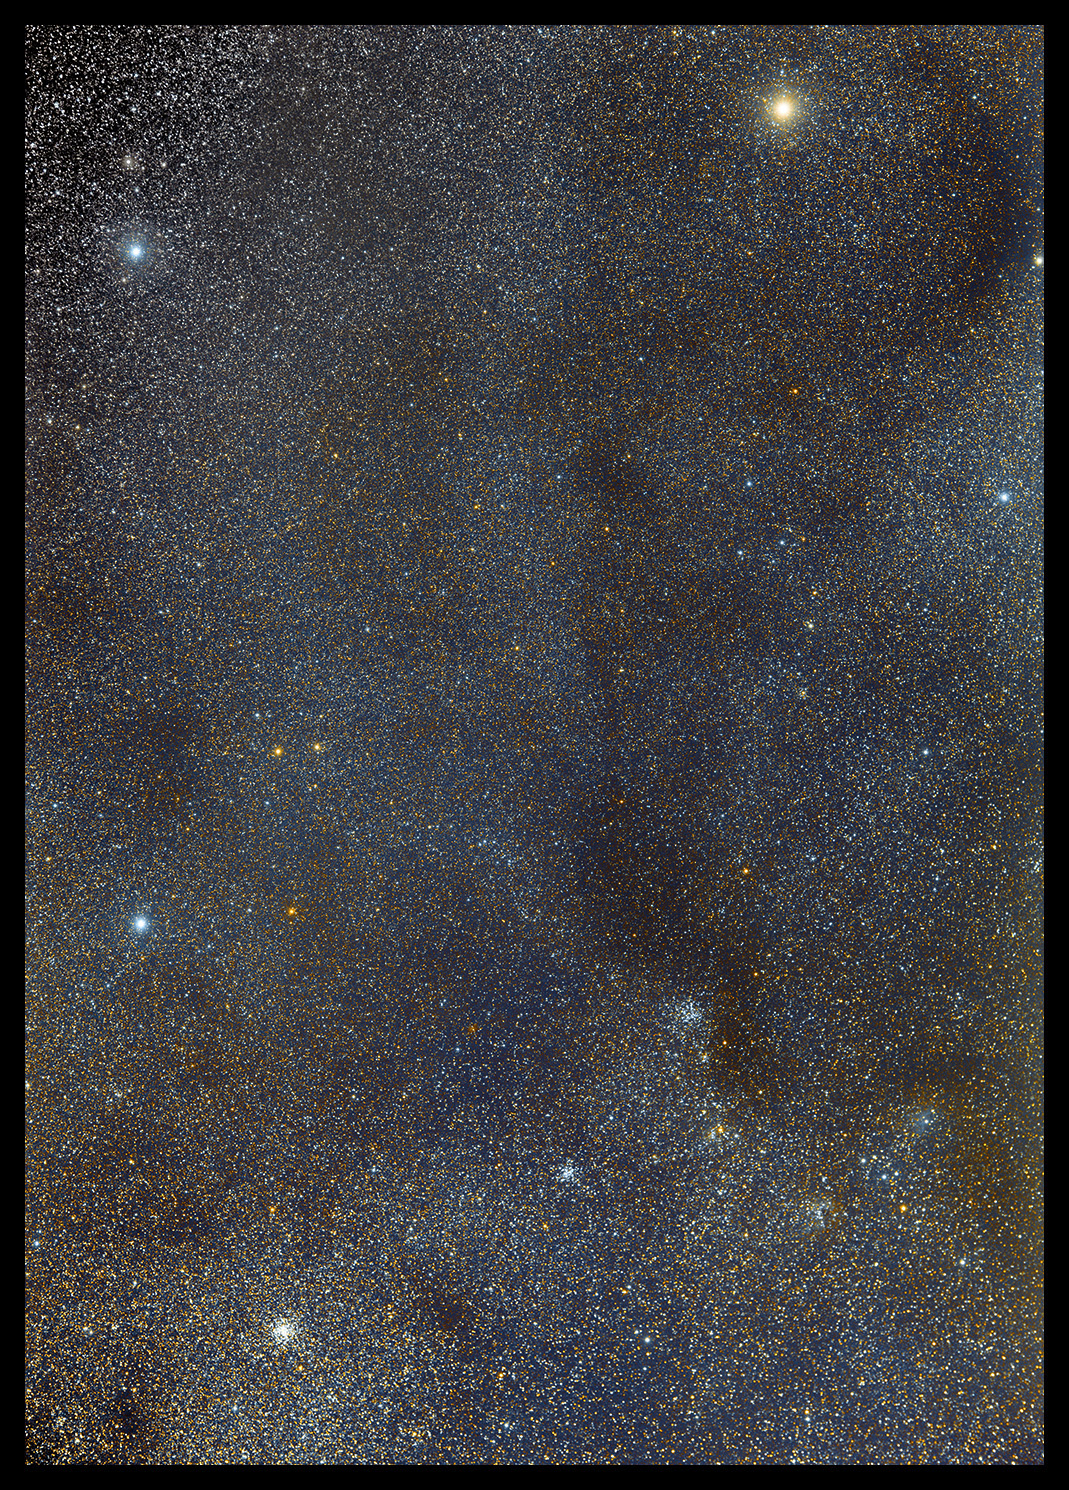
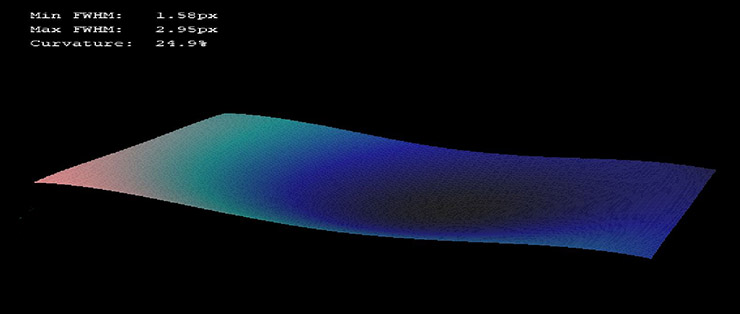
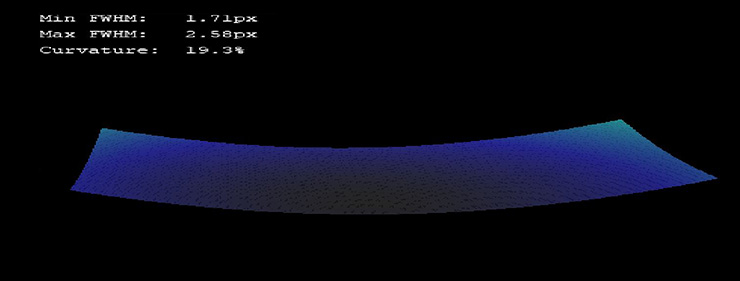
Focus the 105 about halfway to the edge of the field. Last night, I focused near the center and CCD Inspector says the focal surface looked like this:
Tonight's focus. "A" is for Auriga; "B" is for Cancer and Leo.
For orientation, the shutter release is at upper right:
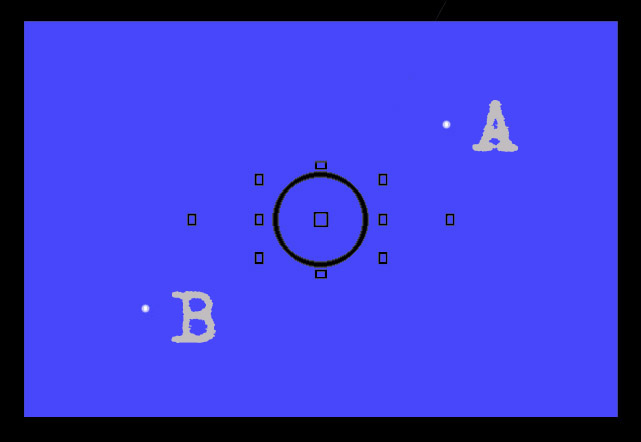
Focusing at position A did not make a hell of a lot of difference compared to focusing dead center (as one might have expected if one had looked more carefully at the damn surface plot from last night's imaging). But focusing at B produced a very nice, almost flat, very symmetric field (18-19% total curvature, which sounds bad but it's really not, probably because it's smooth and symmetrical). So when you use this lens under the stars, focus somewhere around "B."
Do not use the Tiffen #3 soft focus filter to produce expanded, colorful, human-eyes-mimicking star photos. it's way, way too aggressive for that and produces a pathological "starburst" effect. The Kenko Pro1 Digital Softon-A(W) works great on mortal lenses having mere 77mm threads (see the recreation of John Stofan's startrail photo of Orion a few pages back). I tried a 105-77mm stop down ring to put the Kenko on the Sigma. Note that 105/77 squared is less than 2, so stopping the 105mm Sigma down will cost less than a full stop of speed. Since I'm throwing away two stops using the lens under bright skies at F2.8, that's no foul at all. And actually, the 105 at F1.4 has only a 75mm effective aperture, so really, the effect of putting a 77mm stopdown ring on there is... up for grabs. Time for some empiricism. Turns out that the 105 is too wide a lens to tolerate such a substantial reduction without introducing pretty drastic vignetting. Will it flat out? Will it not matter after mixing the images with several unfiltered frames? Only the Shadow knows...
Part of the answer is a synthetic flat made from a blurred frame --Black and White then Gaussian, 500px. This works beautifully to flat the frame from which it was made, at least in black and white using PixInsight's image calibration functions. Realworld results to come. Efforsts using only layer blends in Photoshop have so far been less than useful, but that's why you have the dedicated software. This is progress. Here's a worst-case example: Auriga at 4 seconds, ISO 1600, F1.4 with 77mm Kenko:
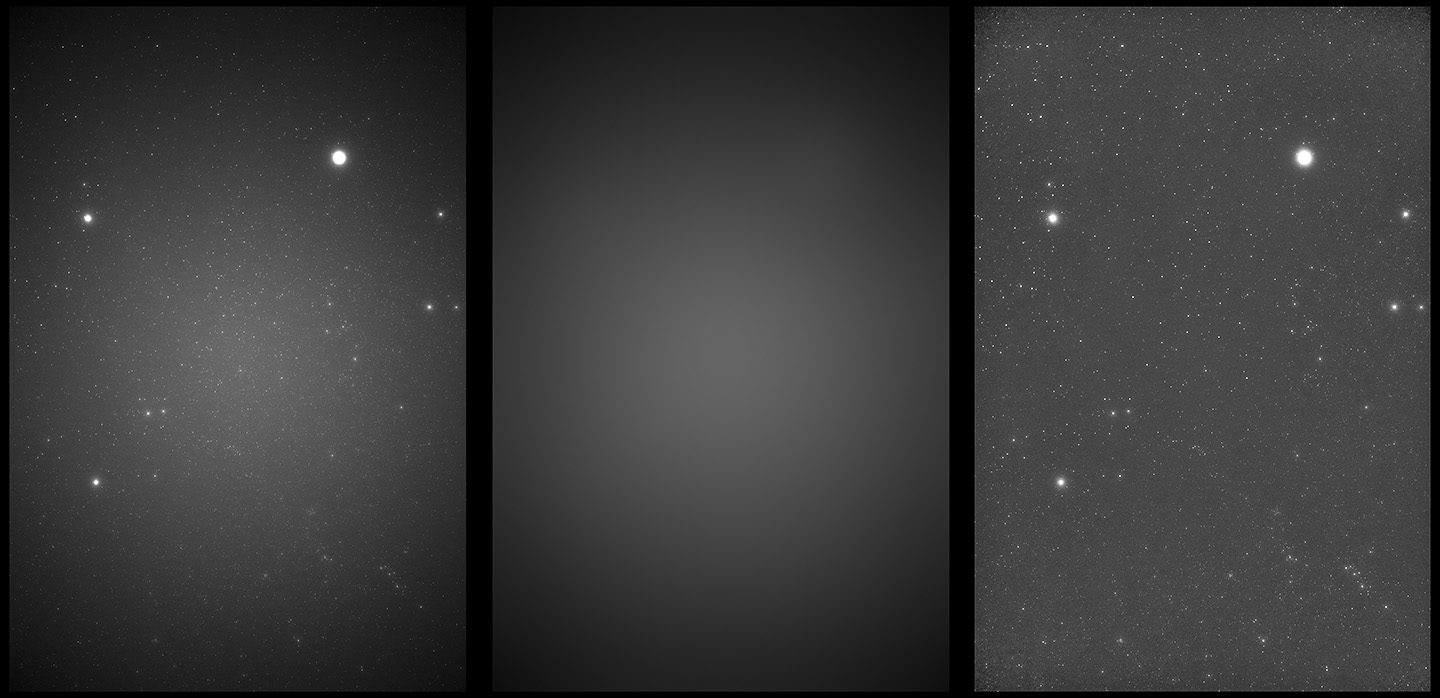
Left: original, badly vignetted frame.
Center: synthetic flat. Black and white, Gaussian blur.
Right: original calibrated in PixInsight using synthetic flat.
(In the right frame, contrast and exposure have been increased in Photoshop
to recover faint stars obscured during the flatting process.)
I've put a wire loop on the back of the LXD-55's Autostar hand controller using Gorilla tape to eliminate the temptation to suspend the controller by its cord. Stop doing that.
The battery pack shown on a previous page is working just fine (it started the night at 12.4v, was still showing 12.2v five hours later). I topped it off this afternoon (13.1v fresh; 12.7v at nightfall; 12.6v under load; 12.2v while driving the LXD-55 at the sidereal rate after six hours; battery recovered to 12.6v two nights later, 12.3v after four more hours.) Doesn't mean I wouldn't like to replace it with lithium; all in good time.