| |
Redistributing the Wealth Photons
12/08/2021. I've lost a lot of equanimity lately trying to get the 24mm F1.4 to behave. First, the diaphragm decided to close down to F16 and stay there. Then whatever modest alignment corrections I made last year using shims in the lens mount went south, too. I "fixed" the aperture by disabling the spring that closes the blades. I always use that lens wide open or right next to it — it's the only reason it exists — so I went ahead and "fixed" the aperture on the bright side. I'm experimenting with it around F2 and wide open at F1.4. I tried a custom lens tool and rotated the rear elements ninety degrees. At least now it varies from sharp to unsharp across the height of the field rather than across the width. Nothing cured or even centered the curved field of defocused and aberrated stars. I went looking for a software fix and found one.
Yes, of course you should click it to make it big.
Canon 6D, ISO 400, 67x5 sec, 24mm Rokinon at F1.4
Stacked in PixInsight, Cleaned up in StarTools
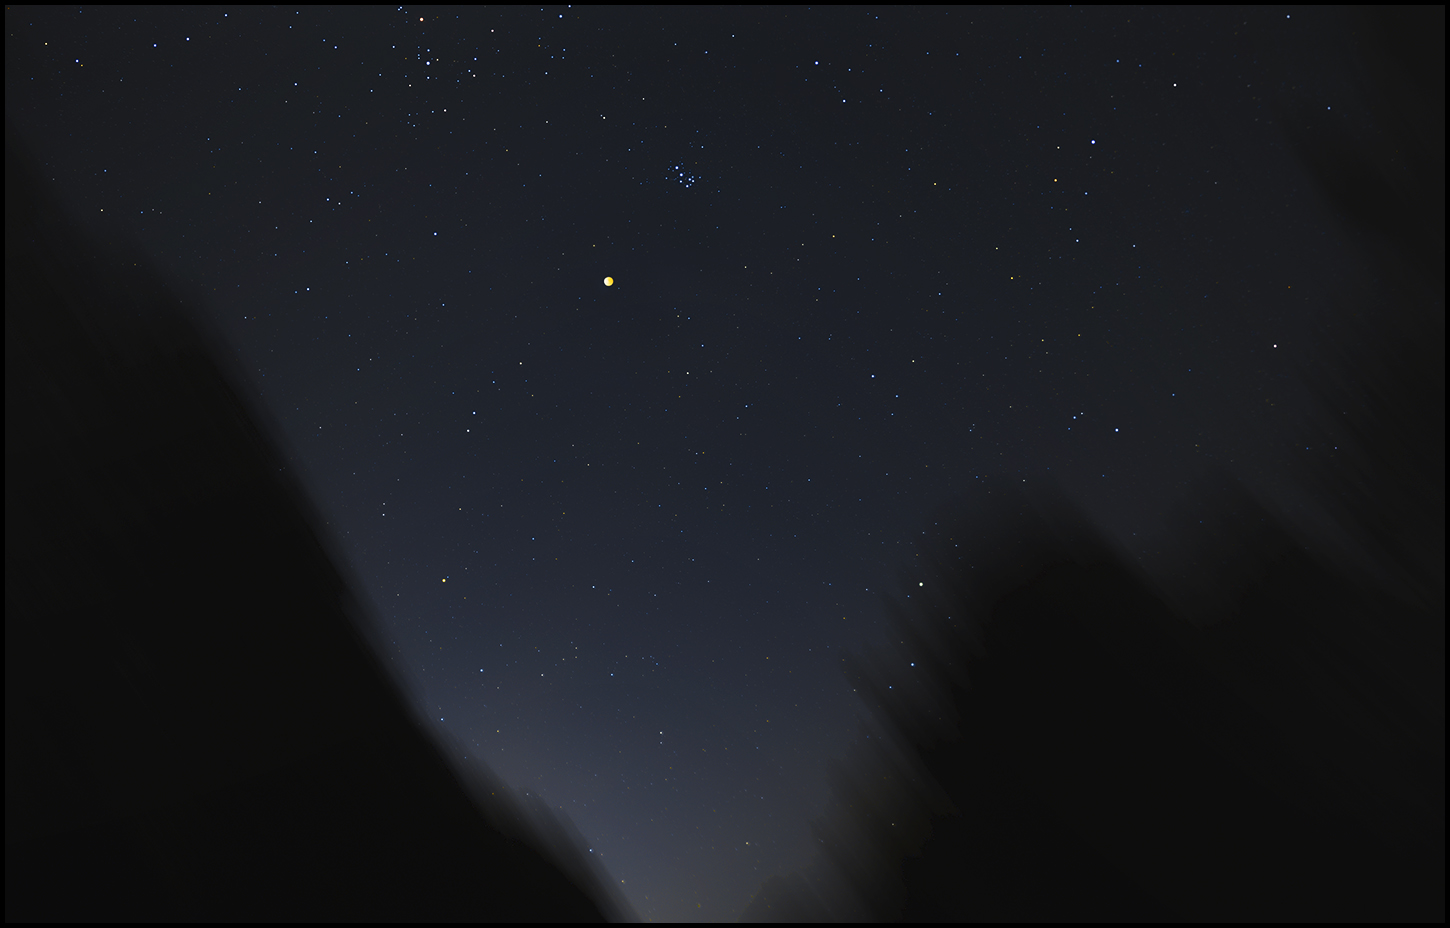
One Moon Selected near Maximum Eclipse.
November 18-19, 2021.
StarTools (www.startools.org) is cheap, and it appears to be effective. It's different, and to me it feels a little tricky and strange. "Counter-intuitive" as it were.
A word about why I'm using yet more software: the keepers of PixInsight's purity are beyond huffy about people wanting to develop scripts, add-ons, and algorithms to fix bad stars in wide-angle photographs. Check out the forum messages. "Address the problem," say they, "Don't look for a fix in post..." Which seems like an odd attitude for software developers whose product includes excellent tools for fixing sensor noise and evening out uneven illumination in optical devices. Furthermore, I don't believe it is possible to take their advice: I don't think a completely satisfactory hardware fix exists at any price. I think the best you can do is find lenses whose images can be cropped to behave decently across a larger portion of their fields. Nobody wants to buy a fast 24mm to use like a fast 50 or 35, or a fast 14mm that's useful only if treated like a 28 or 24.
Yikes. Things may not be as hopeless as all that. I found reviews of and examples from the Sony 24mm F1.4 GM which claim and seem to show pleasing and damn near perfect images with practically no coma. Lotta money but not unholy money. In fact, somewhat less than name lenses. Ignore that one for a moment; it's a lot more than $45, and I seriously doubt it can be adapted to a Canon body — it needs to be 2mm closer to the sensor than the Canon RF-mount permits. Thank goodness. The Zeiss Distagon lenses look good. Astrobin shows a lot of excellent corners from those, and they're not nearly as scary on the used market as one might imagine from their prices new. Here's an article that reviews some wide-angle lenses for astronomical use with a particular concern for comatic aberration. It proposes an unexpected hero: the Laowa 15mm F2.
Anyway, enter StarTools, a rich image processing package written by a developer in Australia. It does a great deal more than what I auditioned it for, but first things first: does it provide a useful fix for grievously damaged star images out near the edges and corners of otherwise decent glass? Yes, it does.
On day one, my results are pretty crude (they're pretty, but they're crude). That's typical of most any high-powered tool. Subtlety comes with experience. The trial version wouldn't allow me to save the results of my experiments, and what I really wanted was to use StarTools output as an intermediate step along the way to a pleasing if imperfect result.
A "pleasing but imperfect" result sounds like weak tea, but it's not intended to be. Since I am all but convinced that throwing unlimited funds at this problem will still produce imperfect results, I am delighted to get "pleasing but imperfect results" from a $45 (USD) software package using lenses I already own.
Down below is the workflow for using StarTools to treat images from my Rokinon 24mm F1.4. Also, here's a glimpse at a downsampled crop going all the way across a 2-second untracked image acquired at F1.4 and ISO 6,400. You're going to have to click the pic to see anything worthwhile. Even then the image will be displayed at about one third of the original and working scales:
I want to practice before posting closer looks at the edges and corners because I think they can be handled better than I yet know how, and I don't want to libel the software by showing inept examples. At the very least, I need to learn to make better masks (a lot of stars got left behind in the upper right, for example). The workflow below produced the results above.
Fixing severe coma using StarTools
- Prepare the file. Convert to TIF, FITS, JPEG if it’s not already.
- Open the file in StarTools.
- Construct a Mask. Click MASK / Auto / Stars. At the bottom of the screen, adjust (increase) “Filter Sensitivity” to avoid selecting noise; mess with other settings as your moved to try. Click DO. Repeatedly CLEAR and respecify the mask until the distorted stars and very little else is selected. Use "grow" and "shrink" with abandon. When satisfied, click KEEP.
- Select “Repair”
- ST will advise “Preview out of date.” This is an odd way of saying, “Ready.” The message says to click DO to re-render. Which is an odd way of saying “Accept and go.” But wait! Before you DO, you might want to adjust the parms at the bottom of the screen, especially the Radial Samples for a severely comatic image, and most definitely change the algorithm from “Warp” to “Redistribute, Core is Avg Location” which means pile up all the photons in each masked area on the calculated centroid. Precisely what I would have tried to do if I still hammered code!
- THEN Do.
- Keep.
- Discard Mask. Select Mask / Clear.
- Keep.
- Save the result!
Some tips:
You're not finished. Note that clusters of fine, tightly packed stars which were well-rendered in the original image may be lost. And colors tend to disappear in redistributed stars.
Put the repaired image on a background layer to the original image in Photoshop. Brush over distorted stars with the eraser. Use a large, diffuse brush with less than 100% opacity. (You'll probably need to adjust levels some, preferably before erasing.) As a final step, you might want to layer color back in from the original image. Or not. At your pleasure. Scale is not changed with the options above.
There are other ways to accomplish this in StarTools. For example, there is also the SVDecon method. It's more involved and I've yet to get it to work very well with my lenses' distortions. But the day is young.
Masks are much easier to make and manage with good, clean, stacked data. Noisy data is hard to work with because it's both important and difficult to differentiate faint, crowded, still-resolved starfields from noise.
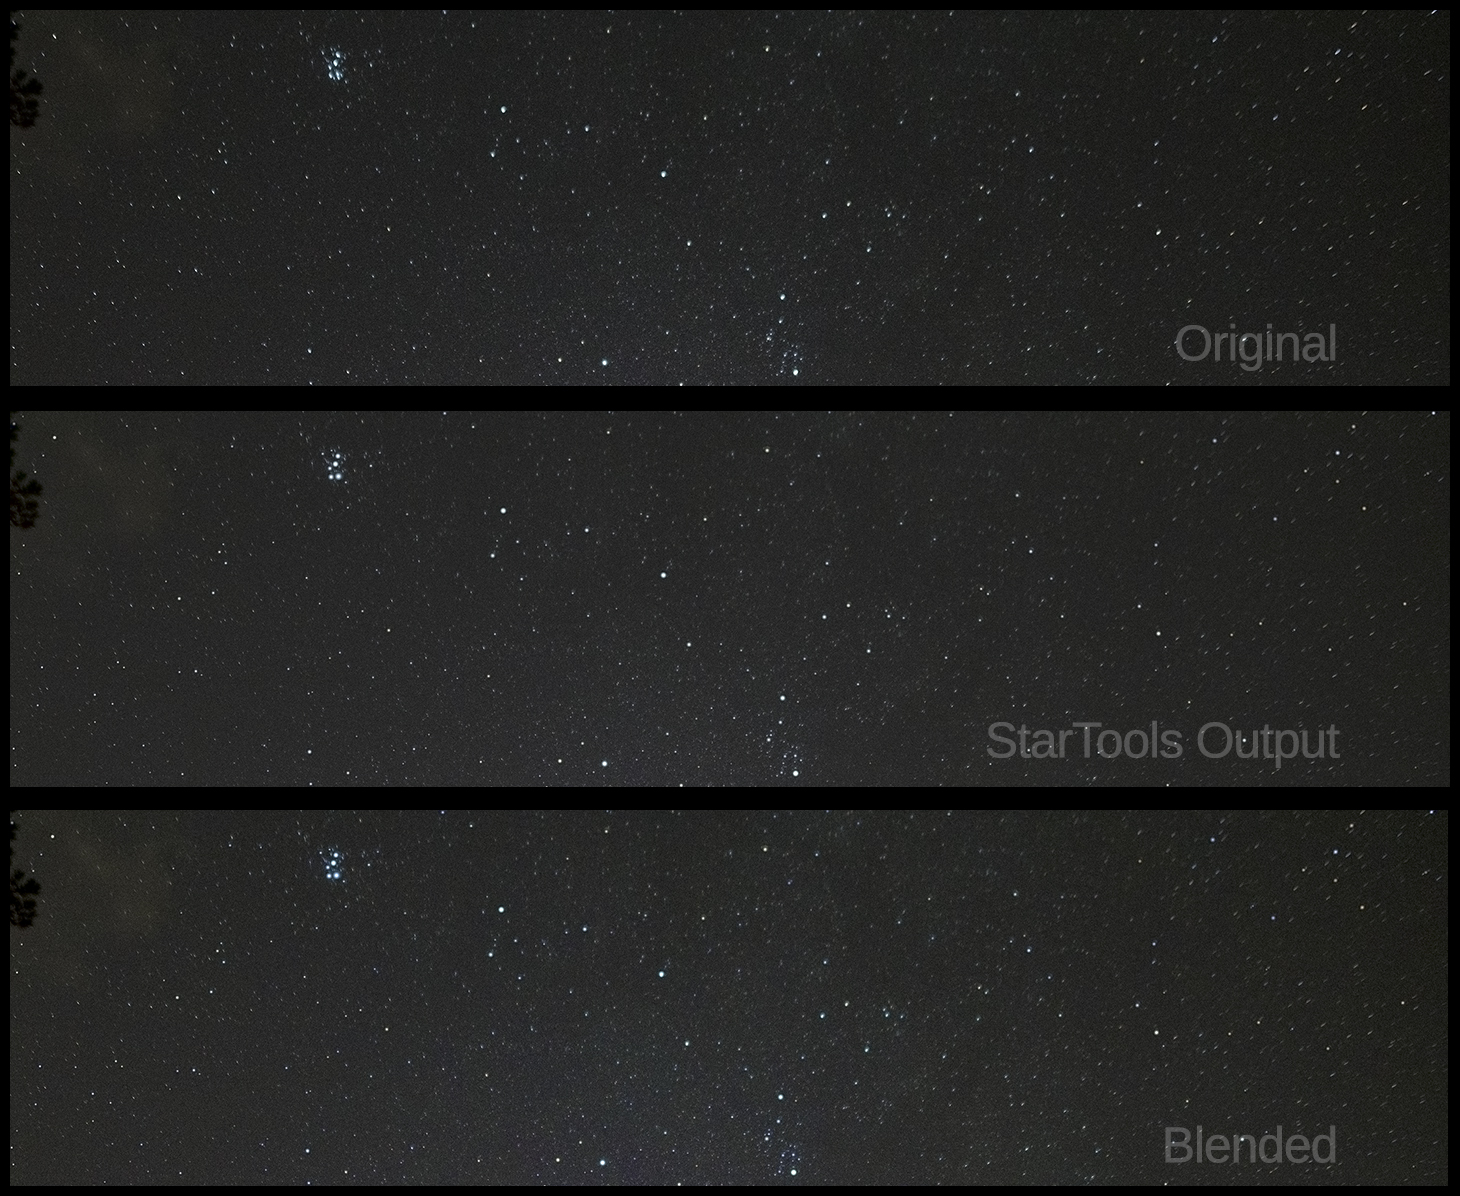
12/09/2021. I shot 22, 2.5 second exposures with the 24mm at F1.4 with the best shimming last week's experiments suggested (1 layer of aluminum foil at the 8 o'clock position of the lens mount; red dot is noon). I used ISO 3,200 and the iOptron SkyTracker and focussed on faint stars at the center of the field. I stacked the images in PixInsight, histogram stretched the result, knocked down the green channel (always too strong owing to the RGGB Bayer matrix), and saved the stack for StarTools to play with, exactly as I would do for a "real" astrophoto. I'm still not going to invite pixel-peeping because I do not yet believe I'm seeing the best results the software can deliver.
Here are the issues I saw: the star-mask StarTools generated flagged M31 as a star so the "repair" algorithm treated it as such. Several stars of the Double Cluster were gummed up in a single blob in the mask and so got turned into a single bright star. I haven't found a way to selectively unmask small areas. Yet. Pretty much everything else was fine. Star colors were OK. If anything, the stars are too perfect. I layered the StarTools image under the PixInsight image and erased everything on the PixInsight layer that appeared to be damaged by coma. (That's fun to see in action.) I retained M31 and the Double Cluster from the PI data as well as most of the relatively clean central part of the image. After I flattened the two layers, I corrected coma in the Double Cluster as if it were motion blur. That's a kludge, but it works for small areas. The whole process took a few minutes, felt robust, and the result looks pretty damn good to me. We're getting there.
12/10/2021. To "unperfect" the image, try this: in Photoshop, select the bright stars (using, for example, the "select brighter stars" action from ProDigital's Astronomy Tools action set). Expand the selection by a pixel. Blur the selected stars (Gaussian 1 - 1.5 pixels), then use curves to dim what should be the fuzzy bits and brighten (retain the brightness of) the centers. Try adding some noise to the selection (!) then blurring and sharpening it. Fiddle with the settings until the sky looks realistic both up close and as a whole.
Here's a downsampled sample of where we are at the moment. Click the pic to see it at 1400 pixels, then scroll down to see where we started. Note the horrendous comatic (or are they astigmatic?) stars in the upper corners of the original image. These files aren't quite big enough to pixel peep, but they're big enough to see that the whole, uncropped 24mm frame is useful. Bring on the Geminids!

12/23/2021. OK, I was wrong. It is possible to get good star images wall to wall and corner to corner with fast, wide lenses. B&H offered a used Carl Zeiss 25mm F2 Distagon with a Canon mount for pennies on the dollar compared to its new price. There's a 30-day return privilege on it, but that's not going to happen: the damn thing looks new to me, and it works superbly. Examples to follow soon. It's still nice to have the software just in case the extra speed of the 24mm Rokinon or the extra span of the 14mm Rokinon is in order, but this Distagon will need no such tricks to get the stars right.
:: top ::
My deep-sky photos are made with a variety of sensors and optics. Deepest images come now from a ZWO ASI1600MM Cooled Pro CMOS camera, an ASIair (model 1) and sometimes one of several laptops. A good many images come from an unmodded Canon 6D but a lot more will be coming from an R6. Video and video extracts begin in a Canon EOS M, usually running in crop mode via Magic Lantern firmware (but the 6D and especially the R6 will probably see more use). Telescopes include an AT10RC, an Orion 10" F4 Newtonian, and a pair of apochromats: a TMB92SS and a AT65EDQ. A very early Astro-Physics 5" F6 gets some use, too. So do lots of camera lenses on both the ASI1600 and on the Canons. A solar Frankenscope made using a 90mm F10 Orion achromat and the etalon, relay optics, and focuser from a Lunt 60 feeding a small ZWO camera will see more action as the Sun comes back to life (Autostakkart!3 is my current fav for image stacking). Mounts include an iOpton SkyTracker (original model), a bargain LXD-55, a Losmandy G11 (492 Digital Drive), and an Astro-Physics Mach1. PixInsight does most of the heavy lifting; Photoshop polishes. Some of the toys are more or less permanently based in New Mexico. I desperately hope to get back soon.
|