| |
The Third Option
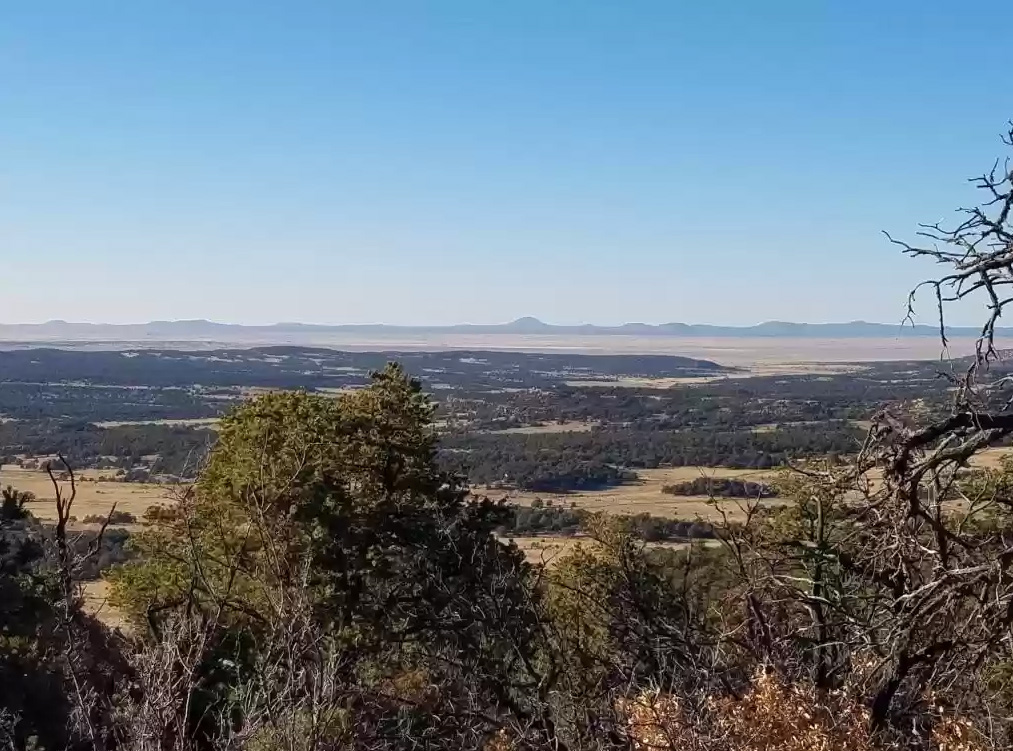
07/31/2022. My first choice would be acreage under pristine, western skies. Six or seven thousand feet above sea level, pointy-topped trees and open grassland overlooking a hundred miles of prairie and desert to ragged-edged mountains. Eight hundred, maybe a thousand square feet of living space, a deck, and a rollaway shed protecting a 16-inch R-C on a solid mounting. I get ads for such places every day; I take note of suitable locations every time I get out west, but it is harder now to believe that I am shopping. The photo above is from a realtor listing; this is one that got away: section U3, Lot 7, Wild Horse Ranch north of Pie Town, NM, 14 acres (I think) for $23k. Sold March 2022. The lot next door was for sale, too. They were both
challenging sites (steep) but inspiring.
Failing that: a dark, western place I could visit for a few weeks a few times a year. Rusty's RV Ranch serves perfectly well.
Failing that: or in addition to that, a way routinely to take better advantage of the gear I have where I am.
There are options intermediate among those three, but together they pretty well tile the plane of my desires.
Friends, we are deep into the third option. Years ago, I thought I had real prospects for the first, but barring a sudden and unexpected influx of serious cash, that's not happening. Covid foreclosed the second option immediately after I stashed astronomical toys in a rolling efficiency apartment in the bootheel of New Mexico (it may yet work, but things feel different). So comes now option three, which I had working a decade ago when I still thought of it mostly as practicing for better times to come. The trick now is to enjoy the third option without being haunted by the first, without, that is, either hoping for or grieving for option one. Either of those mistakes can taint readily available pleasures. Making the most of option three in no way precludes the others; enjoying it is not surrendering, and option two remains solidly in the mix.
Option Three. I identified a small prefab shed suitable for use as a rollaway observatory, shopped up the inverted rails and rollers to allow the shed to move. I put myself to sleep figuring out to accomodate a solid pier in a moving floor, how to secure the shed against wind, how to relocate the whole show in the event we elect to remove some pines. I thought, and think, it could be done within a perfectly reasonable budget.
Then interest rates rose and I needed to pay more attention to more quotidian bills, so I shelved rollaway thoughts and recalled the TeleGizmos365 cover that used to protect my 10-inch R-C and A-P mount in our back yard. Maybe another of those? I really didn't want to spend $200 for a new cover. Maybe I could salvage the old one? It had been draped over the un-instrumented pier in the back yard for a few years, and it was a mess. Consensus online was that the canvas would remain good for many years though the inner, heat-reflecting mylar tended to flake away in tiny bits of red-backed metallic dandruff. That part I knew all about. I and others learned long ago to double-bag gear to keep that stuff away from anything that matters. Someone on CloudyNights said they had simply removed that reflective layer. So that's what I did, and for my trouble I was left with a heavy shroud decorated in baked-on pollen, moss, lichen, wasp-nests and red-clay spatters.
Products made for cleaning sails looked promising but were packaged in multi-gallon quantities. I settled on a powerful cleaner for my kind of organics. It's mostly bleach, but it mostly works, so am I complaining? A damaged seam needed to be re-bound with Gorilla Glue (I clamped it using some PVC rings cut for the boat project, and now it's as solid as it could be). I've applied fresh waterproofing. I'll still double-bag the equipment that lives under the cover, but before the Moon is dark, I expect to have the 10-inch telescope back in place. Autumn cold fronts and the best skies we ever have aren't very far away.
08/06/2022. I extracted the OTA from the corner of "my" room and did some superficial cleanup. The glass looks great. I installed a 3D-printed baffle extension made by Joel Short ("Buckeyestargazer"). Absent the baffle, skylight can slip past the secondary, find its way through the central tube, and strike the sensor lowering contrast and making flat-fielding difficult, especially under bright skies. This baffle fixes that. Joel's documentation said there was some chance that his baffle wouldn't fit through the front of some 10-inch RCs. Thus warned, I was prepared when that turned out to be the case with mine. I removed the secondary mirror after marking its orientation carefully and determining that Bob's Knobs would allow me to put it back really close to where I found it. That left plenty of room to work. The OTA will need to be re-collimated, but I assume it already did, so no harm done.
The sky overhead is what it is: light-struck, frequently cloudy, always moist, and constricted by pines. At most, on one night out of five or six, 25% of the sky is visible (a window maybe 4 hours wide east to west and extending from about 20 to 80 north) for at least a few hours. (Just one week under open western skies provides more stargazing than I get in a year here -- make your assumptions, show your work, you do the arithmetic. I'd rather live under such a sky than win the goddamn lottery. See? This is why it's so hard to make peace with option three. And why option two remains attractive.)
Tomorrow I start reassembling the backyard observatory. I painted a few things -- the lens cap, the removeable gripper, the focusser plug "farm implement red" (Rustoleum's name). The rationale is that all those things often get mislaid in the dark while using the 'scope and will be easier to keep track of if bright red. The truth is, it's just kinda fun: I like casting astronomical equipment in the guise of plows and harrows.
08/07/2022. OK then, tomorrow I start reassembling the observatory. Today, I disassembled and cleaned and relubed and reassembled the porch-dwelling Astro-Physics mount. I hate mud-daubers. I'll block their accesses to the innerds better before getting too far down the road.
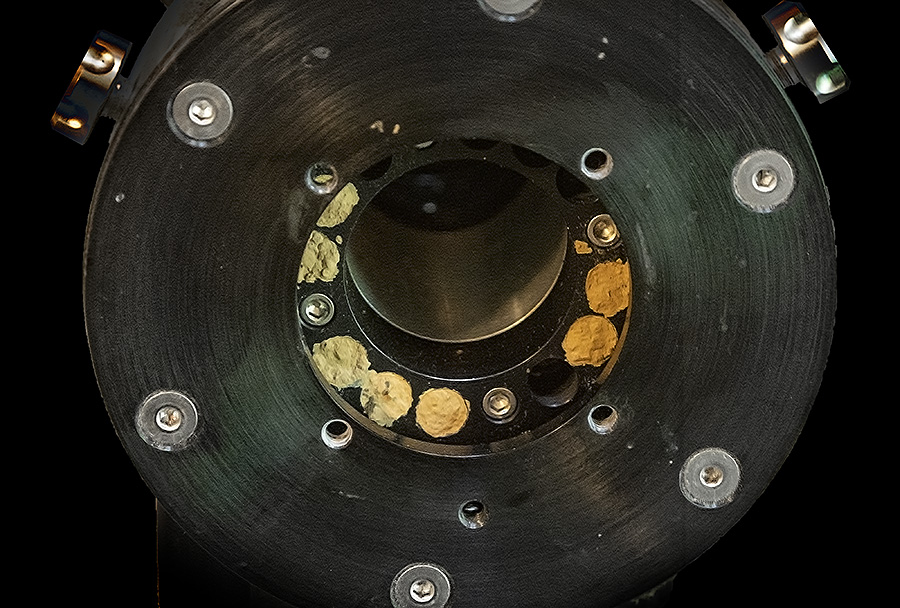
Mud daubers' work inside the declination axis. It looks
way worse than it was. That inner piece comes out easily and is easy to clean.

Polar axis in mid cleaning. It was as bad as the
declination axis; this is "under" the dauber-daubed layer.
There was some sort of 12-year-old lubricant and some sort of moisture on some of these surfaces. I've removed the moisture and relubed using black lithium where metal turns on metal and applied the barest film of machine oil here and there where I just couldn't resist.
It's only a matter of a few socket head screws to get back in there to redo that if I come to appreciate the error of my ways.
Next: get the mount back on the pier and the RC10 TMB92 (why suffer?) on the mount. Rough align on the pole roughly collimate the OTA. Then refine alignment. Get the Toughbook and its suite of programs working for the A-P mount and the deep sky. Confirm that guiding works. Tune up the RC10's collimation. Then decide what's next. Do some solar imaging while the Sun is far enough north to clear the trees. Do some proof-of-concept deep sky imaging. Then what? Get the cooled camera going? Remote operation via the Toughbook? ASIAir setup? Off-axis guiding? Try out some telecompression; try some high-res lunar and planetary imaging when the targets are available. Pick a lane and get serious about the deep sky. Remember that it doesn't all have to be working to be fun and useful. And please: write everything down in a procedures book so this stuff doesn't have to be reinvented every damn time.
08/08/2022. The mount is on the pier. Note to self: silver polishing cloth and a little water works wonders on stainless steel. Electronics come next, and i don't know why I am expecting trouble. The A-P worked fine as a portable mount for the JWST photos a few months ago; it should be just fine, now. I'll use it for some Sun photos later today just to remember how it all works.
Or not. I've called forth a midday thunderstorm.
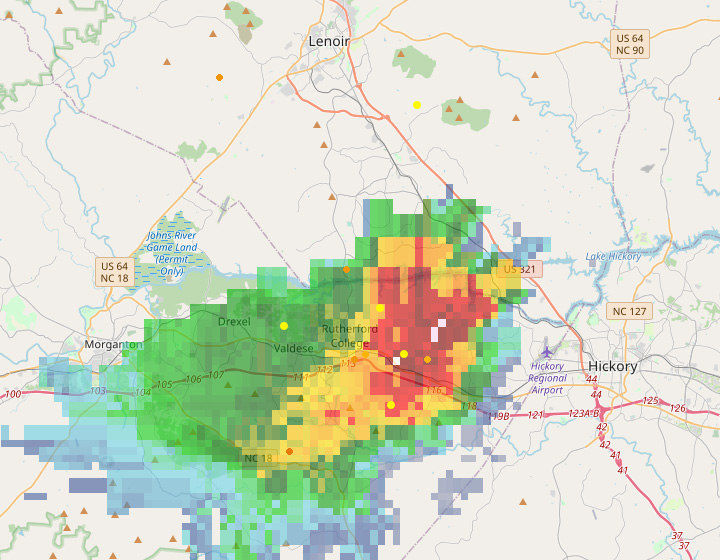
But that moved on. I put the solar scope on the mount and crossed my fingers. Tracking for solar observations was very good! It got better after I tweaked the elevation of the polar axis. There's still some dec drift with the Sun near the meridian; the azimuth of the polar axis is only roughly set.
Despite the good tracking, I have nothing to show for solar efforts. Seeing was awful, and I messed up the focus for the first series of captures. When I went back out to set up the TMB92 for nightwork, I took one more cut at the Sun (it had drifted about a degree south of my field after an hour or so, so I know there's some polar alignment to be done).
I took the solar telescope down and put the TMB92 on the mount. I installed a 50mm guide scope feeding an ASI120Mini. I connected the camera via USB-C to a USB2 port on the Toughbook and ran an ST4 cable from the camera to the guide port on the GTO-CP3 panel of the A-P mount, and that's all. PHD2 is set to "on camera" for the guiding signals. (I never found an online guide or video explaining these connections; so I assumed it must be so stultifyingly obvious that it doesn't need explaining. What would I do if I didn't know enough to be confused? I'd hook the "guide port" on the camera to the "guide port" on the mount. D'uh. We'll see.) If this is all it takes, I'll be way ahead of the messy connections I used a few years ago, and the same schema can be used with the 80mm guidescope for the RC10, and probably with the G11 in Rodeo as well (see "option two" above, but don't dwell on it yet; we're doing Option Three just now, only Option Three). Maybe I'll eventually opt for ASCOM connections to the A-P mount. Or maybe I'll try this arrangement with the ASIAir next. Hush. First things first: what's going to happen after the Sun goes down?
I focused on Arcturus, messed up the goto recalibration, swept up M13 in the R6 behind the telecompressed TMB92 (I'm making this as easy as possible tonight), and focused the finder which, as it happened, was very nearly aligned with the TMB. While waiting for the night to deepen, I built a dark library for the guider (10 darks each from 0.5 to 6 seconds at 0.5 second intervals). Then I started PHD2 "looping," let it pick a star, and told it to calibrate. Which it did, very quickly and calmly. Then I told it to guide. And it did that, too. So I locked the remote release on the R6 to take endless 20 second exposures at ISO 1600. There's a lot of twilight and a lot of moonlight out there, but tonight's effort is all about making sure everything works. Beauty comes later.
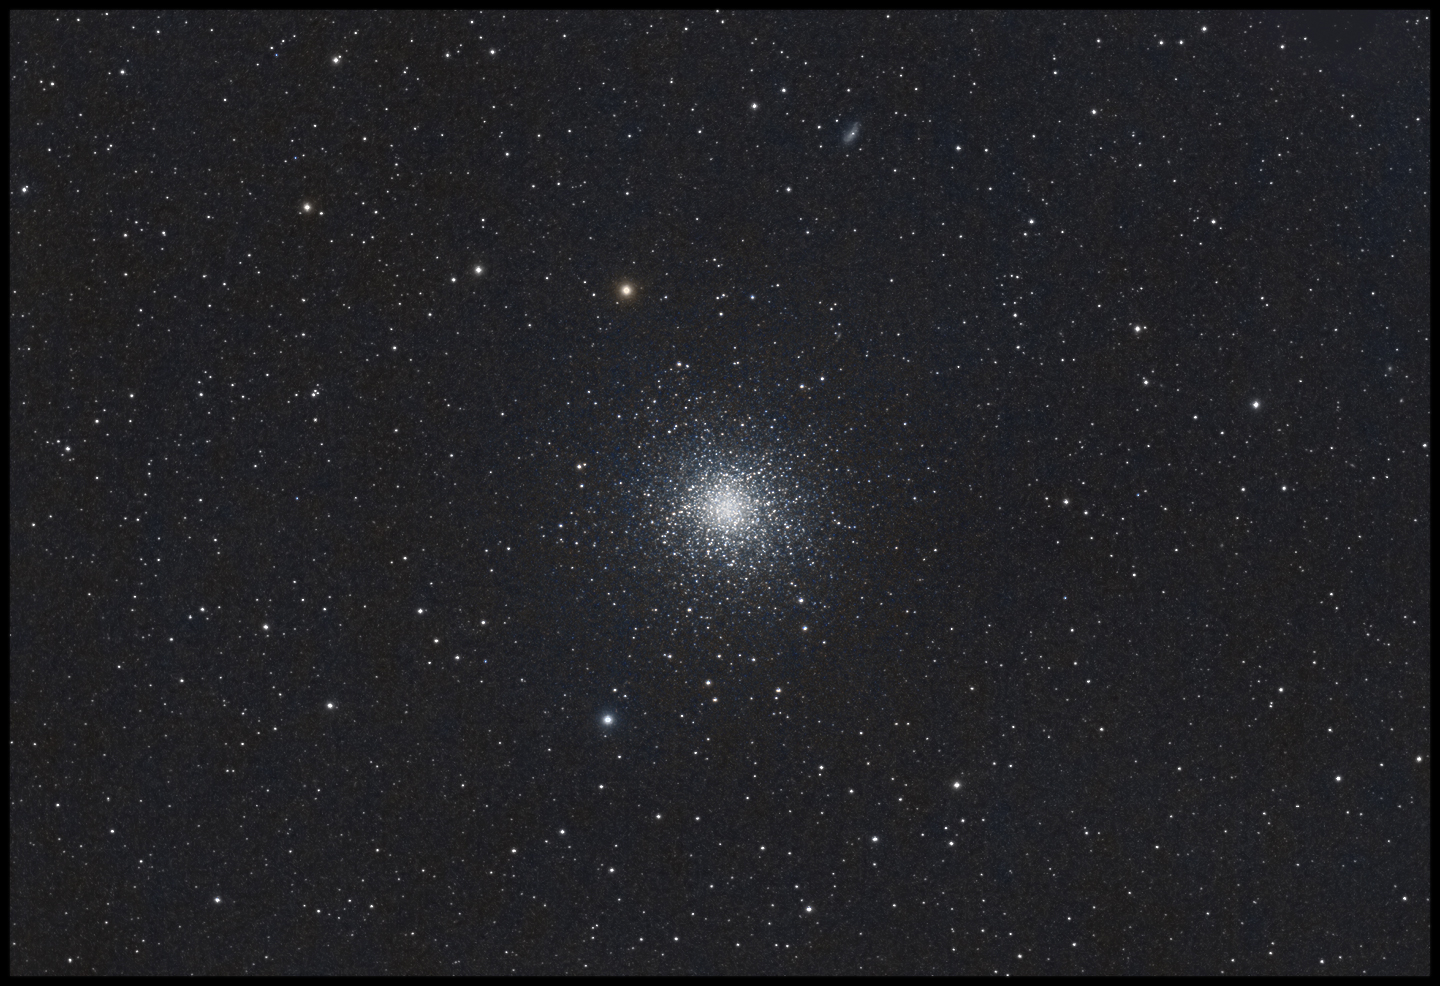
150, 20-second exposures, R6 @ ISO 1600
TMB92 w/TeleVue flattener (efl 402mm)
This is a crop of about 9% of the sensor's area.
Yeah, you can click it! Please do.
Everything worked! Dec error was a consistent 0.8 - 1 arc second almost entirely on just one side of perfect; RA oscillated from +/-1.4 arc seconds. I inferred that polar alignment was not all it could be (no surprise) and that periodic error was not fully corrected. Absent Ray Graloc's software, I used the hand control to record and play back a "PEM" correction. That improved RA guiding. It cut the range about in half. A single iteration of PHD2's polar alignment routine proved very effective, too, but I called it a night before taking enough data to quantify the improvement (PHD2 reported that I finished within about 12 minutes of the pole; I was likely off by a degree or two to start with). A few more iterations will be worthwhile, but that will need to be redone in any case after loading the mount with a heavier OTA and four or five times the focal length.
That is what a completely successful effort looks like! If I didn't know better than to say things like this, I'd say that top shelf hardware and modern software make astrophotography too easy. What that really means is that I have to elevate my goals. And don't be counting chickens. There are a lot of features to get working yet --chilled sensors, filter wheels, the ASIAir-- with much heavier and longer glass than the TMB92.
Some satellites in the dusk: Here's the same data treated differently, emphasizing rather than deleting pixels that are statistically brighter from one frame to another. Eight or ten satellites sailed through the field of view.
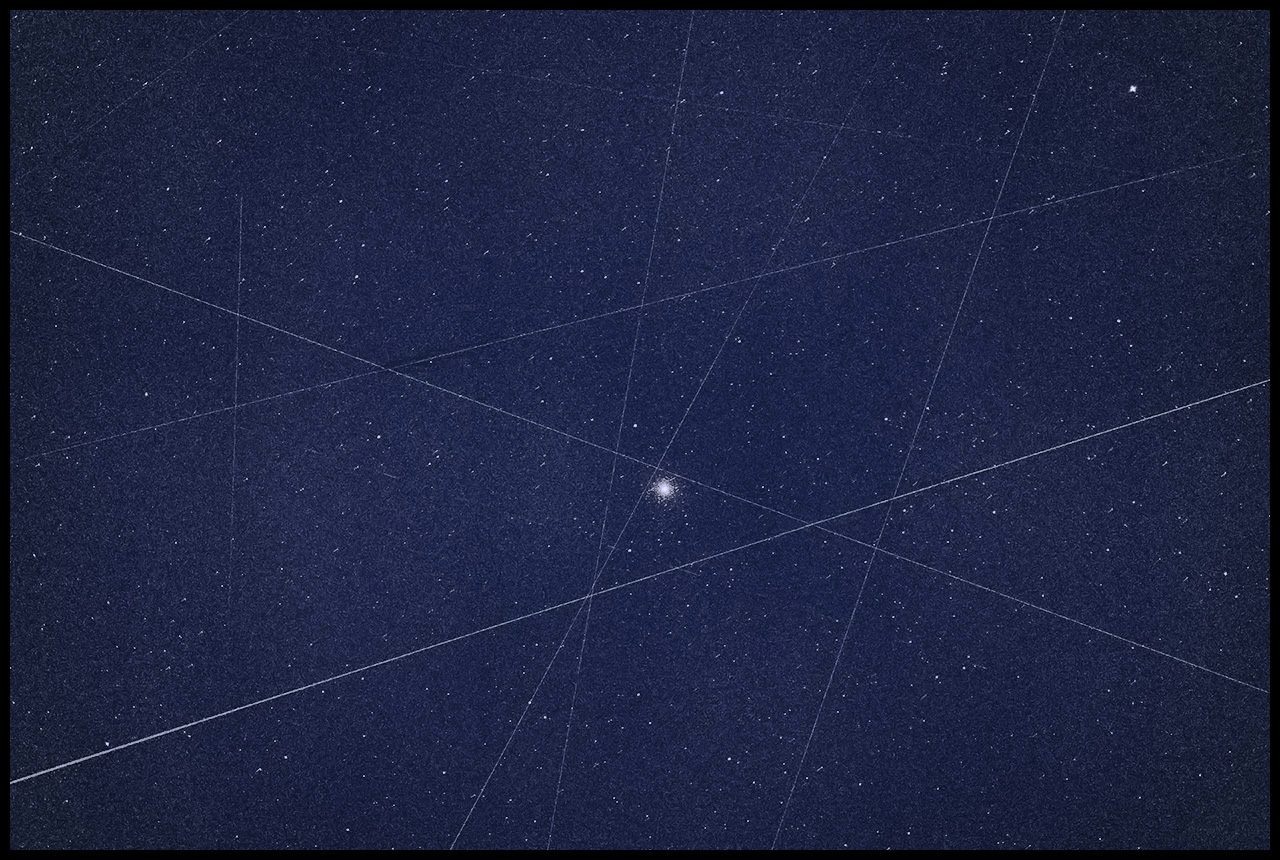
Bright pixels in the same data stack as above, layed
over a single frame.
:: top ::
My deep-sky photos are made with a variety of sensors and optics. Deepest images come now from a ZWO ASI1600MM Cooled Pro CMOS camera, an ASIair (model 1) and sometimes one of several laptops. A good many images come from an unmodded Canon 6D but a lot more will be coming from an R6. Video and video extracts begin in a Canon EOS M, usually running in crop mode via Magic Lantern firmware (but the 6D and especially the R6 will probably see more use). Telescopes include an AT10RC, an Orion 10" F4 Newtonian, and a pair of apochromats: a TMB92SS and a AT65EDQ. A very early Astro-Physics 5" F6 gets some use, too. So do lots of camera lenses on both the ASI1600 and on the Canons. A solar Frankenscope made using a 90mm F10 Orion achromat and the etalon, relay optics, and focuser from a Lunt 60 feeding a small ZWO camera will see more action as the Sun comes back to life (Autostakkart!3 is my current fav for image stacking). Mounts include an iOpton SkyTracker (original model), a bargain LXD-55, a Losmandy G11 (492 Digital Drive), and an Astro-Physics Mach1. PixInsight does most of the heavy lifting; Photoshop polishes. Some of the toys are more or less permanently based in New Mexico. I desperately hope to get back soon.
|