| |
ATLAS and ZTF
2/06/2023. I still haven't figured out why the flat panel works so poorly with the TMB92, but I will (see below!). After I shot ZTF tonight, I discovered that 2022 U2 ATLAS was in the same frame. The smaller, more distant comet is ten magnitudes (!) fainter, but right there with it. Guide 9.1 put it about 24 arc minutes farther along its trajectory than my photo shows, a discrepency confirmed by an Astrobin photo from a photographer in Spain. I wasted a lot of time trying to reconcile the position of the glow in my photos with Guide's results and finally thought to consult NASA/JPL's Horizon program. Its output agreed with the photos, so I leave the discrepency as a mystery and am satisfied that I have both in this stack. ATLAS is the pale glow above and to the right of ZTF. It's moving only a third or a fourth as fast, so its image is considerably less smeared.
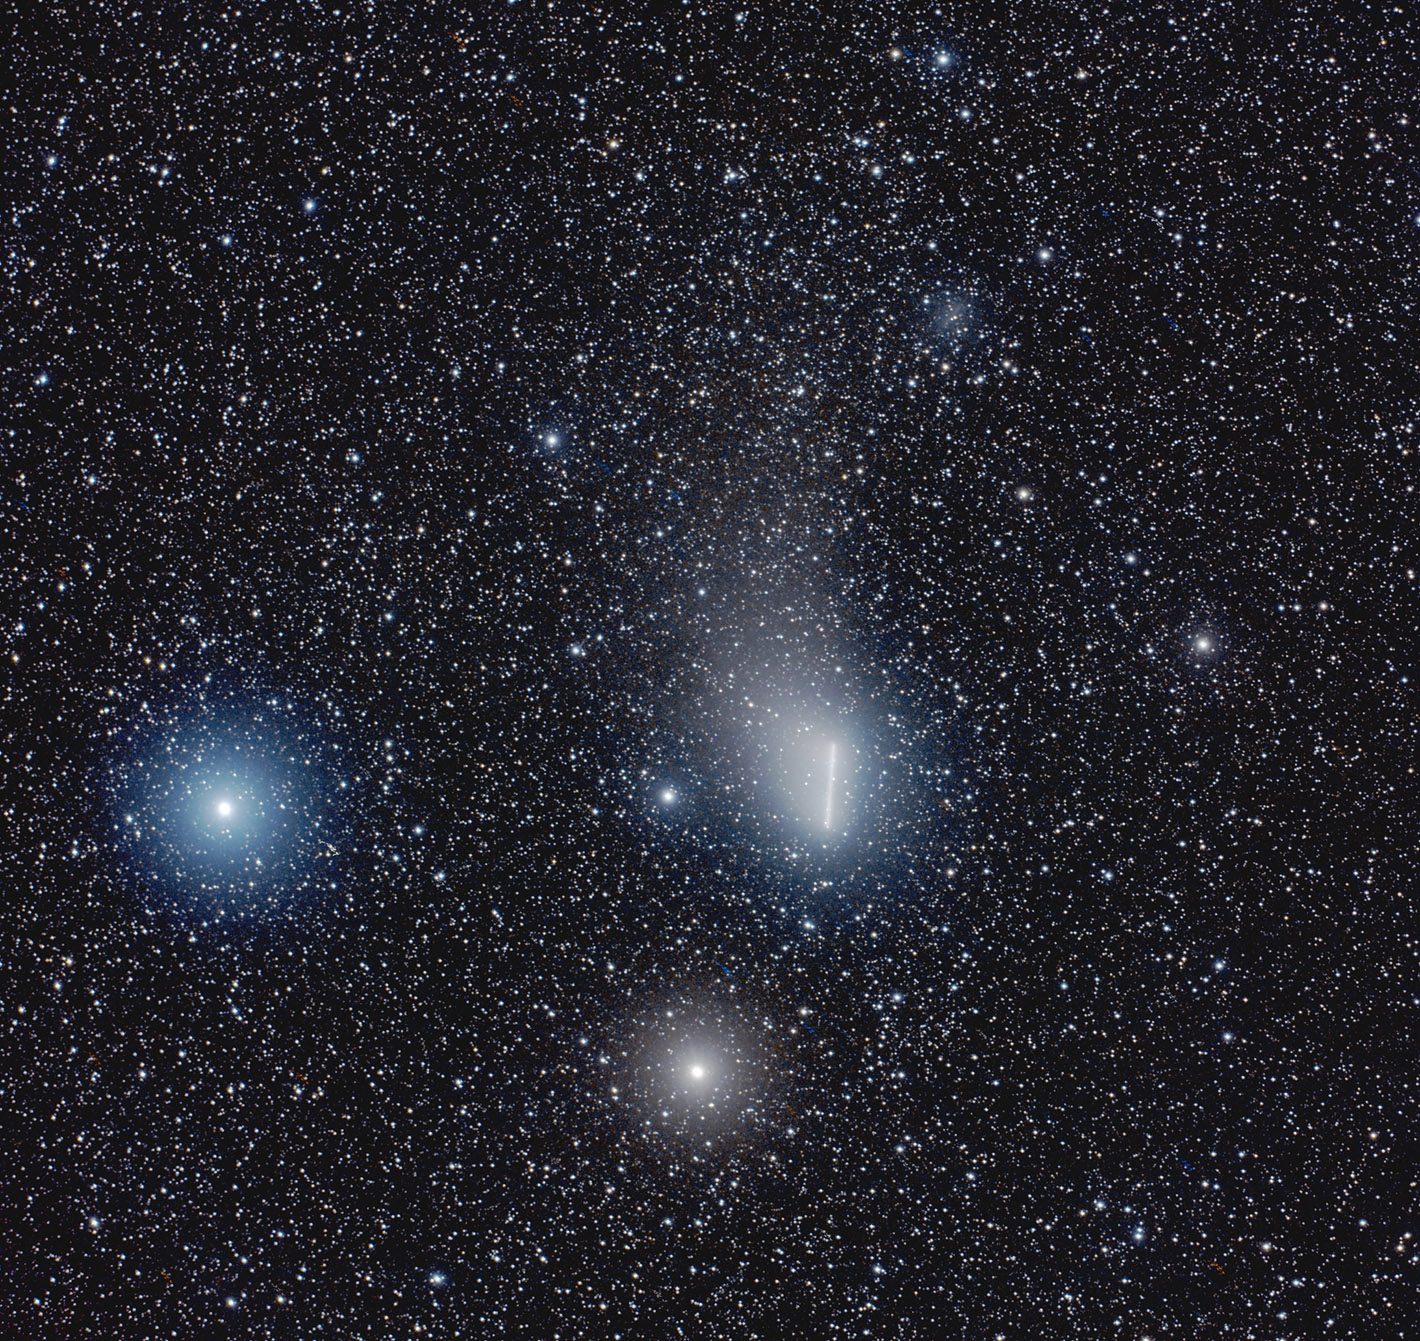
TMB92SS @ 402mm, tight crop
30x20s, R6, ISO800
Click at will.
You might say, "Why didn't you align on the comet(s)?" and I would say, I tried aligning on ZTF but the blizzard of startrails hid ATLAS. By the time I knew to look for it, I had discarded the raws in favor of the star-aligned frames (102 of them). I thought I could re-align on ATLAS etc, which turns out to be problematic. There may yet be a way. In the meantime, ATLAS is surprisingly conspicuous for an object ten thousand times fainter than ZTF. The two brightest stars in the frame are Eta and Zeta Aurigae.
02/09/2023. Aha! I vastly underexposed the flats which left their corners much too dark which in turn caused gross over-compensation when calibrating light frames [a fine theory but it may be garbage, dc] As an experiment, I converted one flat to a 16-bit tiff after pushing it a couple of stops using the "exposure" slider in Adobe RAW, then applied it to a single frame from the most recent comet session (after arguing with Pixinsight about matching geometries -- I don't recall what combination of format conversions finally worked). In the future, expose brighter flats and proceed normally. The failed flats' histograms were dead center on the R6's display, but that's not bright enough. [Not that simple, and pay no attention to the camera-generated histograms; they do not relate to raw data. dc] Online, I found suggestions to use pixel math to raise the levels of CMOS-based flats. Save that for fine adjustment; expose well to the right; and hope that is sufficient. [Actually, so far, my best results come from severely UNDERexposing flats, see proposed workflow below.] Almost all the shading I want to correct is far off axis and quite dark; it doesn't really matter much if the center of the flat is very bright [yeah, well, maybe it does matter...] What's critical is having the shaded portions meaninfgully lit.
Here's a damn-near-full-frame to show that the light panel absolutely can be used to calibrate R6 frames behind the compressed TMB92SS.
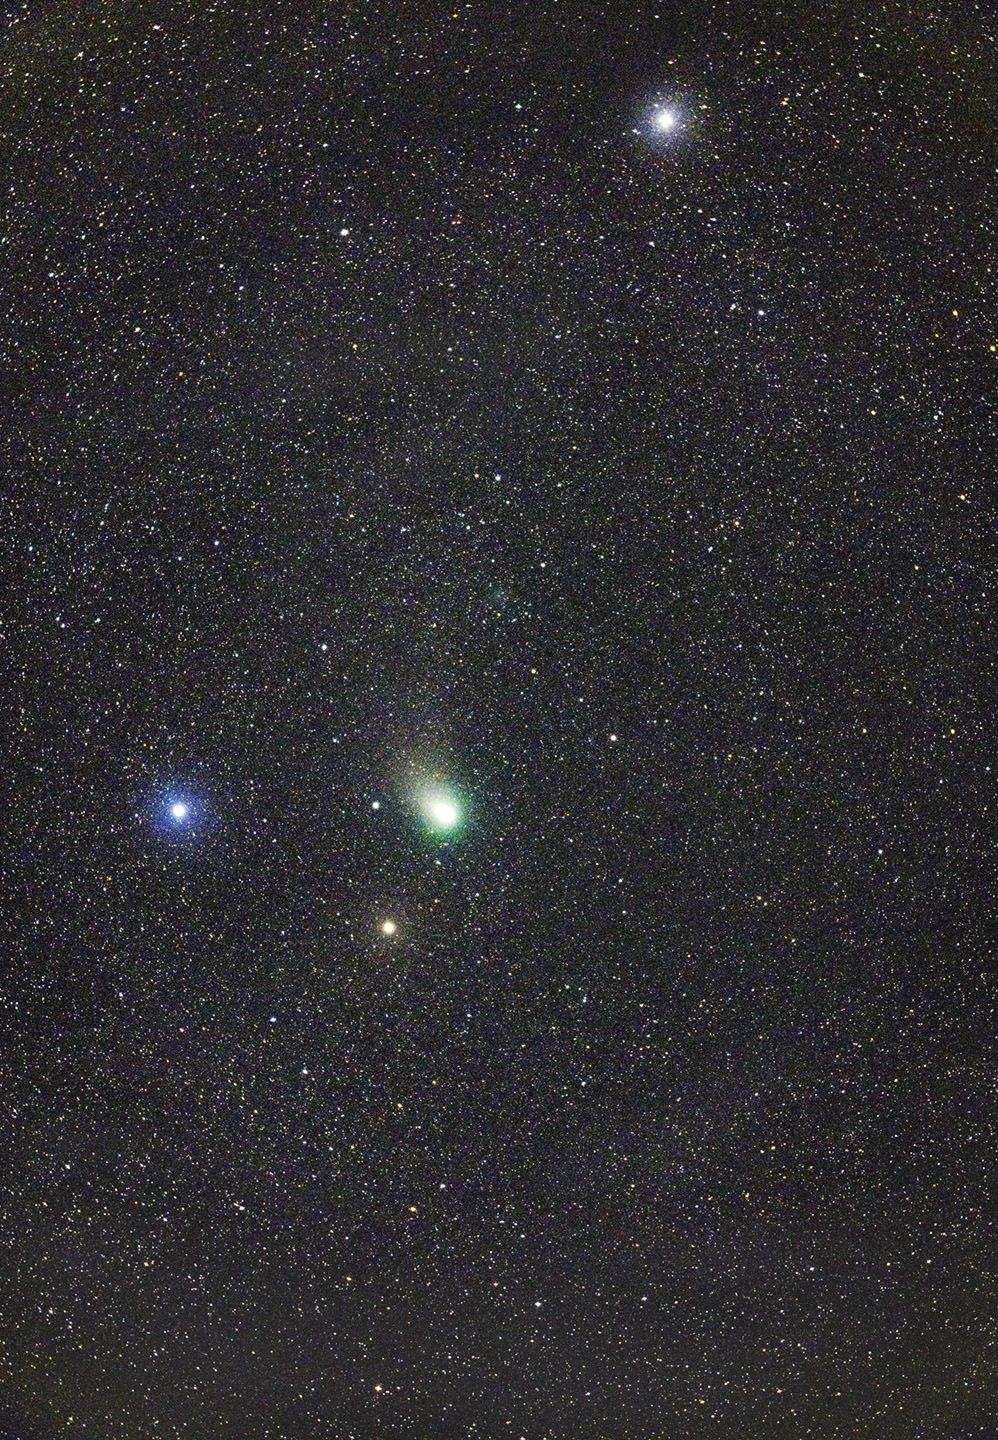
20s, ISO 800
Make it big; ATLAS is there even in this single sub.
That is a wide field, just a whisker less than 3.2 x 5 degrees. It's not perfect, but it's a convincing proof of concept, having controlled vignetting at least to the degree that the usual gradient and synthetic flat tools can handle it. How well? Note that ATLAS is clearly shown and that the darker bits beside and just to the left of the brightest star in the image (Epsilon Aurigae) are real. Those are the dark nebulae LDN 1475 and LDN 1478.
And now, a day later, I've gone nuts trying to make such results routine or even repeatable. I was getting gross over-compensation from my flats, and nothing I dreamed up seemed to get me closer to a successful workflow.
After spending all day on this, I have a possible path to produce useful results. Clearly, it needs refining, and I want to see it work again a few times before I say this is it, lest I lead myself and any visitors far, far astray. With that caveat, here are my notes from a successful run.
Flat prep:
- In Format explorer, double-click RAW and be sure "pure raw" is selected.
- Take flats via AV at -2EV. (Contra received wisdom and common sense).
- Convert format of flats to XISF, specifying 32-bit floating point.
- Integrate: average, no pixel rejection, no normalization; specify output in "same format," save your flat.
Image prep:
- Convert lights to XISF, also specifying 32-bit floating point.
- Calibrate by applying flat, specifying 32-bit floating point format. (FWIW: output pedestal, literal value; flat is not calibrated; separate CFA scaling is checked).
- Debayer the calibrated images.
- Align (generate drizzle data if needed -- see advice below.)
- Integrate (add drizzle data as apt)
- Drizzle integrate (optional).
The result is still not perfect -- it's very much like what I show above, so I'm saving you bandwidth by not showing a visually similar result (you're welcome). The remaining vignetting is within the range of correction in PI and PS. Make sure this process works, then tweak the details (doubtless some matter) until it works better.
On the Pixinsight forums, in a discussion about flat-fielding issues similar to mine, "Bulrichl" suggested the following workflow:
ImageCalibration -> (optional: CosmeticCorrection) -> Debayer (RGGB, VNG) -> StarAlignment (Generate drizzle data checked) -> ImageIntegration ([Add] drizzle data checked) -> DrizzleIntegration (Enable CFA-Drizzle checked)
In DrizzleIntegration, the path to the calibrated light frames has to be input under 'Format hints/Input diectory' if they reside in a directory different from that where the Drizzle data files are.
Judging from images in that thread, star images do look better (sometimes dramatically better) after running Drizzle Integration. So give that a try...
I tried drizzle integration on a stack of 54 TMB92SS / R6 images of M13 from last fall. I didn't see what I'd call a world-changing difference. I suspect drizzle integration may make a more appreciable difference when working with seriously under-sampled data. I also saw some curious grid artifacts appear. Drizzle integration is a slow process compared to many PI actions: it takes 15-20s per sub for full-sized R6 frames on my i7 computer (six cores, 12 threads, 32GB of RAM), so for a tall stack it can involve considerable time. I'll keep it in my pocket and deploy it now and then.
:: top ::
|