|
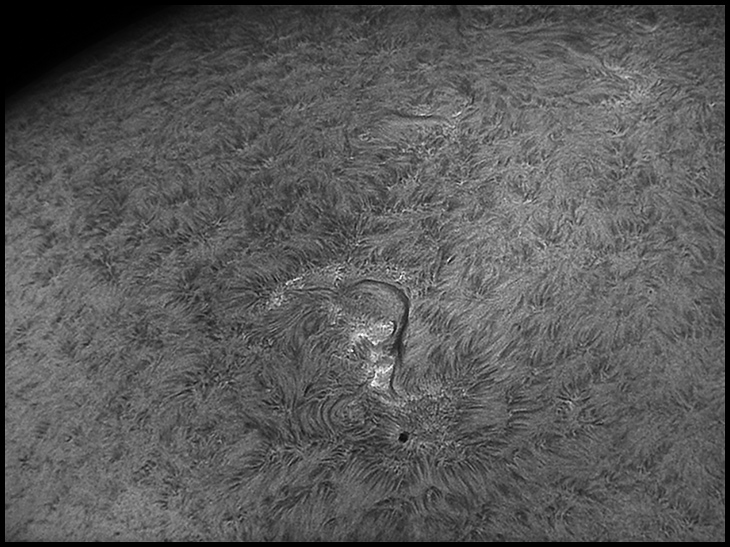
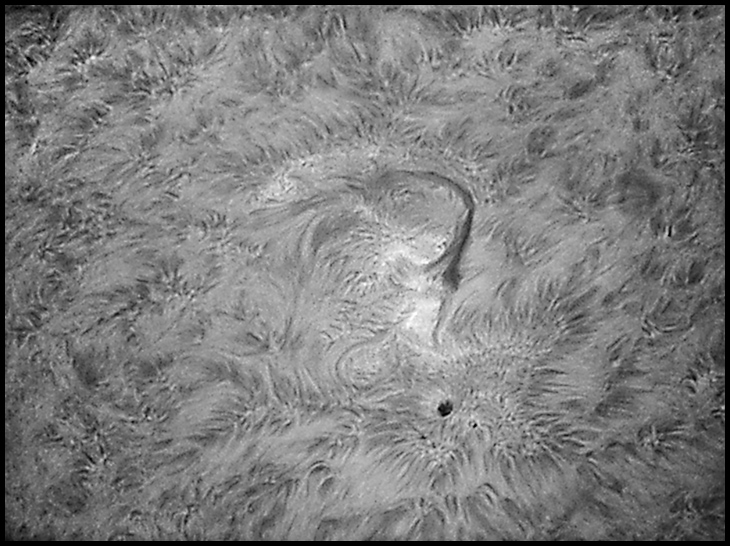
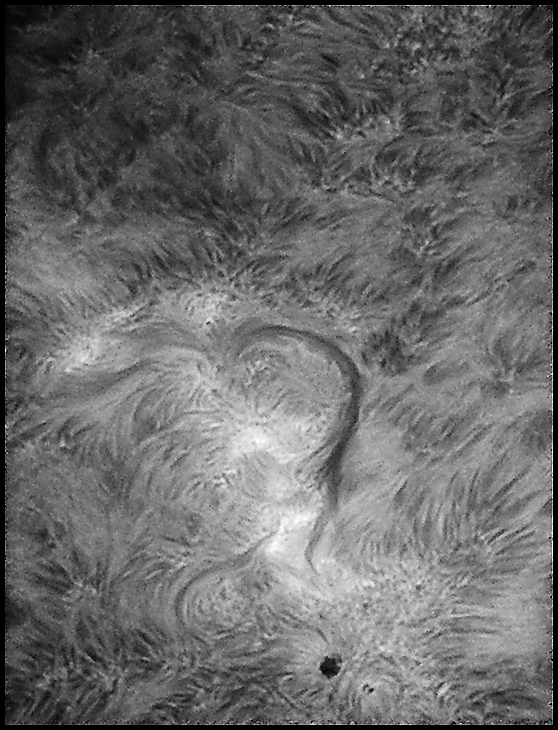
AR 1543
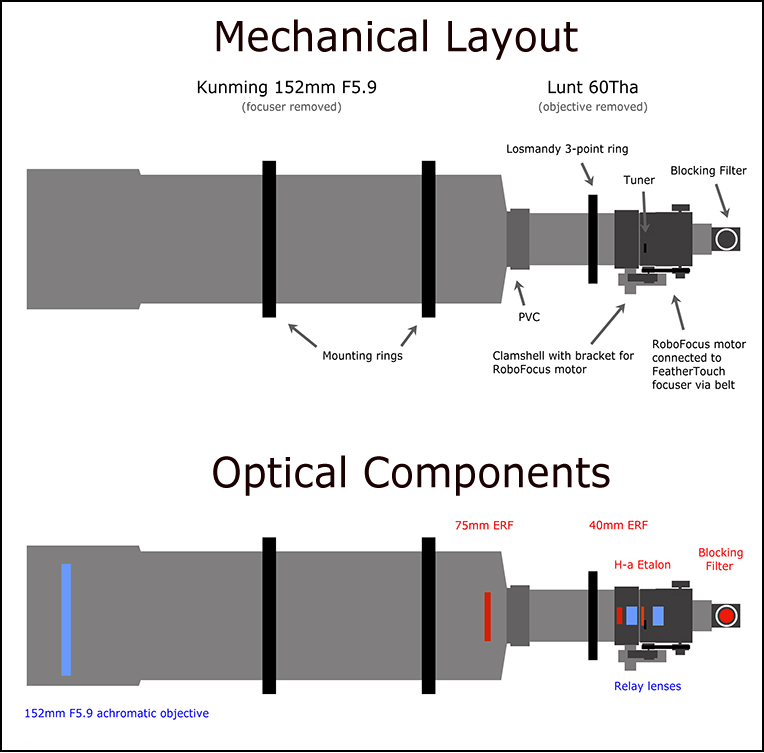
Not too shabby for first light under hazy skies, no? There's a real difference in the experience of observing the Sun with lots of aperture and a generous image scale compared to observing it with a much smaller 'scope. Fine detail, much finer than is visible behind smaller glass, flickers into view a frame or two at a time, but the overall impression is of a much softer image. The Lunt etalon is tuned by tilt, so it is crucial that the Lunt OTA be mounted squarely to the Kunming objective. A Losmandy 3-point collimating ring provides the push-pull, up-down, left-right nudges required. A PVC adapter provides a fixed point at the tail end of the Kunming, and the collimating ring's bolts tilt the Lunt ota from that fulcrum. The difference between being almost aligned and not nearly aligned is huge. By and by we'll see how almost aligned and damn near aligned compare. "Where precision cannot be built in, build in adjustability instead."
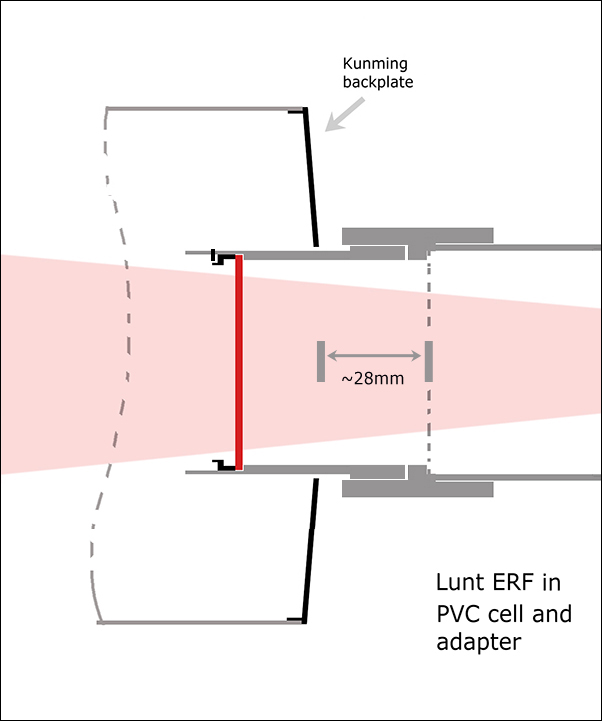
Both drawings are approximately to scale. 28mm is the distance from the Kunming's backplate to the front of the Lunt tube.
DO NOT FOLLOW THIS LEAD UNLESS YOU KNOW WHAT THE HELL YOU ARE DOING! PVC fittings connect the Lunt OTA (on the right) with a short length of 3-inch tubing modified to hold the 75mm ERF. The 3.5-inch coupler that connects this 3-inch tube and the Lunt OTA needs to be opened up by a mm or so to permit the Lunt to fit inside snugly but not too snugly. The length of the coupler will need to be adjusted to allow the proper spacing of the Lunt and Kunming's optics. The 3-inch tube's diameter must be turned down to 87-88mm to pass through the Kunming backplate. The I.D. of the sky-end of this tube is machined out to 79mm to form a ledge against which the Lunt ERF rests. A 67-77mm step-up ring serves as a retaining ring to keep the ERF in place; three 10-24 grub screws threaded and glued into the 3-inch PVC loosely secure the step-up / retaining ring. The only critical dimension is the spacing of the Lunt and Kunming OTA's. The white tube of the Lunt must be 1.1 - 1.2 inches behind the opening for the focuser in the Kunming's backplate. Slight changes in this spacing produce large
differences in final focus position. In fact, it's important to know that the measurement provided here works
with a custom-machined Feathertouch adapter; the stock Lunt focuser is slightly longer or shorter; the Lunt-supplied FeatherTouch is also slightly longer or shorter. Your spacing will differ slightly. I make no guarantees that in this configuration your Lunt OTA will reach focus without cutting metal -- I'm just sayin'. This worked for me. [8/21: The stock, non FT, Lunt focuser works superbly. See below.]
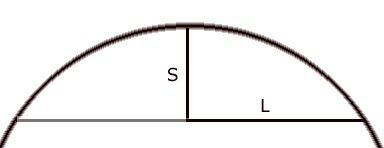
8/18/2012. Added ProtoStar flocking paper to the adapter that joins the two tubes. Added a set screw to the collimating ring's base to make up for the marginally too-narrow dovetail to which it is clamped. Removed 80% of the same dovetail that will never be used. An ounce here, an ounce there... Clouds blew out this afternoon, leaving a milky blue sky. Good enough to try some stuff, not good enough to prove anything. I still don't know if I'm getting all the contrast I can out of this outfit, and I am not convinced that I have aligned the tubes well (in fact, I'm pretty sure I have not got them aligned as well or as repeatably as I'd like). Most times, I'd use a laser collimator, but since the laser light is outside the tiny bandpass of the H-a telescope, end-to-end optical collimation is not possible. The digital level (made for setting angles on saw blades, used heretofore for approximating polar elevation) can be used to align the two tubes to within about 0.2 degrees, maybe better. Twelve minutes of arc may not be good enough, but it's a very good start. There was not much to see on the Sun despite three M-class flares in the last 24 hours and so not much to determine just how well this folly works. I tried some photos of a minor active region (AR1547) surrounding a tiny spot, but I got nothing worth prepping for show and tell. Excellent sharpness, dismal contrast. I'm putting it down to thin clouds and lively seeing. I wanted to determine the image scale of these Frankenscopes, so I began with an image from the 152mm instrument. I computed the solar radius (r) in pixels based on the sagitta (s) of a chord drawn across an image that included the solar limb. Here it is geometrically:
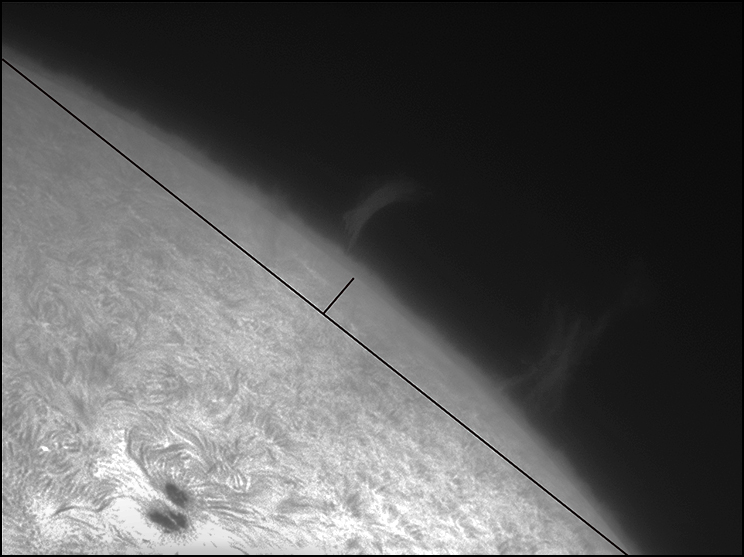
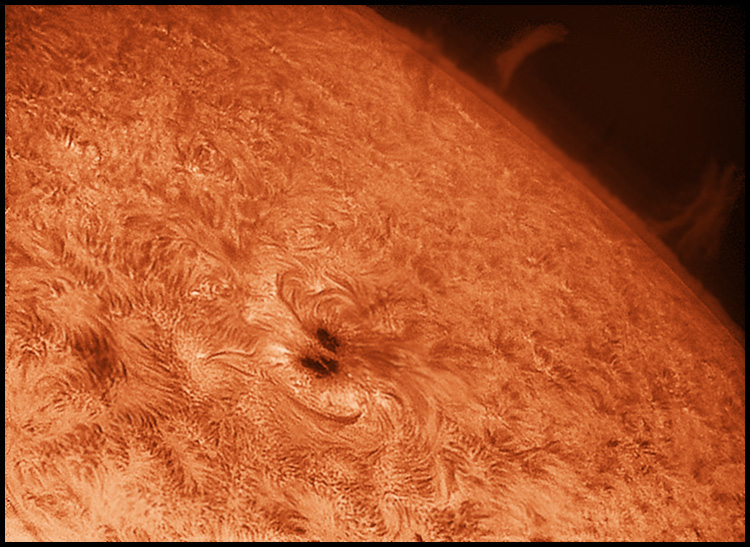
Here is that geometry applied to one of yesterday's images (note that I am measuring the photosphere, below the delicate chromosphere which is well shown in this frame):
S = 82 pixels, 2L = 1362 pixels, so L = 681 pixels We have r = (s^2 + L^2) / 2s = 2,868 pixels. Guide 9 says the solar diameter was 31.60 minutes of arc, so the solar radius was half that or 948 seconds of arc. Finally, we have 948 seconds of arc / 2868 pixels = 0.33 seconds of arc per pixel, which, given daytime seeing and the 152mm aperture's theoretic performance, is a nice amount of oversampling for effective image processing. These numbers make it possible to compute the effective focal length of the Kunming / Lunt. With the barlow inside the Chameleon's snout, the EFL comes to 2,350mm or F15.5. (For the Orion / Lunt, we're likely looking at a very similar image scale and a focal ratio near F26. The Orion yields about 1.6x the oversampling owing to its smaller aperture.)
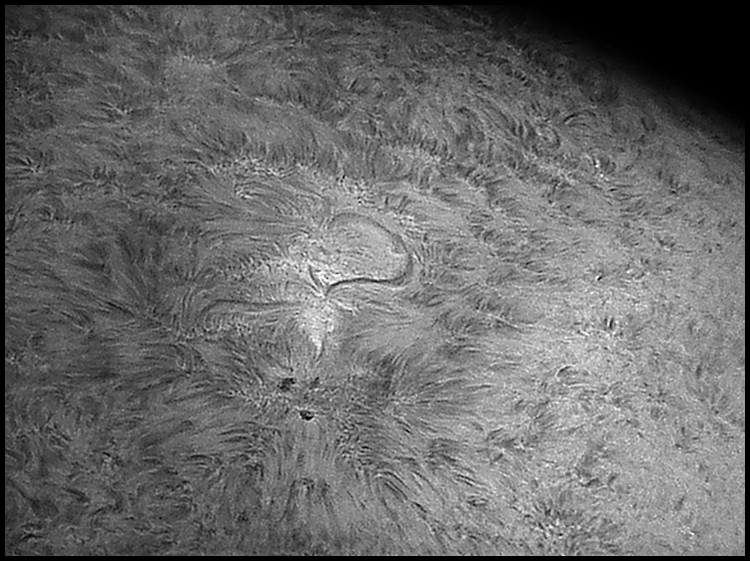
8/20/2012. Another unexpectedly clear mid-day gave me another chance to examine and adjust. I really need to stop worrying over the details until the Sun offers up another complex, high-contrast active region. By all indications, the 152mm hybrid delivers excellent detail even though the impression on the screen is of a very soft image -- maybe it's just a function of spreading a second of arc across three pixels under lively air, 'cause the finished image has much to commend it:
Minor Active Region 1548
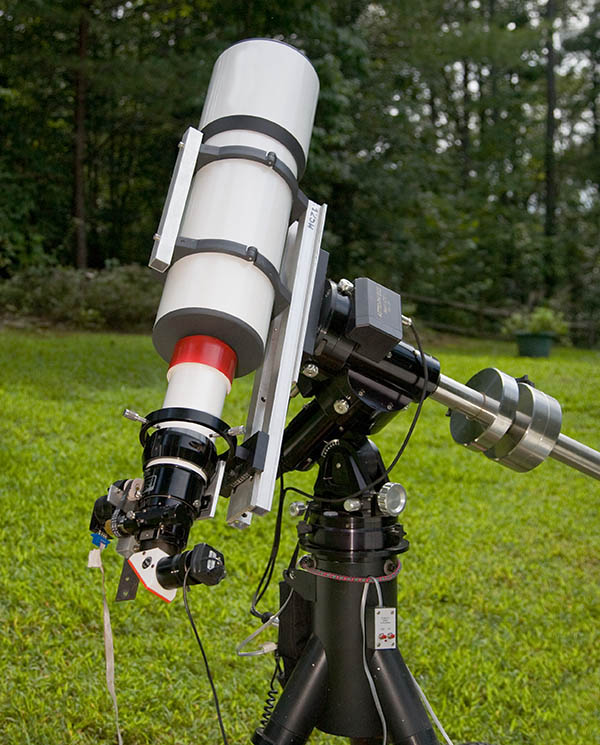
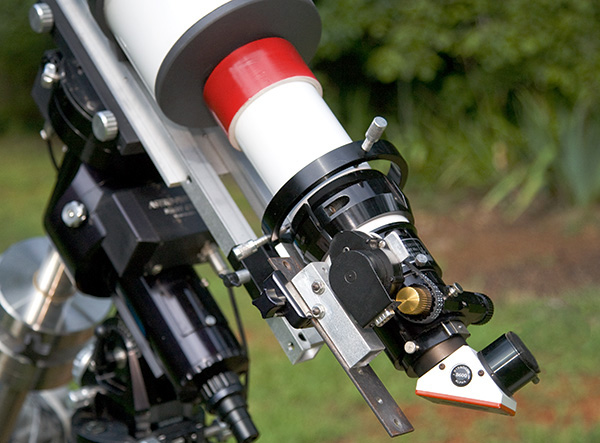
Anybody else see the potential for an expensive, absent-minded disaster in those photos (or in the drawing up top?). What happens if (when!) I decide to tweak the alignment of the tubes and forget to hang onto the Lunt when I loosen any of the collimating bolts in that 3-point ring? The Lunt slides out and hits the ground, right? So, let's put the collimating ring on the tailpiece side of the clamshell. There is (or there soon will be) room on the motor bracket to allow the timing belt to reach back to the focus knob. This new arrangement will also have the advantage of not allowing the Lunt to move for and aft while adjusting alignment, saving a lot of effort finding and keeping focus. Also, it will be less out of balance and the increased distance to the fulcrum (the nose piece on the Lunt) will make finer adjustments possible. Good deal all around.
8/21/2012. Done. I also reverted to the original Lunt focuser which does come to focus in this configuration. With Robofocus for small, repeatable motions, the original focuser is plenty good enough, so let's reserve the Feathertouch for other apps. I used a clear mid-aftenoon to try out different EFL's. The alignment and spacing of the hybrid telescopes didn't even offer to shift. Just make a better focus-motor mount so that the Lunt can be used on its own without losing the Robofocus motor. If you remove the Barlow, a good focus is not far away (in) and the image scale is much less daunting. Images on the screen look reasonably crisp. Here's AR1548 with no barlow:
Best 80 of 400 frames
I measured the sagitta of the Sun's limb in another image at this scale and got 1987 pixels for the radius of the solar disc. The Sun today has an apparent radius of 949 seconds of arc, so without the barlow we have 0.48 seconds of arc per pixel. If you put the barlow inside the snout, the scale is as determined above, about 50% larger than without the barlow:
Best 100 of 1,800 frames
The smaller image looks crisper on the screen, to be sure, but the point of using the 152mm objective is scale and detail and for that, the 0.33 arc seconds per pixel scale produced by the barlow seems better -- it's not empty magnification. I'll get ambitious and try the barlow on the end of the snout some steady (or steady-ish) day. 0.25 seconds/pixel anyone? Oh, hell, why not today? Here's the same region:
Best 100 of 400 frames.
At a quick look, I measured 3,920 pixels for the solar radius with the barlow mounted on the end of the snout. (The solar limb was hard to "read" because the photo was not particularly good for the purpose; do it again). If accurate, that would suggest 0.24 arc seconds per pixel. That's F31. And you know what? It works really well. On 8/23, I got 4,007 pixels for the solar radius; at the time, the Sun subtended 31.64 minutes of arc which works out to 0.238"/pixel. Call it 0.24 seconds per pixel and be happy. But be ready to drop back to 0.33 or 0.48 when seeing forces the issue.
:: top ::
|
© 2012, David Cortner
 S = r - sqr(r^2 - L^2),
solve for r